
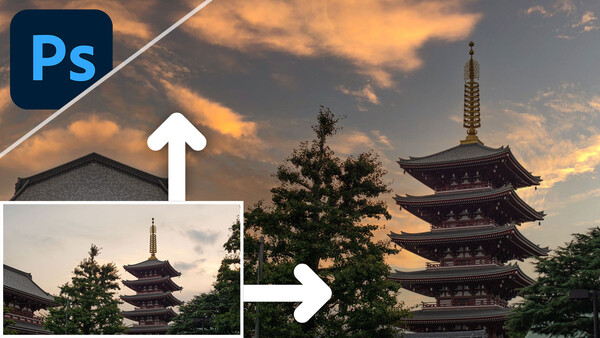
Replaces skies in minutes with Photoshop CC's replace sky feature and these useful tips to get perfect results every time.
You might think that Photoshop CC's new sky replacement tool is a fix-all feature that can work magic. Largely, you'd be correct. It uses AI technology to scan your images and make complex masks while overlaying some of the preset skies already installed in the software. But sometimes, things can go awry, as everything that involves technology does, and your skies can end up looking unimpressive or worse yet, downright unrealistic.
That's okay, though, because Adobe has thought of this by giving us users some useful controls and sliders to help the feature along a little bit. That said, there are some things to look out for when matching up photographs and sky presets, which I'll outline below.

Choose a Suitable Candidate
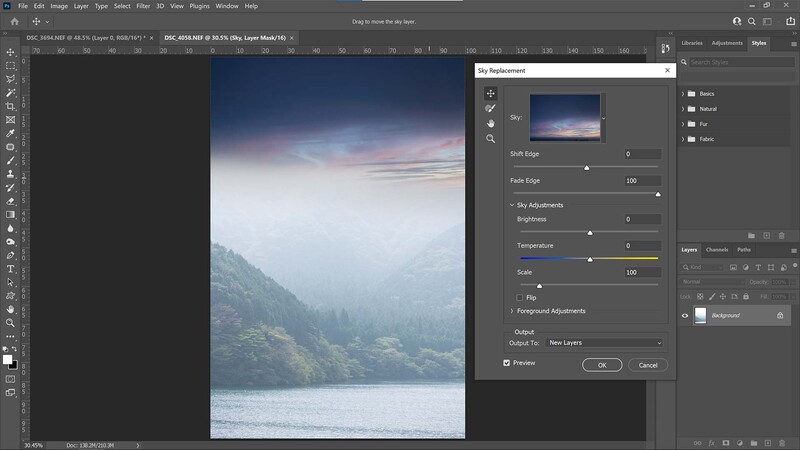
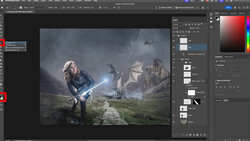
The first big barrier is to find a photograph that is suited to a sky replacement. Not every photo will be a match, such as my example above of the mist rolling in over mountains. This makes it very hard for the AI to comprehend, and as you can see, it ends up doing a pretty bad job despite its best efforts to fade it in with the mist. I think even a well-seasoned image editor would have their work cut out to make a brilliant job at a sky replacement for this kind of shot, though. Other images that probably won't work that well are anything where the foreground and background are especially out of focus (think shallow depth of field) because Photoshop will need image data to make its calculations.
Start Sky Replacement
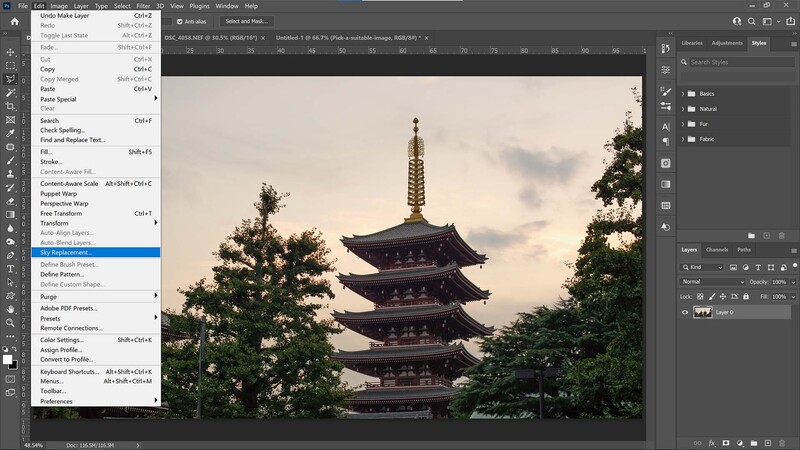
I've chosen this shot for a sky replacement for a few reasons. First off, the sky is a little drab and doesn't really enhance the scene despite taking up a large portion of the frame. The trees provide complex outlines with plenty of tiny spaces in between the leaves which, if you were masking traditionally could take hours to deal with. Also, it was taken at sunset, so we have warmer yellow and purple tones in the sky, which are clearly absorbed by the buildings and trees even though they're in shade. To start a sky replacement, head to Edit>Sky Replacement.
Match the Sky to the Scene
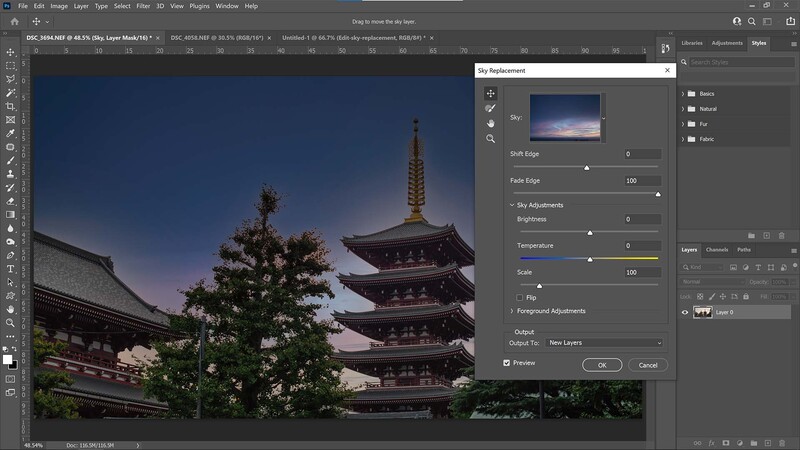
As I mentioned, this shot was taken at sunset, so we expect warm tones. The Sky Replacement feature has many skies presets to choose from, and the first one that opened on my laptop was this sky that was clearly taken at dusk after the sun had already passed beyond the horizon. The blue tones really do not match the ambient scene at all, and Photoshop is clearly having a hard time trying to fade the effect into the trees and building. Instead, we'll need something much brighter and warmer.
Appropriate Sky Matching
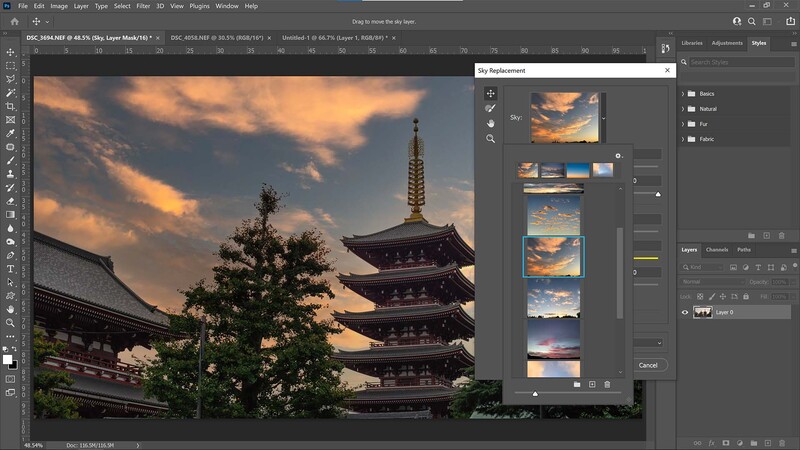
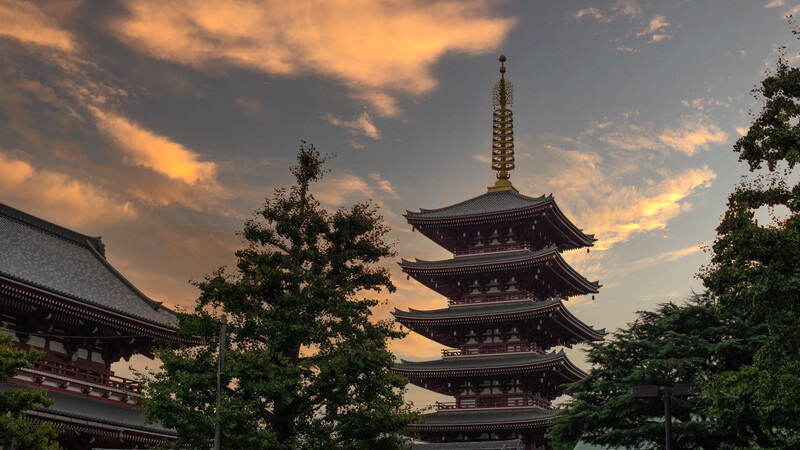
After flicking through a few options, I've settled on this scene. The clouds provide rich texture, which is much needed for this expansive sky view, and it has rich orange hues reminiscent of a sunset. The clouds are even slightly backlit, roughly matching where the sun was actually positioned in the original photo. Now that we have colors and lighting fairly close to the original, it's time to refine the settings.
Fade the Edge
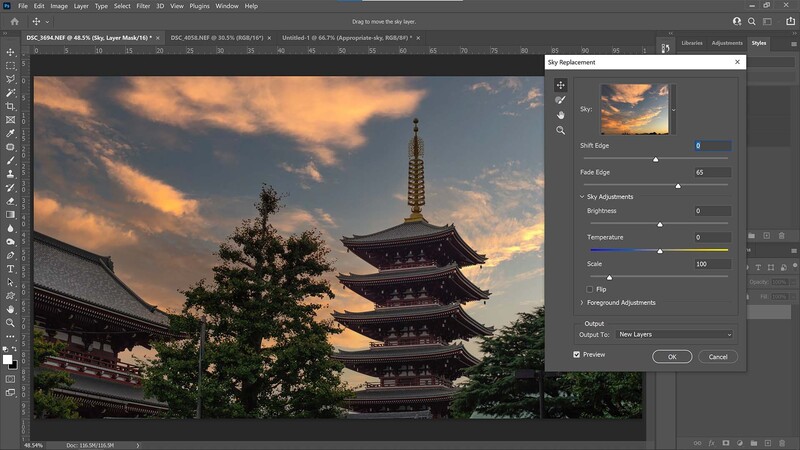
The Sky Replacement tool has multiple settings to allow a smooth transition from the sky to the environment. From top to bottom, we have Shift Edge, which allows manual control of where the mask is drawn around the foreground subjects. Next is Fade Edge, which will blend the sky in with the rest of the scene. I've decided to turn this down from 100 to 65 here because I wanted this blend to be a little more abrupt. The original fade at 100 displayed a slight glow around the scene, which I was unhappy with.
Sky adjustments can be found underneath these settings and provide brightness and temperature sliders, which help match the exposure and white balance in the original photo. Scale either zooms in or out on the background sky image, which is useful to match the size of the sky with the proximity of the foreground.
Alter the Other Parameters
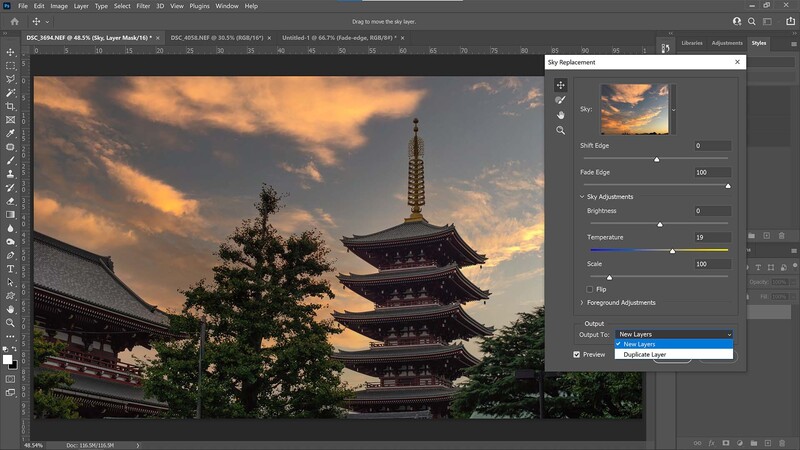
There are dedicated foreground adjustment controls, which I didn't need to use in this shot, but the next most important control is the output box at the bottom of the window. You can switch between having the replacement sky on a new layer or a duplicate layer. A new layer will allow you to toggle between the masked sky and the original photo on a separate layer, and this brings the opportunity to refine the mask manually should you wish to do so. By duplicating the layer, you have a brand new layer with the applied sky replacement on it, which is a little less flexible.
If you need to give a final polish, then I recommend exporting it out over to Lightroom for a final sweep of exposure, tone, and color. But if you don't have Lightroom, you could always use the adjustment layers in Photoshop, which allow for non-destructive editing of your photo, which can be altered at any point.
The main step to remember when using the sky replacement feature in Photoshop CC is to find a photograph with enough sky in the frame for a decent replacement, devoid of any obscuring by mist or fog. This will make it easier for the software to do its job. Choose a sky preset that roughly matches the scene you have in the original photograph, including color balance, exposure values, and light direction. Make simple adjustments to the controls available in the sky replacement feature and don't go too extreme; if you find yourself moving the sliders to either end for every setting, it might be worth switching skies or re-editing the original photograph. Then, finally, choose which method you want to output the result to, whether duplicating the original layer with the sky superimposed or on a new layer from which to edit and alter the mask or turn it on and off, as this option also allows for a blend between skies by adjusting the opacity of the layer.


Join the Fstoppers community for free
-
Post comments and join in the discussions
-
Browse the site ad-free
-
Share your work and get featured in the community
-
Compete in the photo contests for fun and prizes
No comments yet