If you've dug through your camera's settings a few times, you've likely ran into the Color Space setting. You may have asked another photographer what it all means, and they've probably just told you to set it to one or the other, and forget about it. However, both sRGB and AdobeRGB have their advantages and disadvantages, so how do you distinguish one from the other?
What is Color Space?
In layman's terms, color space is just a specific range of colors that can be represented in a given photo. JPEG images can contain up to 16.7 million colors, though neither color space actually uses all 16.7 million colors available. Different color spaces allows for you to use a broader or narrower range of those 16.7 million colors used in a JPEG image. The difference lies within what is considered wider and narrower color spaces.
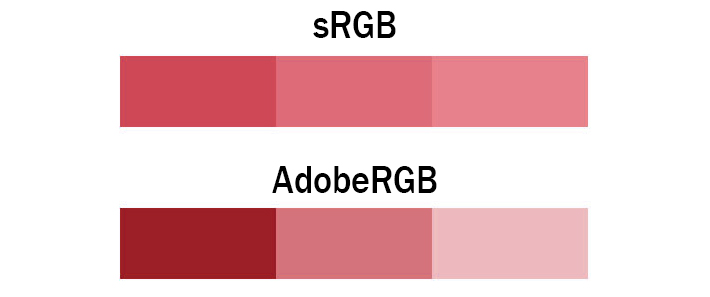
The image above explains it pretty well. Both images contain only three colors, however, the colors shown in the AdobeRGB scale have more differential between them. This means photos taken in the AdobeRGB color space will have more vibrancy in their colors, whereas sRGB will traditionally have more subtle tones. In situations where you're photographing strong color tones, sRGB may need to dull them out to accommodate, whereas AdobeRGB is able to display those colors with more accuracy.
The Types
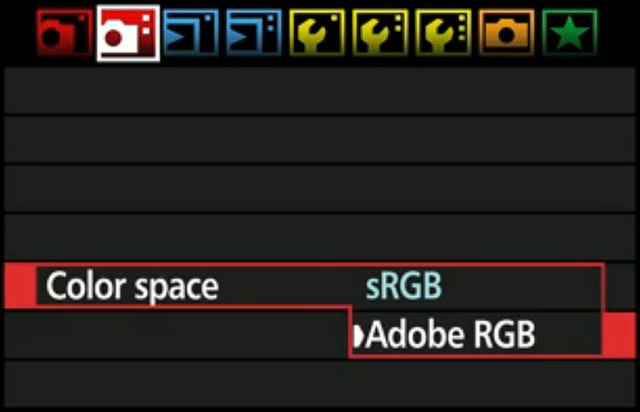
In digital photography, there are two main types of color spaces, AdobeRGB and sRGB. If you go into your camera’s settings, you’ll see that you’ll have the option of using either, straight out of the camera. You’ll also have the option of converting it to one or the other in post processing (with limitations), but which one should you use?
The Difference
To better understand which one to use, you must first understand the difference between the two. AdobeRGB, by all accounts is better, as it represents a wider range of colors. How much better? They say that AdobeRGB is able to represent about 35% more color ranges than sRGB is able to. But does that make it the best for photography? Not exactly, as the world works with sRGB far more than it does with AdobeRGB.
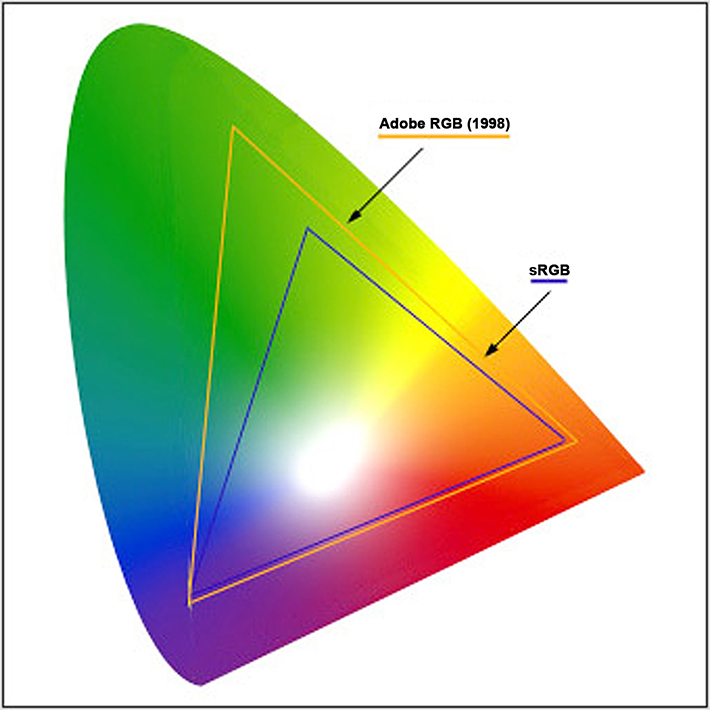
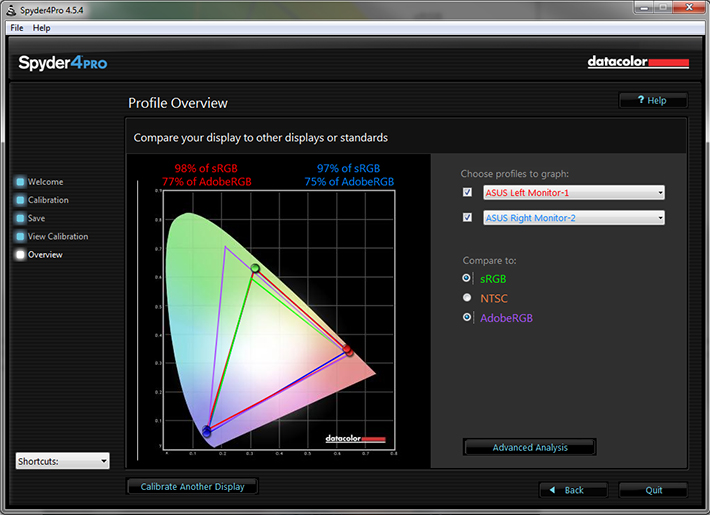
sRGB came first, and almost everything on a computer is built around sRGB. The internet, video games, applications, personal devices, and most everything else has adapted sRGB as their standard for color space. Even the monitor you’re using likely cannot display all the colors of AdobeRGB. That's right, most traditional computer monitors can only display about 97% of the sRGB color space, and only about 76% of the AdobeRGB color space. Even screen calibrators will often tell you how much of the color gamut you're able to display.
Since most web browsers have adapted sRGB as its color space, if you upload an image to the internet with the AdobeRGB gamut, the browser will convert it to sRGB, and it’ll do a terrible job at it, as shown below.
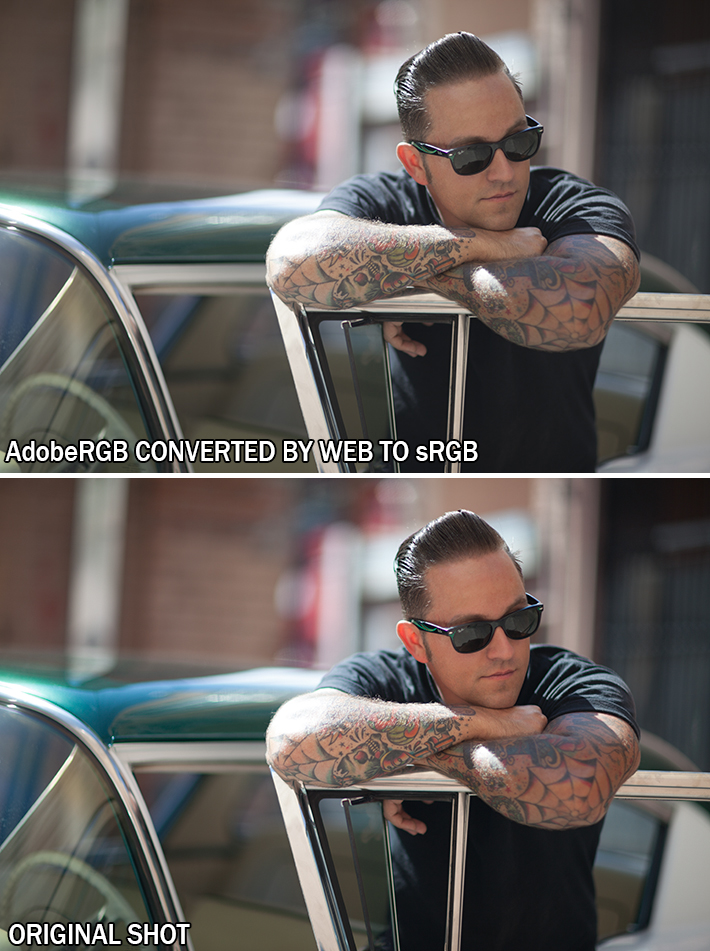
The photo above is an unedited photo that I took this summer. If you shoot in AdobeRGB, and let web convert your photos, you’ll be left with dull, muted tones. So why not shoot in sRGB full time? You absolutely can. However, if you’re printing your work, you’re losing potential colors in your images by shooting sRGB.
Printers, have began adapting the AdobeRGB color space. This allows for more vibrant colors in your prints, with better color consistency that your own monitor cannot even replicate. But do you want your prints to look differently than they do on your monitor? I say yes, as it provides richer colors that bring out details that would otherwise go unseen.
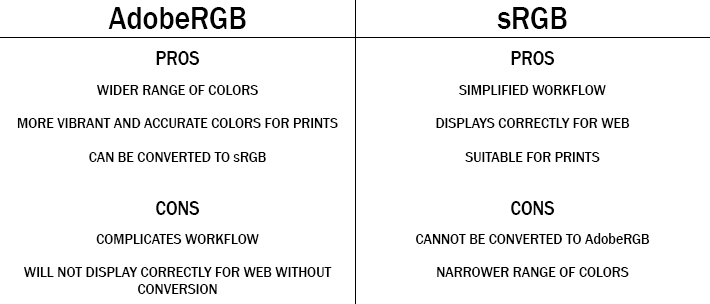
When shooting in AdobeRGB, you're able to convert it to sRGB at any time, without any loss of color in your images. However, this is a one way street, as sRGB is unable to accurately convert back to AdobeRGB.
If you’re not printing your work often, sRGB is the choice of color space for you. It’ll be the surefire way to guarantee that your photos look great on the web, and still look accurate in print. However, if you’re often printing your work, and looking for vibrant colors, AdobeRGB may be the choice for you, it just adds a few steps to your workflow process, as you'll need to save them as sRGB to correctly display them on the web.
How to Accurately Convert Your Photos from AdobeRGB to sRGB
In Adobe Lightroom
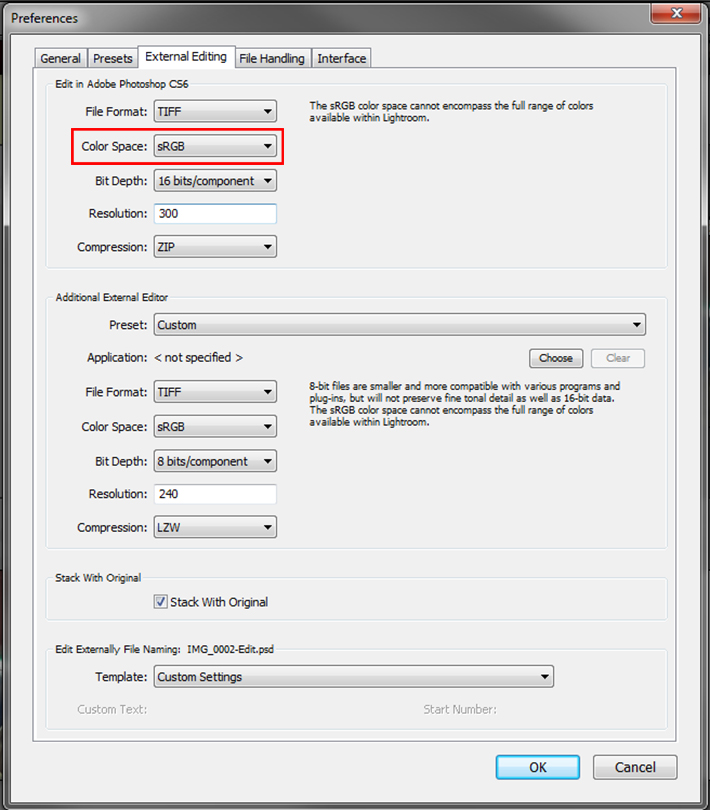
If you use a tandem of Lightroom and Photoshop, Adobe makes this conversion process painless for you. My workflow, and many others consists of loading images into Lightroom, making basic corrections, then importing the image directly into Photoshop. Upon importing to Photoshop, you can have your images converted for web with just a few simple setting adjustments. Simply go into Edit>>Preferences>>External Editing and adjust your color space to sRGB when being imported to Photoshop. This technique is the most preferred, as it'll automatically convert all images you export to Photoshop to sRGB, without any color loss in the web format. This will also allow you to keep both an AdobeRGB copy of the image for print, and an sRGB version to use for web and everything else.
In Adobe Photoshop
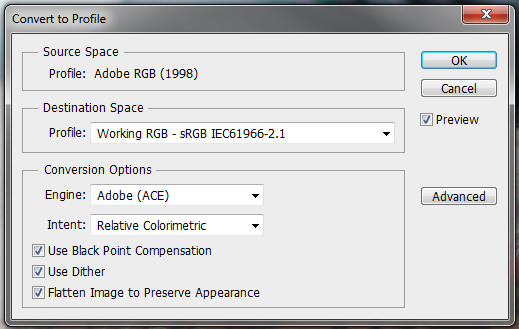
If you work without Lightroom and still want the benefits of AdobeRGB color space, you can also convert your images for web in Photoshop. Simply navigate through your menus to Edit>>Convert To Profile and change your destination space to sRGB after editing your image. To insure that you do this everytime, I recommend you incorporate it an action used for saving your images. Remember, failure to convert your images prior to saving them for web will result in dull and unflattering color tones.
Conclusion
If this at all confuses you and leaves you feeling overwhelmed, switch your camera to sRGB color space, and leave it like that. It'll still allow you to photograph and print beautiful images. However, if you're shooting specifically for print, AdobeRGB offers more range and versatility in the images taken. It all really comes down to personal preference, AdobeRGB does offer more colors, but at the cost of complicating things for a subtle difference in your photos. However, if you're a perfectionist, like myself, the extra steps taken to shoot in AdobeRGB may be worth the headache to achieve nicer prints, and get the best of both worlds.
If you'd like to learn how to use Adobe Lightroom more efficiently on any device, make sure to check out our Mastering Adobe Lightroom course with Pye Jirsa. The content Pye covers will appeal to every level of photographer and will save you an incredible amount of time on your image editing. Save 15% by using "ARTICLE" at checkout.


If I can't see what I'm editing, how is that an advantage? In the case of AdobeRGB or ProPhotoRGB the color space is out of gamut for my screen. Isn't that like editing in the blind?
Hi Zac, Excellent and easy to understand article. Thank you so much. I created an account with FS just to ask you this question: I make prints two ways, with an Epson R3000 printer and through MPIX Pro. The Epson Printer uses Adobe RGB and MPIX Pro uses sRGB. According to your advice, I should set my camera settings to Adobe RGB (RAW) and do my photo editing in Adobe RGB. I have a problem, however, upon export from LR, when I use the sRGB export setting, the colors are not converted well at all, as you say. They are dull. How do I get my sRGB files to look as much as possible like the Adobe RGB files in LR and Photoshop? Also, how can I easily get 300 photos to look as good in sRGB without having to edit each photo? Thanks.
Hi, good article. But I am not sure to understand one thing. You are supposedly to be able to convert from Adobe RGB to sRGB, but how do you do that preserving the "Adobe RGB" vibrancy? How did you create the photos showing "Adobe RGB Converted / Original Shot" if the photo is sRGB and the "Original Shot" has more vibrancy? Thanks!
Thanks for this! I work in video and am trying to wrap my head around color spaces to get deeper into color grading. Sounds like I'm fine sticking to sRGB basically all the time... for now. However, I notice in software like After Effects, there are a TON of color profiles to choose from. I don't know if there's a difference whether you're grading towards projecting onto a movie screen versus web, or if it actually has more to do with adapting to various monitors as you work, or what. Still have much learning to do!
So:
sRGB/Adobe SRGB 1998 setting in the camera only affects the jpg file and the image displayed on the camera's LCD.
If I understand correctly, Lightroom is not defining data based on color space. The conversion of the raw file into a color space happens in software such as Photo Shop.
As such, you can convert one RAW file into any and all color spaces that are definable in the software (Photo Shop).
Excellent article. I have a question. I have Eizo monitor (AdobeRGB/sRGB I can choose color space), I have Epson SC-P600 printer, I have Colormunki calibrator. I'm going to print my photos. Which color space should I set in my monitor and in software before I start calibration. Previously I used sRGB on my monitor and simpler calibrator.
I'm currently doing an assignment on this and it has helped a huge amount , so clear and so understanding