
Retouching can take a long time, especially cleaning up skin. But Anthropics aims to fix that with their new version of Portrait Pro, with AI-powered skin retouching. Does it live up to the hype? Let's find out.
Retouching can be extremely difficult and time-consuming. Dodging and burning, frequency separation, cloning, healing... it can get overwhelming and time-consuming. Portrait Pro 19 is software from Anthropics that uses artificial intelligence to make things quick and easy without looking like a skin-blurring filter (provided it is used correctly).
Aside from skin retouching, the program can also replace backgrounds, adjust face shapes, adjust hair contrast and color, brighten eyes, and even relight the face. The face relighting is probably my favorite tool in the bunch because it's so unique.

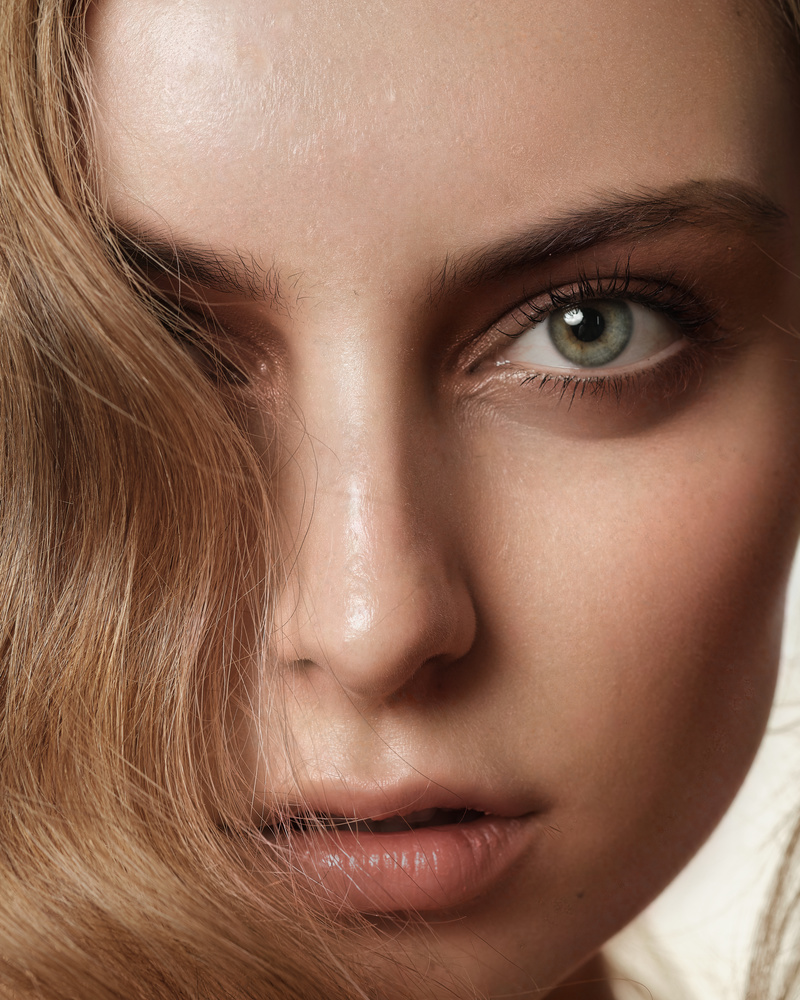
A shot retouched using Portrait Pro 19
Model: @Ashley Doe
Important Notes
Something to keep in mind with Portrait Pro 19 is that it is not a one-click solution, and that's actually one of the reasons I like it so much. Portrait Pro gives you full controls over every parameter with an easy-to-use interface. One thing that I'm not a huge fan of is that it seems to miss seemingly obvious pimples and such; so, after you go in with Portrait Pro, you will still have to pull out the healing brush or clone stamp and remove some of the larger blemishes. On the plus side, by leaving out larger blemishes, it also preserves important things like freckles; I guess we just aren't at a place where AI can differentiate between freckles and blemishes yet.


Model: Rhianna Campbell
MUA: Anja Dimitrijevic
As you can see, the image on the left, I only used Portrait Pro to retouch the shot, but the image on the right, I did a little bit extra: namely some frequency separation and some healing brush on her small blemishes.
Something else to keep in mind is that the default settings are far too strong, and in my opinion, less is more. One thing I would suggest you do when you open up the program is to go to "Presets -> Manage" and set "Reset to original" as the default; otherwise, you will open up the image and find it a little over-retouched and have to set it to reset every time you open the program/plugin.
How to Use Portrait Pro 19
Portrait Pro 19 can be used in two major ways: as a standalone program or as a plugin for Photoshop. I exclusively used the latter. As a plugin, Portrait Pro can also be used as a smart filter, allowing you to mask it in or go back and make some changes after you've already done work. As someone that is incredibly indecisive and will often do a lot of work, leave it for a while, and then come back with fresh eyes, being able to come back to where I left off is a godsend.

The screen you are greeted with
When you first open the plugin, you will be greeted with your image and a whole bunch of options on the right-hand side. As I said before, be sure to change your default from "Standard" to "Reset to Original." In the "before" tab, you can see the face(s) that Portrait Pro selected, as well as the specific mask it is using on the face. You can choose the gender of your subject and even add faces if your photograph has multiple people in it. If the face outline doesn't perfectly match the face, you can manually move the anchor points around for a perfect fit. I found the software almost eerily good at finding the face, and it only needed minor adjustments here and there.
I found most of the tools pretty self-explanatory; however, most of the sliders are extremely powerful, so I rarely went above 30% for anything. The Face Sculpt tool is similar to Photoshop's built-in liquefy tool; however, I found it easier to use with slightly more options, including an option to restore the shape of glasses.

If you look at the top, there is a Master Fade slider. This is present in almost all of the different sections of Portrait Pro, allowing you to dial back some options if you went too far without needing to go into each individual slider and dial it back. This Face Sculpt tab is also where the "expression" slider is held, where you can easily add a slight smile to your subject. The Lens Correction tool is also fantastic, as it actually uses 3D modeling to accurately distort (well, un-distort) your model's face.
Next, I'm going to go over the feature that is going to be the most used: skin-smoothing. The skin-smoothing option is powered by AI using Anthropics' ClearSkin 5 technology. It has options like being able to adjust specifically around the eyes, removing pores, fine shadows, and more. This is a tool that is best used in moderation, especially the pore removal and remove grease tools.

The remove pores and remove grease sliders can remove all sense of highlights in your image.
The texture tool is probably one that is a bit of a lifesaver. It re-adds texture if you've gotten your settings right where you want them, but the skin ends up a little too smooth. I find that the texture slider works wonders with just a little bit.
If you find that the software is accidentally affecting your eyes or your backdrop, you can edit your skin mask with a brush and just a few clicks. It's incredibly simple to do and works like a less laggy version of Photoshop's "Select and Mask." It's incredibly fast and lightweight, to be honest.
Skin Lighting and Coloring is probably my favorite feature, so it's getting its own section below.
The makeup tool is used for adding makeup to your shot. I don't use this tool often, as I usually hire makeup artists and don't want to mess with their work too much, but you can see an example below. It has sliders for lipstick, eyeshadow, blush, bronzer, and more. If you want to add makeup to your shot, this is a nice, easy way to do so.

Have you ever spent 20 minutes trying to really clean up an eyeball? Well, Portrait Pro's "Eye" section makes this as easy as just moving a slider. This section also has sliders for sharpening just the eyes, whitening them, darkening pupils, brightening irises, and even changing eye colors. With the power of AI, it can even tell when an eye is shut so you don't have anything affecting an eye that isn't actually there. If the AI gets it wrong, you can manually turn the eye off.
The mouth and nose section is like the eyes section but for, well, the mouth and nose. It has tools for whitening and cleaning teeth, changing the hue of the lips, and sculpting the nose. My favorite tool here is the "moisten lips" function, which really adds that little bit of micro-contrast to the lips, making them look moist and healthy.
The hair tool allows you to do some color adjustments and tweaks to hair, as well as clean it up; it is mostly just color correction tools with a mask for the hair, except for the hair-tidying mode, which really speeds up hair retouching allowing you to quickly clean up those imperfect hairs.

An example of the hair smoothing feature
Penultimately is "Picture." I really think that this should be the first set of sliders, as it is basically a camera raw tool, allowing you to quickly and easily adjust things like exposure, contrast, dehaze, vignette, and more. This has more use when using Portrait Pro as a standalone program than as a plugin in Photoshop where you likely have already made these changes, but it's a nice addition!
Lastly is my least-used tool: the layers panel. This is used to add foreground or background elements. The program intelligently selects your subject and allows you to replace the background with either an image or a solid color and, much like the rest of the options, you can fully control the mask to your liking. While I do prefer Photoshop's tool for selecting the subject, I will say that Portrait Pro's is a lot faster and doesn't lag as much.
Overall, the interface is incredibly easy to use, fast, and powerful. A fantastic combination. According to Anthropics, the program is twice as fast as the previous version, and I can definitely feel it.

A full before and after using a bit of every tool available
My Favorite Feature
My favorite feature within the program, by far, is the relighting feature. It is so incredibly unique and useful. I love it. There is a 3D wireframe picture of a head and a circle you can click and drag around it: this is your "light." You can easily move the light around and impact how the model's face is lit.

A rough example showing the relighting differences
Model: Carly White of Elmer Olsen Models
MUA: Matthew King
There are other controls, like contrast, shadows, kicker light, and even a cheekbone slider (which I love). Overall, this is a fantastic tool to add a little bit of dimension and contrast to your model's face without a whole lot of work. For best results, I find that it's most effective when you set up the fake light from the same direction as the real light. In my opinion, just this feature is worth the whole cost of the plugin.

All of the sliders availible to you in the "Lighting" section
What I Think Is Missing
There is one feature in Portrait Pro 19 that I feel is missing, and that is a clone stamp/healing brush tool. Due to the program's ability to totally stand alone away from Photoshop and its inability to notice blemishes in the current form, I feel that in Portrait Pro 20, the addition of a healing brush or clone stamp would be extremely welcome.
Versions
There are three different versions of Portrait Pro 19: Standard, Studio, and Studio Max. Standard is the basic, cheapest option. It only works with JPEGs and cannot be used as a smart filter. The Studio version will work as a smart filter in Photoshop and supports raw images. Studio Max has all of the above and even allows you to batch process images, so if you are, say, doing a beauty editorial, you can have the same adjustments work across images without needing to dial them in, giving the exact same amount of retouching on all of the images.
Conclusion
In conclusion, Portrait Pro 19 is a fantastic tool for any retoucher, as it is able to quickly and easily get you from the start of an image to about 85% complete with just a few clicks. I found that for fashion images and full-body shots, this was all I needed for retouching. However, for beauty portraits, like the ones seen in the majority of this article, it did need a little bit of extra work afterward, but overall, I found myself finishing images in far less time with equal or better results than my normal workflow.
What I Liked
- Quick and easy.
- Fantastic results.
- Full control over parameters.
- The relighting feature is absolutely incredible.
What I Didn't Like
- The default settings are way too strong in my opinion, but you can change that.
- Sometimes, pimples and small dark spots do not get recognized. They are quick and easy to fix, but it would be nice if Portrait Pro took care of them or had a healing brush tool built in.
- Sometimes, it can introduce a very small color shift, but that's easy enough to fix.
Special Offers!

Model: @Abuk.Tong of @BnMModels
MUA: @SangeetaBhella
Currently, everything in the Anthropics store is 50% off, however, just for Fstoppers readers, they have provided us with an extra 15% off on top of that with the coupon code: NT6265.
You can buy Portrait Pro 19 here. If you would like to try it before you buy it, you can pick up a trial here, and if you already have the previous version of Portrait Pro you can upgrade that right here.
Are you going to pick up Portrait Pro 19? Why or why not?


I believe there is a healing-like brush: it's called touch-up and at the top middle part of the screen I believe? I bought this a couple years ago, and while I only pull it out for headshots (which isn't that often as I shoot primarily weddings), I find it to be excellent. The lighting tools can completely transform and improve your image. Their advertising and examples seem gimmicky and overdone, but with a light hand, this software can work wonders.
Is it just me or the before/after image sliders on this site have become so much smaller? It's hard to the see the difference since the image is so tiny.
No one will improve if things are done for them.
Do you still go out to the woods for an hour to gather firewood before you can start cooking or do you just turn on the stove?
No one wants to spend more time with menial work when there are faster and automated ways to do things.
A person still needs an artistic eye to know what is an "improvement" looks like. A heavy hand can easily go too far with any tool. Just watch me smoothing a board with a hand planer.