
As I always discuss, I am looking constantly for every way to streamline every little detail of my workflow as much as possible. Today I want to talk about what you do after you run your actions. It's a very simple thing that I rarely see anyone do.
The Scenario
Everyone uses actions to do certain things, maybe setting up a frequency separation layer stack or create a dodge and burn layer group. But one of the things I find most overlooked is what do you do right after you run the action. Most of the time, you'll be cloning or healing for example and then you want to jump into a dodge and burn, so you run your dodge and burn action (preferably via a shortcut key to be even faster than clicking, especially if you are like me and use 2 or 3 monitors, it's a ways to travel across the screens to get to your pallettes). But then you will hit the B key for brush, then you'll likely need to change your flow or opacity. So you press those keys and move on. After doing this millions of times, you do get pretty fast at it. But we can make it even easier and faster.
Reduce Keystrokes
We'll always have to use some keystrokes throughout the process, be it constantly changing brush size, feathering, etc., but we can greatly reduce the time and keystrokes by adding to the necessary tool selection to end of our actions.
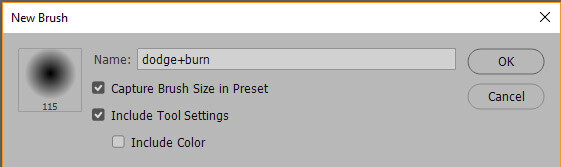
As an example since I dodge and burn on a 50 percent gray layer with a brush tool at 3 percent flow and a soft feathered edge I first create a custom brush preset for this. I chose to include size in preset, which gives me a certain starting point centered around the most common size I begin my dodge and burn with. Of course that varies by image and crop, but it will certainly put me in the ballpark size right away.
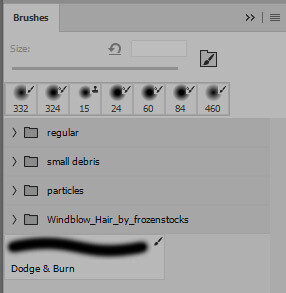
Then I will select the last step in my action and hit record. Select the brush tool (via shortcut or by clicking it) and then click on your new brush preset you made.
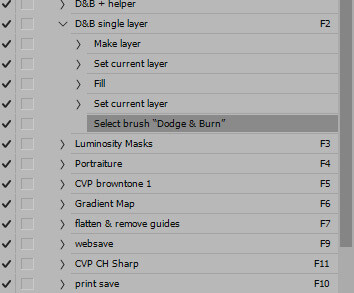
That's it. Stop the recording action (very important for obvious reasons) and voila, on every image from here on out, you can just run your action and even the tool will be selected.
Making Full Use
You can also use this for other things, such as a frequency separation. Many folks have purchased some kind of action or downloaded a free one but they vary in the last step, so I choose to select a clone stamp tool and highlight the high frequency layer after the action is run and I can immediately begin working on texture. Or of course if you wish to work on the low frequency first, go ahead and record that into the action and select a mixer brush with your settings already set.
Tip
This is not limited to actions you created. Don't be afraid to modify purchased or downloaded actions to better suit your workflow. Most don't come configured to that level because everyone uses them differently, but you can tailor it to your workflow and save thousands of keystrokes per month.


Join the Fstoppers community for free
-
Post comments and join in the discussions
-
Browse the site ad-free
-
Share your work and get featured in the community
-
Compete in the photo contests for fun and prizes
2 Comments
You created a brush called, “dodge+burn”, but your action calls for a brush called, “Dodge & Burn”. Just a heads up on the inconsistency
indeed, I made a new brush for the tutorial aside from my working brush, so I could show/screenshot the "new brush" window.