
Have you ever seen a complete 360X180 degree panorama on Facebook and wondered "how do they do that?" Today, I'll teach you.
First, let me start out by saying that the absolute easiest way to take full 360x180 spherical panos is to buy a 360-degree camera. These cameras used to be really expensive, but now, you can buy some pocket-sized versions for less than $1,000 that can create perfect panos instantly. But, if you don't want to buy more gear, I'll tell you how to do it with whatever camera you currently own.
How to Mitigate Parallax When Shooting Any Pano
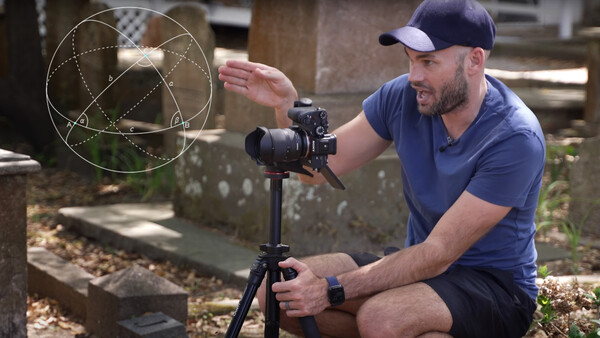
The key to successfully creating any type of panorama is to capture a series of images without parallax (effect whereby the position or direction of an object appears to differ when viewed from different positions). Landscape panos don't usually have a parallax problem because the subject is so far away from the lens that parallax is unnoticeable, but if you're shooting a scene with foreground elements, parallax will ruin your pano by making your images impossible to stitch.
The most professional and accurate way to mitigate parallax is to use a tripod head like the Nodal Ninja. These manual "gimbals" allow you to pivot your camera around your lens's nodal point and allow you to change your frame without adding any parallax. Of course, if you don't want to buy a 360-degree camera, you probably also don't want to buy a special tripod head. Don't worry, you can still do this with whatever gear you have.
Using a DJI Gimbal To Shoot a 360X180 Pano
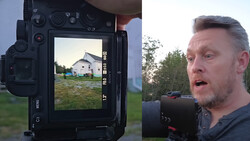
If you own a DJI gimbal, it may be able to capture a 360 pano automatically. Keep in mind that this method will have moderate parallax issues and will only be able to be used in large environments. You can check out my video tutorial below:
The String Method
The final and cheapest way to capture a 360-degree pano is the "string method." Tie a string to the front of your lens and let it hang down a few inches from the ground. Put a coin under the string to mark its location. As you spin the camera to capture each shot, make sure the string is aligned with the coin on the ground. When you tilt the camera down, the lens and string will also lower, raise the center column of your tripod to return the lens to the correct position. Do the opposite when you tilt the camera up. This is a quick and easy way to capture images while mitigating parallax.
How to Stitch a 360X180 Spherical Panorama
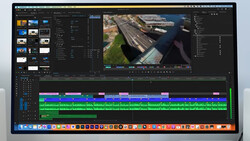
Although Lightroom and Photoshop can easily stitch standard panoramas, to create a 360X180 pano with an equirectangular projection, you're going to have to use specialized software.
There are free programs that can do this, and I may test them out at a later date, but the current industry standard is software called PTGui, which stands for Panorama Tools Graphical User Interface. In the two videos above, I show you how to use the software to stitch your photos together to create one large equirectangular projected image.
Once you've stitched your images together, you can drag your file into Photoshop for global and detailed editing. Again, the full explanation of this can be found in the two videos above.
How to View A 360X180-Degree Spherical Pano
Before attempting this myself, every time I saw an interactive 360-degree image online, I just assumed that the interactivity was somehow built into the image file. Sadly, that's not how it works. 360-degree panos are just stretched-out static jpeg images. To make them interactive, you're going to have to upload them into some sort of 360-degree viewer. PTGui has one of these viewers, and there are other options online as well. If you want to house this on your own website, you're going to have to upload one of these viewers to your page.
The easiest way to view your 360-degree pano is on Facebook. Upload your wide pano jpeg, and Facebook will automatically recognize it as a 360X180-degree pano and will display it in an interactive viewer. If you're on a computer, you can use your mouse to navigate the image. If you're on a phone, you can move it around in 3D space, and it will automatically navigate the image.
Stay tuned, in the near future, we are going to take things up a notch and start producing content on virtual 360-degree tours.


Join the Fstoppers community for free
-
Post comments and join in the discussions
-
Browse the site ad-free
-
Share your work and get featured in the community
-
Compete in the photo contests for fun and prizes
3 Comments
If money is tight, you can always pick up the Neewer pano head for like $100. It doesn't have the bells and whistles, but it'll get the job done.
Salty Cremepuff. Great advice. From the "tutorial" video I have serious doubts whether the gimbal can do the job. The lens nodal point is too far offset from the centre of rotation. Total waste of money and also a hugely expensive gimbal for such a simple job. The DJI RS2 is designed to stabilize your camera for vidoeography.
The "tutorial" is absolute nonsense. He speaks about the importance of "nodal point" rotation to avoid perspective shifts so that the overlapping frames can be stitched properly, then proceeds with a demonstration in which the rotation is hugely offset from the nodal point. This is the most basic aspect of panoramic photography. Failure to set up the gear properly means total failure. All these frames show that rotation is NOT around the nodal point.