
I have never been a fan of digital effects that emulate analog results. I always thought making a digital image look like it was shot by film was a deception. Could DxO FilmPack 7 change my mind?
Changing my Mindset
For the first half of my photographic life, I shot film. But like most people, the second half has been dominated by digital photography. Although I still dabble in analog, I like digital photography. The aesthetics of modern sensors and lenses appeal to me. The ability to achieve photos that were impossible even a decade ago appeals to the geek in me too. Moreover, I find my camera's ergonomics, build quality, and functionality superb. But I also enjoy the look of film, the mechanics of a good-quality film camera, and the entire chemical process.
Nevertheless, I never really understood the idea of making a digital print look analog. I considered it losing the best of both approaches and creating a pretender. Although I have tried adding grain, borders, and textures to pictures, it hasn’t appealed to me. Nevertheless, I do know that is a subjective viewpoint, and I am always one to challenge my opinions.
So, to review this software, I took a step back from my preconceived ideas. To begin with, I ignored the film names and considered the presets as starting points for development. I create presets as starting points to develop photos in the different apps I use, so this would be no different. Plus, although I don’t try to emulate film, I don’t always create deliberately clean, crisp images.
The Range of Presets
It hasn’t gone unnoticed that some digital cameras look like their film predecessors. Models like the OM System PEN range, the Nikon Zfc, and Fujifilm’s X range could easily sit among the collection of vintage cameras on the top shelf above me and not look out of place. Of course, Fujifilm is well known for its film emulations and is popular with some for that reason. However, DxO FilmPack 7 has a much wider range of results available than you will find in any digital camera.
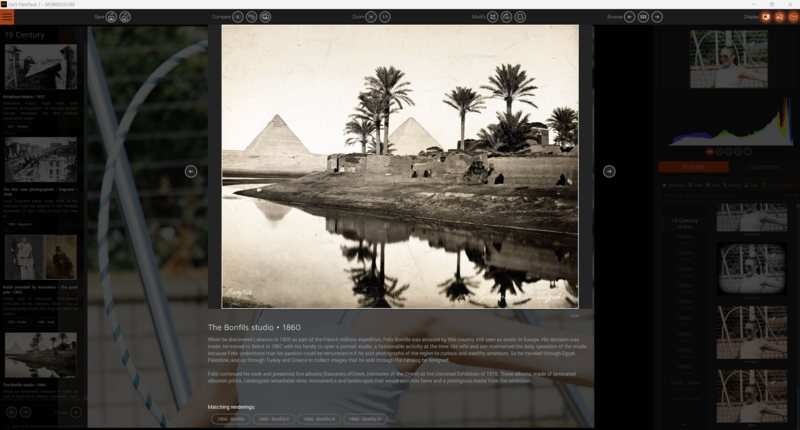
Within the Presets section are 58 negative film, 39 slide film, 39 designer, 39 digital, 6 cinematic, plus 104 Time Machine presets, equaling 285 presets in total. The Time Machine is fascinating as it not only matches the rendering from various points over the last 200 years but gives a history lesson with each one.
I can’t pretend to be an expert on every film type ever produced, but DxO has clearly done its homework, and the results are widely accepted as accurate simulations of the original film stock. When I compared it to the images where I knew the film and paper, the results were true to form.
DxO FilmPack 7 in Use
FilmPack 7 can be used as a stand-alone program or integrated into other software such as DxO PhotoLab, ON1 Photo Raw, Photoshop, and Lightroom.
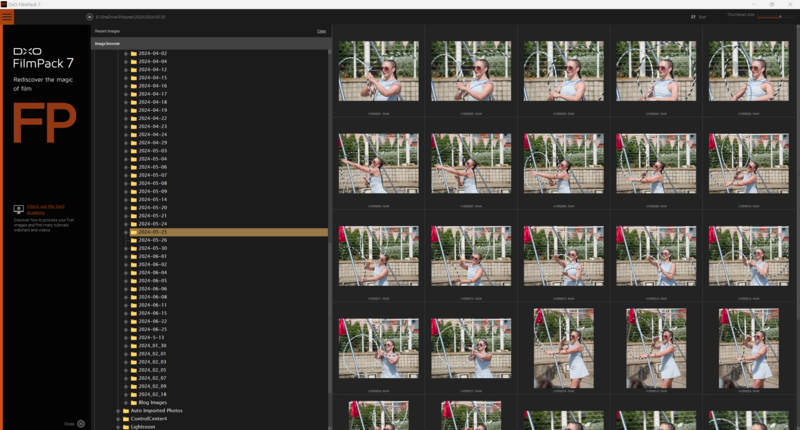
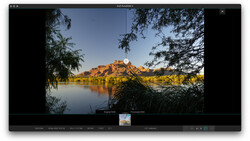
When using it alone, you start with its browser for navigating images. A double click on an image opens it into the film emulation presets; it can open raw files and apply the presets to them.
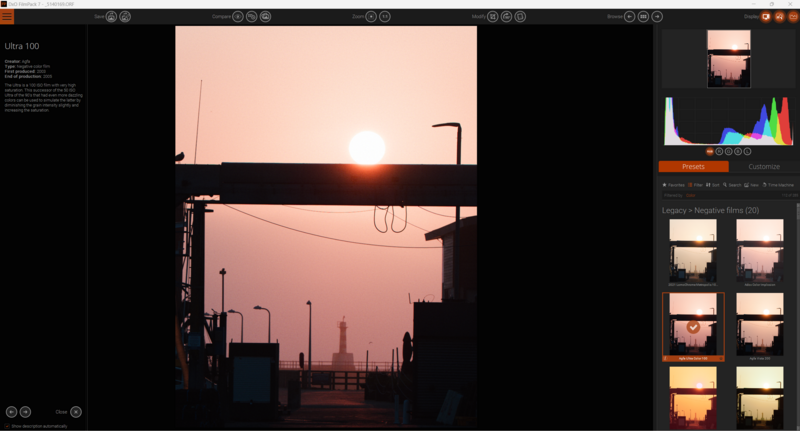
Another interesting feature is that on the left of the screen, it gives you a summary of the film, with its production dates including whether it is still being made, and a description of the film’s look. For example, it tells me that the production of Fujifilm Astia 100 stopped in 2010, is an older calibration than the 100F, which has a finer grain, although the rendering is close. It has a softer look than Velvia but has more lively colors than Provia.
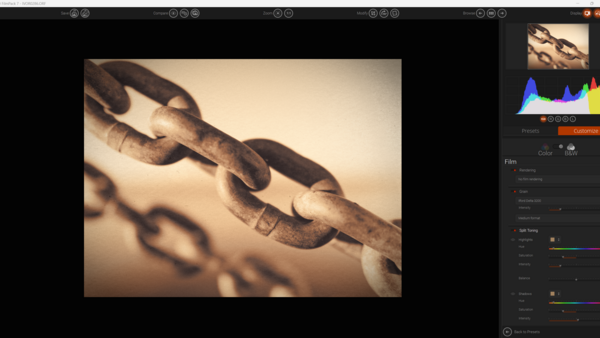
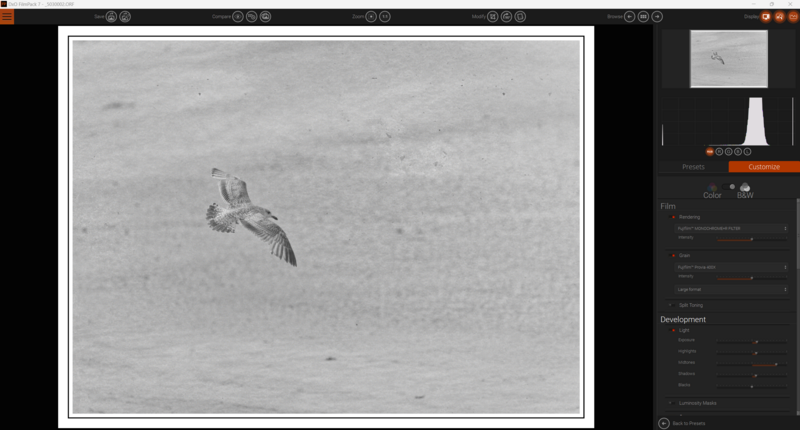
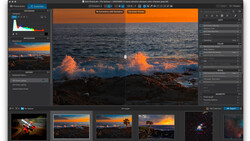
On clicking an image, it opens into the presets section. A banner is then displayed at the top of the image indicating that the automatic lens correction is being downloaded. When that download completes, the banner tells you that FilmPack is ready to apply the automated optical and noise corrections to the photo; FilmPack uses the same uniquely accurate DxO Optics Modules as DxO PhotoLab. Clicking OK validates that.
Then, you can select your desired preset in the Presets tab and make further adjustments by clicking on the Customize tab.
The Customize tab has an array of adjustment options split into sections called palettes.
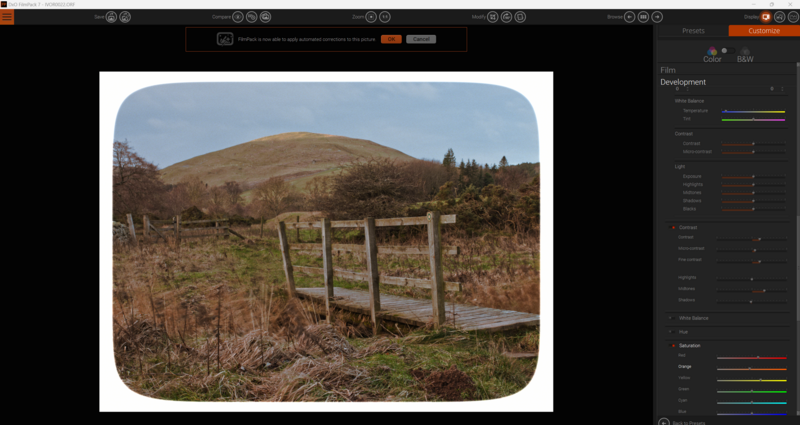
The Film palette allows you to emulate different films, add grain, and apply split toning. Below that is the Development palette. That has the usual color and tonal adjustments you find in most raw development programs and luminosity masking.
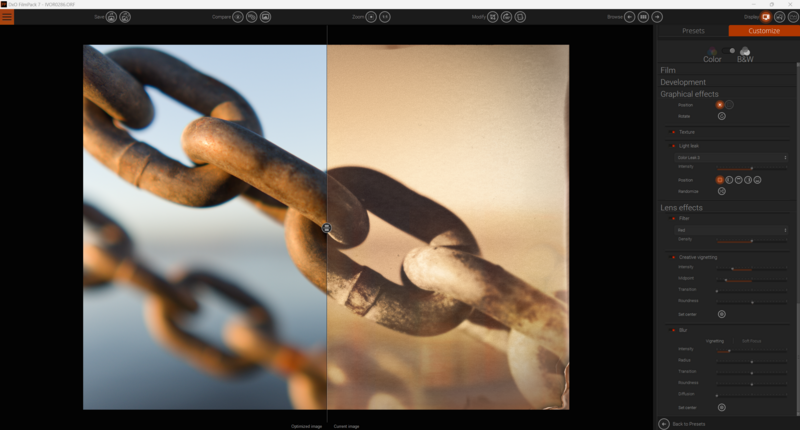
Graphical Effects allows the addition of frames, texture, and light leak effects. Meanwhile, the Lens Effects allows adding colored filters, vignettes, and blur. The texture effects can be adjusted or randomized, so you don’t have to have the same pattern overlaying each photo. I found the application of textures the easiest of any program I have tried.
Along the top are various grouped buttons: save and create preset; various compare options; zoom and 1:1; crop, rotate, and straighten; browse and navigation; and display options.
Worthy of note is the ability to add presets of your own. Thus, you can produce a consistent look across a range of photos. One quirky behavior that caught me out was the leveling tool. To use it, you click and hold, and then drag the line along the vertical or horizontal line you want to use as a level, as opposed to clicking each end of the line.
Fast and Simple
The software has a simple, easy-to-navigate user interface.
Switching between modules is fast, as is the application of the presets. When you switch to the Customize palette, the sliders are gentle, and I found even moving them a long way gave very subtle and pleasing results.
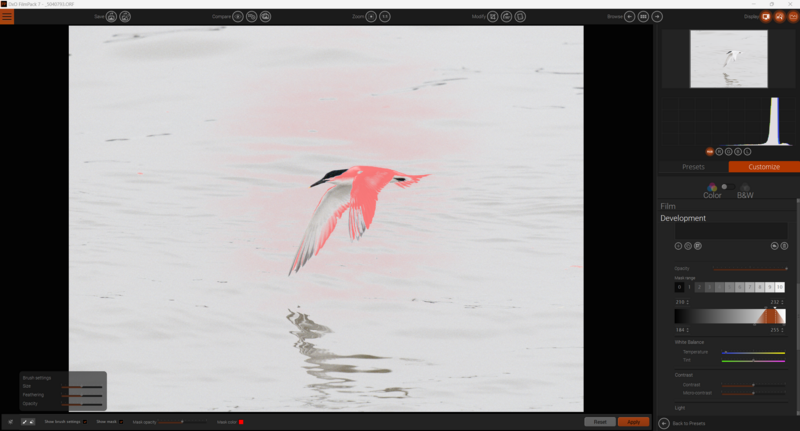
A couple of options I would like to have seen as a standalone program. Firstly, it doesn’t have twin-screen support; it would have been nice to browse on one screen and apply the presets and adjustments on the next. It has no database nor generates sidecar files, so raw adjustments are not automatically saved when reopening a raw file. Nevertheless, you can save the settings as a preset and apply them quickly again later. Secondly, apart from luminosity masks, there are no local adjustments.
Integration with DxO PhotoLab
The good news happens when you activate FilmPack 7 within DxO PhotoLab. FilmPack’s adjustments and effects are unlocked and are then fully integrated within that program. All FilmPack's functions appear under the various adjustment tabs throughout PhotoLab. The presets appear, with their previews, when you click the Apply Preset button in PhotoLab. You can apply those and jump back and forth to the other adjustments in PhotoLab, working on a raw image. This integration adds enormously to both programs' functionalities, increasing the appeal of both.
This useful video from Michael Wayne Plant gives a typical workflow in PhotoLab 7 with the FilmPack 7 extension enabled.
What I Liked and What Could Be Improved Next Time
What I Like
- Simple to use.
- Works well as a plugin for Lightroom and other apps.
- Excellent as an extension to PhotoLab 7.
- Film simulations are accurate.
- The film stock is well-researched and the program gives interesting historical information.
- Time Machine is fascinating.
- Batch processing is possible.
- It’s a comprehensive raw processor.
- Compelling results.
- It’s not jumped on the AI bandwagon, so images won’t be marked as AI on social media.
- Reasonably priced for a quality raw converter, and not a subscription.
What Could Be Improved Next Time
- As a standalone program, it lacks some standard features in other software.
- It does not save the developments of individual raw images, so settings are not recalled the next time you visit an image unless they are saved as a preset.
- No dual-screen option unless integrated with PhotoLab.
- No local adjustments.
- Limited keyboard shortcuts compared to other programs.
In Conclusion
Historically, I was doubtful about emulating film as a digital effect, but now I get it. There’s a lot of fun to be had from using it, and I find the results compelling. After starting my journey as a skeptic, I arrived as a convert. I still have reservations about fakery and digital images pretending to be film photographs. However, adopting the mindset that the presets are just making the images into art and nothing more than that, there’s no difference between applying film emulations, doing a simple black-and-white conversion, or making any other raw adjustments. Furthermore, I can see the need for some photographers to have a historic look to their photos.
Although it can be used as a standalone program, FilmPack 7 comes into its own as a plugin or extension to other programs.
Like the other software that comes out of the DxO stable, FilmPack 7 is a solid application giving superb results. It is designed to work best as a plugin for other apps, excelling when integrated into PhotoLab 7.
FilmPack 7 is available from the DxO website. A Free trial is available and it can be bought at the current sale price of $109, usually $139. Or you can upgrade for $59.
Join the Fstoppers community for free
-
Post comments and join in the discussions
-
Browse the site ad-free
-
Share your work and get featured in the community
-
Compete in the photo contests for fun and prizes
No comments yet