If you're into video editing you are probably interested in visual effects to some extent. Even if you aren't, bookmark the current article as you will eventually be. Visual effects is not some software magic that works with any footage. With video you have lots of still images per second and the process of making a composite needs to be automated as much as possible. Working on a frame by frame basis is avoided as much as possible. In this video you will find 10 quick tips on the importance of having appropriate video content in order to help easily create more realistic visual effects.
1. Camera Motion
As a first tip the author of the video insists on having camera motion always in the shot. This makes the video look "hard to create with visual effects." While this sounds like the truth, I don't think it's always mandatory, as we filmmakers know camera movement has to be motivated, not random. If your shot calls for a locked camera, there's nothing wrong with adding visual effects on it. You can show off with locked footage too.

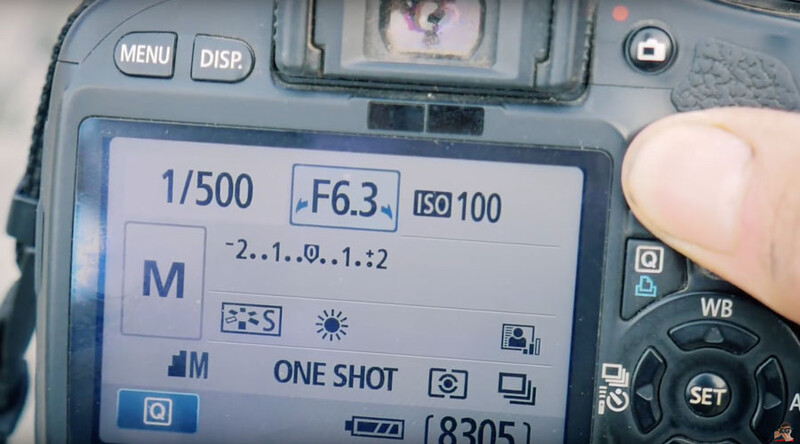
2. Shoot With a High Enough Shutter Speed to Avoid Motion Blur
Tracking is one of the basics to almost every visual effects shot. In order to have an accurate result the software relies on optical recognition of certain areas in the clip. Most motion trackers have a hard time with frames that are entirely blurred by the camera motion. To avoid that you better shoot with a higher shutter speed to avoid frames like the above. Of course the scene may not permit shooting at such a setting, in which case you should mind your camera movement.
3. Know the Camera Settings for the Footage
While most professional cinema cameras have the camera settings in the footage meta data, it's not that common with DSLRs. If you are working with visual effects you better know the camera settings such as focal length, aperture, and shutter speed. On a personal note, I would add keeping track of the camera position from the ground as well as the distance from the subject. This will make for more accurate 3D object modeling and rendering in the video.
4. Make Sure There Are Tracking Markers in the Shot
Tracking footage without any distinctive contrast objects is nearly impossible. That's why you should try to have elements in the frame you can use in your tracking software. If there are no such elements, create some by using tape of some sort or other object. Usually those marks are removed in postproduction or replaced by a 3D model or other footage. Think about placing them in such a manner so they can be easily removed or replaced later.
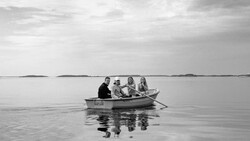
5. Shoot From a Tripod If There's Nothing to Track
If you're shooting an ocean background plate for a ship added in post you won't be able to track anything distinctive. If you need to have camera motion you better add it in post and shoot locked on a tripod. You may also need to shoot a little wider so you have enough resolution to work with in post.
6. Avoid Fast Camera Moves
Just like with shooting with slower shutter speeds, blurred frames can occur when moving the camera quickly when panning, tilting, or zooming. If you need tracking during that camera action you better find a workaround as it will be quite hard to track blurred frames.
7. Shoot a Blank Background Plate
This tip is true for photography composites too. It's good to have a blank background plate of your scene without any actors in it. It can be a time saver when you need to mask something out of the scene and replace it with frames from the blank plate. You can also use it as a helping footage or B-roll for some other project.
8. Shoot a 360-Degree Environment Map
Environment maps in visual effects are very important for creating realistic lighting and reflections on 3D models. They can also be used to fake camera motion within a scene. An environment map is a 360-degree panorama image.There are lots of tutorials online for creating such images. There are mobile applications that can help you quickly create environment maps with your phone, especially if you are going to use it only for unpretentious lighting and reflections. If you want to have a real deal shoot, photograph the panorama image using a camera that shoots raw files. This way you will create the so called "HDRI panorama" which has more dynamic range than a panorama created out of JPEGs from your phone.
9. No Blue Screen? Try Using the Sky
Keying objects from a blue or green screen is a typical routine in the VFX processing. However, sometimes you may have an unplanned situation where you are on location and you need to shoot an object against a seamless background. If the sky above is blue you can use it as a background. Even if it's not blue, keying high contrast objects from a gray sky is also possible. Just make sure the object you are going to be keying out doesn't contain colors similar to the background.
10. Have Foreground and Background Objects For Tracking
Parallax is one of the best approaches for creating a 3D illusion on a 2D screen. It is when the camera moves and there are objects in the foreground and in the background. To make sure your camera tracking in post is accurate in the 3D space, make sure you include both foreground and background objects in your footage.
I hope those tips will help you bring your video work to the next level. If you are interested in working with 3D for your photography or video work, CG Geek's channel is a great resource. I have watched videos related to working with Blender, which is a free 3D software. It can be used not only for creating 3D objects and rendering scenes but also to help you create stunning visual effects on a budget. I strongly advise you to add some 3D software skills to your tool kit if you haven't already gotten into it.

Join the Fstoppers community for free
-
Post comments and join in the discussions
-
Browse the site ad-free
-
Share your work and get featured in the community
-
Compete in the photo contests for fun and prizes
1 Comment
That's one in-focus tree!