
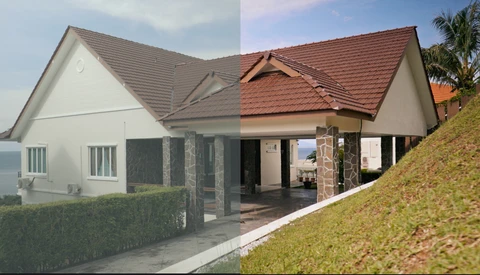
Coming from a photography background, venturing into the video realm can feel overwhelming. While I'm confident in most aspects of photography, the learning curve for filmmaking is steep and often more complicated than expected.
One challenge I've encountered is working with Canon C-Log while filming on the Canon 5D Mark IV. Having the ability to film in C-Log on this camera is both a blessing and a curse. On one hand, you get the benefit of filming in a log profile, which offers a more dynamic range by using a flatter gamma curve. On the other hand, there is surprisingly little accessible information about how to handle C-Log footage correctly, with most tutorials out there usually trying to sell you LUTs that don’t quite deliver. In this article, let's break down the essential details for understanding Canon C-Log and explore its key advantages over standard video profiles.
Camera Settings When Filming in Canon C-Log
After experimenting with Canon C-Log for a while, I can confidently say it's not ideal for casual filming. This is because C-Log requires a rather delicate and thoughtful approach from recording to grading to truly harness its advantage. Factors like camera settings, scene exposure, and lighting control all play a crucial role in the final outcome.
Let's start with camera settings. When it comes to aperture, you'll generally want to shoot as wide open as possible to create that soft, cinematic look. In cases of overexposure, you can either use an ND filter or increase your shutter speed. Both methods work, though the latter might be more practical during filming. However, a higher shutter speed comes at the cost of losing natural motion blur, which isn’t a major issue, as this can easily be added back in post-production.
For shutter speed, the standard guideline is to follow the 180° rule for the most natural motion blur. If you're filming at 25 fps, your shutter speed should be set to 1/50 s, which is 2x the frame rate. However, this rule isn't set in stone. You can adjust your shutter speed to achieve specific effects. For instance, slowing it down for a blurred, nostalgic look or speeding it up for a sharp, sci-fi, stop-motion effect.
ISO is arguably the trickiest part of the equation. Each camera has its own native ISO value that yields the best dynamic range, and some cameras even have dual native ISO, with one optimized for low-light scenes and another one optimized for bright scenes. For the Canon 5D Mark IV, Canon recommends using ISO 400 when shooting in C-Log to achieve the best dynamic range. When making adjustments, it's advisable to stick to multiples of ISO 160 to avoid unwanted banding.
My general approach is to first set my aperture, shutter speed, and ISO, then fine-tune the exposure using an ND filter if necessary to avoid overexposure. For underexposed scenes, I’ll either introduce additional lighting or, as a last resort, increase the ISO to balance the exposure.
How to Expose Your Footage When Filming With Canon C-Log Profile
Assuming you've enabled recording in Log format on your camera, let's dive into how to expose footage correctly when shooting with Canon C-Log or any Log profile. There are several approaches to this, but I've found two methods that work best for me. The first involves exposing normally using a pre-loaded REC 709 conversion curve on your monitor, and the second is exposing to the right using the histogram.
Some filmmakers suggest using an 18% gray card for setting exposure, as Log curves typically place middle gray at around 32-38% on a waveform. However, I find this method cumbersome and not flexible enough when working in varied lighting conditions where quick adjustments are necessary.
Method 1: Using a Pre-loaded REC 709 Conversion Curve
In this method, you use a Look-Up Table (LUT) to preview what your footage will look like after grading on the recording monitor or camera itself. The REC 709 LUT gives you a more accurate representation of contrast and color, helping you to judge the right exposure. It's important to remember that the conversion curve doesn't affect your recorded footage, as it's just an overlay for preview purposes. As an added benefit, the added contrast also makes it easier to judge focus since Log footage often appears flat and soft, which can make it hard to determine sharpness.
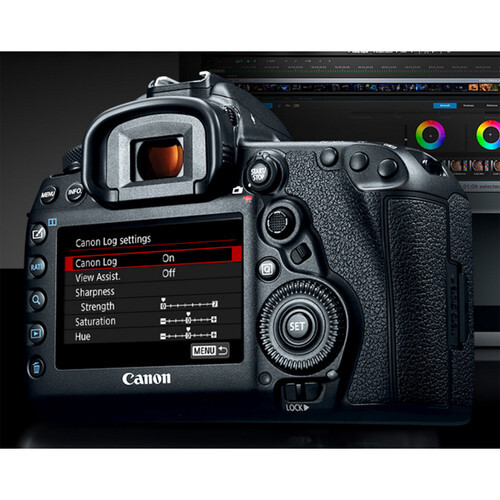
For Canon 5D Mark IV users, you do not need to load an external LUT. All you need to do is enable the "View Assist" option under the Log settings. This feature switches on the REC 709 preview, allowing you to preview your footage as you normally would, making exposure and focus adjustments much more intuitive.
Method 2: Exposing to the Right Using the Histogram
The second method, exposing to the right (ETTR), involves pushing your exposure toward the upper end of the histogram, essentially from middle gray to maximum white. Most cameras, including the Canon 5D Mark IV, when recording in Log mode, tend to preserve more detail in the highlights than in the shadows, so pushing your exposure to the right helps to retain crucial information in the brightest areas.
However, it’s essential to experiment with how far you can push the exposure before white clipping occurs and details become irrecoverable. Generally, this method works well for scenes with minimal highlights that you can afford to blow out slightly in order to preserve more midtone and shadow detail. Keep in mind, though, that Log footage can become noisy and grainy if you attempt to lift shadows too much in post-production. Meanwhile, for scenes with lots of highlights, the ETTR method can be rather limiting, as you may lose important details in those brighter areas.
Grading Your Footage: Converting Log Footage to REC709
Grading your footage is essential if you want to fully unlock the potential of your Log footage. This is also where many Log recordings can fall short, often looking worse than footage shot in a standard profile. In this section, I’ll share my approach to grading Log footage based on my setup: the Canon 5D Mark IV and DaVinci Resolve NLE video editing software.
There are two main methods for grading Log footage. The first is using the “Color Space Transform” node in the color grading tab found in DaVinci Resolve, and the second is applying the official conversion LUT provided by Canon.
Method 1: Using Color Space Transform in Davinci Resolve
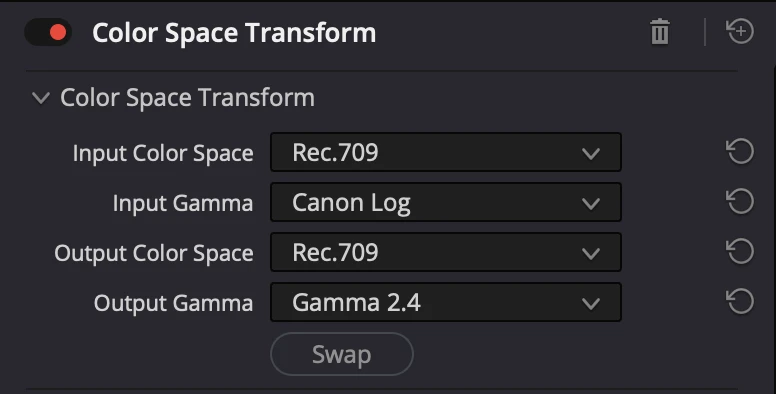
This method is fairly simple and efficient. The idea here is to convert the gamma of your recorded footage (input) to match the gamma of your intended export media (output). To do this, simply add the “Color Space Transform” effect to a node in the color grading tab and select the right input and output gamma settings. This converts the footage from Canon Log to Gamma 2.4, which matches the calibration of my screen and export preferences. You can experiment with other output gammas like REC709, REC709-A, Gamma 2.2, or Gamma 2.6 to see what works best for your project.
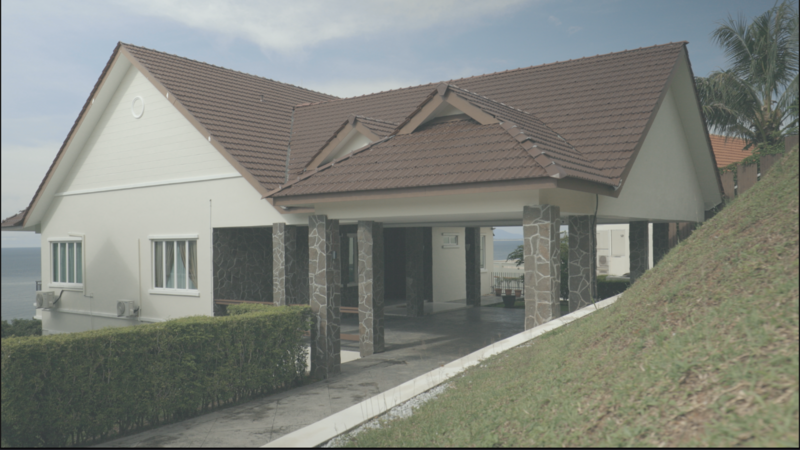
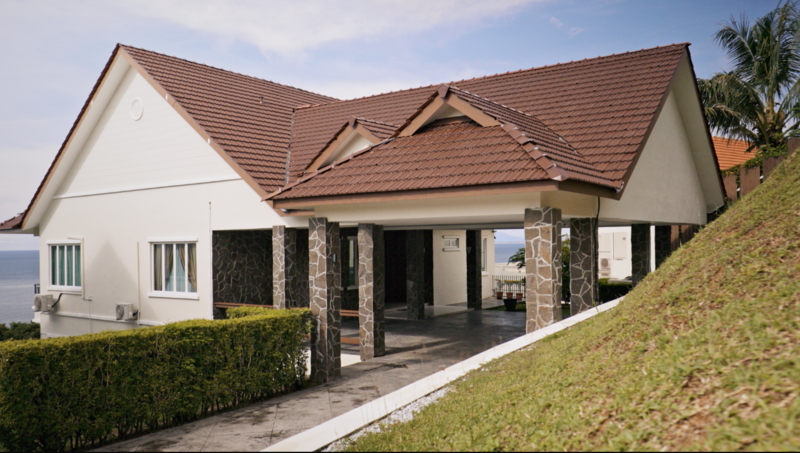
The advantage of this method is that it allows for a more standardized workflow. It lets you adjust the node structure to grade footage from different cameras with varying gamma and color spaces, ensuring consistent results as long as you’re working within DaVinci Resolve.
For those filming with the Canon 5D Mark IV, it’s best to use REC709 as your input color space rather than REC2020 for the 8-bit footage. This will give you a more accurate color representation unless you’re deliberately aiming for a creative look.

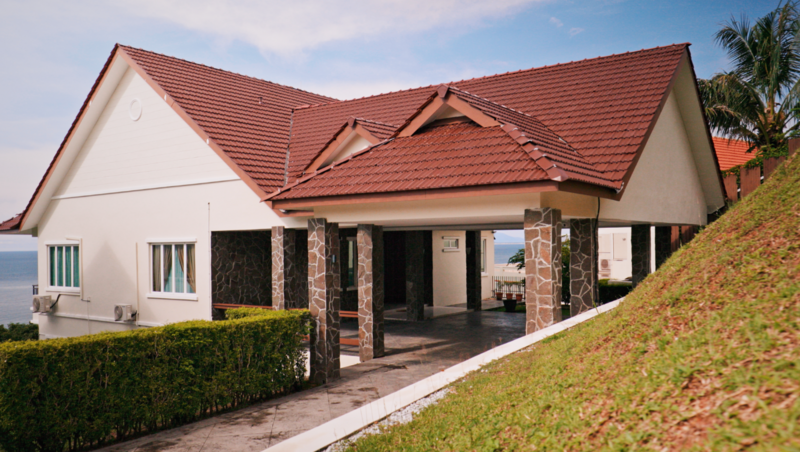
Method 2: Using Conversion LUT provided by Canon
This method works with any NLE video editing software that supports LUT color grading. While it's a simpler approach, it can deliver inconsistent results if the wrong conversion LUT is selected.
To use this method, download the official LUT from the Canon website. In the downloaded zip file, you’ll find folders for 1D LUTs and 3D LUTs. For the sake of simplicity, we’ll focus on the 3D LUTs, which are generally better for accurate color management because they offer full volumetric, non-linear color adjustments. Opt for the LUT with 65 grids, but if your editing software can’t handle that, try the 33 or 17 grid versions instead.
For convenience, all the LUTs provided by Canon have a standardized naming convention shown below for you to figure out which LUT to use for your camera:
[1]_[2]-to-[3]_[4]_[5]_[6][7]_[8].cube
- Input Gamut/Color Space
- Input Gamma
- Output Gamut/Color Space
- Output Gamma
- Grids
- Input range (N:Narrow, F: Full, L:Linear)
- Output range (N:Narrow, F: Full, L:Linear)
- Version
For example, the Canon 5D Mark IV records in BT709 gamut (Rec709) color space with Canon Log gamma. If our target output is also Rec709, the correct LUT would be “BT709_CanonLog-to-BT709_WideDR_65_FF_Ver.2.0.cube.” Load this LUT into your NLE, and you can apply it to your footage to convert your Log footage into a Rec709 footage.

One thing to point out is that, as far as I know, BT709 and REC709 are essentially the same. It’s a bit puzzling why industry standards use different terms for what is fundamentally the same thing, only adding to the confusion.
For comparison, you’ll likely achieve similar results using both Method One (Color Space Transform) and Method Two (Canon’s Conversion LUT). Personally, I prefer Method One, as it ensures consistency in workflow when working with footage from multiple cameras within the same project.


Conclusion
Now that you’ve learned the essentials of Canon Log, it’s important to note that Log footage generally does not perform well in low-light conditions. The reason for this is that Log gamma is designed to preserve highlight details in high-contrast scenes. While in low-light situations, where contrast is minimal, Log gamma becomes less practical and may result in more noise than necessary.
For me, it’s been a long journey of gathering the right information and experience to feel comfortable working with the Log profile. While I’m not a professional colorist, I hope this article provides enough guidance to help you start filming in Log. Lastly, do you typically shoot in Log profile? What tips or tricks do you use when working with Log footage?



4 Comments
This was a great overview. I don't shoot video so I don't use logs and LUTs and CODECs, but this article gave me some idea of what they are and how they're used. Thank. you!!
Thanks for reading! I have been shooting videos on and off but mostly having no idea about how all these work because they are just simply way too complicated and lacking of proper information online is not helping. I am glad that this article helps you. I have tried my best to summarised it
That seems like a lot of work, with my 90D I don't have c-log but I have learned a few things more about shooting with my 90D. For DNR my preset custom mode 2 is my go to for video. Shooting 4k in a mode that I created was basically no saturation and high contrast. However I still feel like it's a waste of time color grading, because the raw color out of a canon is always good. I do it anyways. I say the most interesting think about my work I edit it on a cell if the file not too big. Canon EOS 90D.. 4k cinematic. I pick some cinematic glass also I'm learning. I'm a pro photographer but I'm learning video. Great review.
It is indeed a lot of work when shooting in LOG, and I would not recommend it if you are not shooting any project professionally. You are right with Canon's colour being good enough once the contrast and saturation is dialed down slightly. With LOG profile you may gain some more dynamic range but you will have to be the judge will you need that extra dynamic range or will you need that flatter profile to worth that hassle. All and all its still a feature that is nice to have and experiment with.