
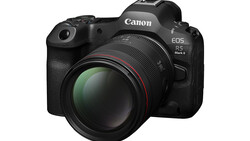
Ever wonder about VR filmmaking, but aren’t sure how to get started? Here is a mini-primer using the Canon RF 5.2mm f/2.8 L Dual Fisheye 3D VR lens and the R5 C camera.
Let’s start with a disclaimer. I am not a tech person. My interest in all things art comes purely from a narrative approach. I am a director/DP and screenwriter. My photography career, whether still or motion, is thoroughly driven by the characters I’m putting on screen. The tech part of the deal is largely a means to an end. So, when new technological ways of storytelling appear on the horizon, I am rarely the one who can explain the nuts and bolts.
But new technology does often breed new opportunities, both professionally and creatively. New ways to approach tasks. New ways to produce work. In the advertising world in which I work, there has been steady growth in what is called the “experiential” market. Unlike traditional commercials where, much like narrative film, a director takes an audience through a story and a product through clever cuts and framing, the experiential market is all about providing customers with unique experiences. These experiences are less about dictating a specific line of events. Rather, they allow a potential buyer to experience the product or brand through means outside of traditional media. Think, for instance, of a shoe brand creating an athletic competition that customers can apply to be part of, then filming that experience documentary style to share on social or to cut down into a 30 second spot. The end goal is the same, reach customers and convey your brand message. But the method of delivery can be more engaging by involving the customer in the process.
There are few forms of filmmaking more engaging that VR filmmaking. With VR filmmaking, you are creating a 180- or 360-degree world where the person viewing the film literally steps inside of it. They can look up, right, left, down at their own pace. Less about presenting a world in a very prescriptive way. More about letting the viewer search around in the world for what they want to see.
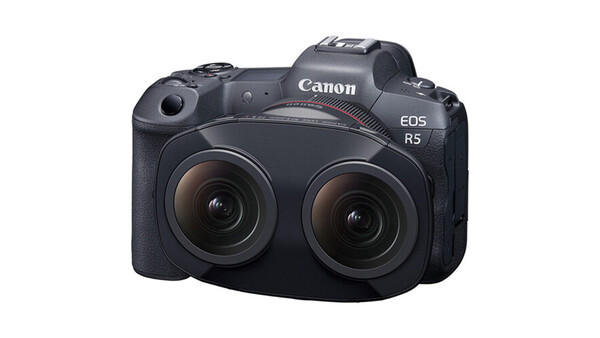
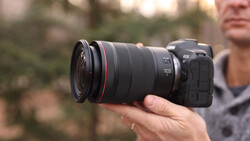
If this sounds like a complicated way to make a film, you would be right. Many of the rules you will have learned as a traditional filmmaker will no longer apply. The filming process and editing process require different tools and tricks. But, thankfully, Canon has moved into the space with the goal of making the VR filming experience more accessible with the Canon RF 5.2mm f/2.8 L Dual Fisheye 3D VR Lens. It may look strange at first, with its two bulging eyes making your camera suddenly look like a futuristic space creature, but the dual lens setup provides a wide 180 degree field of view that is the key to putting VR within your grasp.
I know what you are thinking. All that stuff is great, but how does it actually work? I had that same question myself. And fortunately, after getting to use the VR lens in combination with the Canon R5 C for the last couple of months, I can give you a few pointers to get yourself started. Think of this as a primer. It is by no means a comprehensive guide to VR filmmaking. I am new to it myself, so I’m learning too. But these basic starting points have helped me go from concept to creating a complete VR world and will hopefully give you an entry point into the new form. Where you go from there is up to you.
The Viewer Is in Charge
Step one, before even picking up the camera, is to make a mental shift. In VR filmmaking, the viewer is the auteur. Not the director. As a traditional filmmaker, I make my living knowing when to cut from one thing to another, always knowing the right time for a closeup, and carefully paying as much attention to what I don’t want the audience to see as much as what I do want them to. To a large degree, VR filmmaking robs you of this power.
In a VR world, using the VR lens, the audience is in control. They have a 180-degree view of the scene. They can look where they want to look at any given moment. Think about the practical implications of that. You can no longer cut to a closeup to draw their attention to something specific. So, you’ll need to accomplish that through other means like dialogue, your actors' gestures, or sound cues. If you want them to be looking left, you need to give them a reason to be looking left. But, if you have them looking left, it’s probably not the best time to give them vital narrative information on the right.
This also means that your production designer just got a whole lot more important. In traditional filmmaking, you can just crop out things that you don’t want the audience to see. But, in a world where the audience can see 180 degrees, it is far harder to crop things out. So you need to pay a great deal of attention to everything in front of the camera. You never know when the audience's attention may drift someplace unintended. And you wouldn’t want their attention fixated on the wrong thing. Like a light stand in the frame, for example.
Beware Your Equipment
That brings us to a couple simple gear considerations. The camera being able to see 180 degrees mandates several decisions. For one, because it can see all the way up and all the way down, tripod legs, shotgun mics, or other accessories can easily be seen in frame if you aren’t careful. The best way to avoid this is to mount your camera on an extension arm which takes it away from the tripod legs. This prevents the viewer from being able to look down and see filmmaking equipment that will take them out of the scene.
You will also need to take care to place your lights in such a way that they will not be in frame. This can be a challenge if you are used to getting your lights in close to your subject. One technique I’ve seen is to actually allow your lights to stay in frame, but then shoot a plate shot, so that you can easily paint out the production equipment in post. Considering that VR filmmaking benefits from shots being locked off, the process of combining shots in post shouldn’t be too complicated. But it does take planning.
Learn to Love Sticks
We live in a world of gimbals and handheld cameras. When shooting VR, you really want to stick to the sticks. Sure, you might be able to get away with a super slow push in on a very well balanced slider (although beware of the slider itself making its way into the shot) or utilize very finely tuned slow camera movements with a robotic arm. But, for the most part, you are going to want to avoid as much camera movement as possible.
Why? Well, VR films are meant to be seen inside a VR headset, something like the Meta Quest or the newly announced Apple Vision Pro. This is great because it allows the viewer to move their eyes around a scene in a very natural way, looking around the frame as they would look around the real world. Shooting from a tripod gives them a steady starting point to look around. If the world they are seeing inside the headset is constantly moving around and unsteady, they are likely to feel less captivated and far more nauseous. Shaky handheld camera work might look great on the big screen when watching one of the Bourne films, but closeup inside a headset would be quite a different experience.
How Close Is Too Close?
You are also going to need to make sure that you are capturing your subjects from the best perspective. Unlike traditional filmmaking where you have the freedom to place subjects almost anywhere, subjects within a VR world tend to look their best when positioned within a more limited range. Position them too close to the camera and the fisheye nature of the lens will, well, not look good. Closeups on faraway movie screens look fantastic. But a tight closeup of a person inside a headset may give them the impression that the subject is seriously invading their personal space. Yet, if you position them too far from the camera, they will become too small in frame for the viewer to engage with.
There aren’t any hard set rules, but, from what I’ve learned, most subjects seem to look their best somewhere between 3 and 15 feet from the camera. This puts them far enough away to look pleasing to the eye, but not so far that we can’t make out who we are looking at.
Mind Your Horizon
The same goes for your horizon line. I’ll admit, I have never been the best at always keeping my horizon lines straight when behind the camera. It’s not that I don’t try. I think I just must see the world in a slightly tilted perspective, because I’ve spent hours of my life straightening shots that I could swear were straight when I was on set.
Like the handheld issue, VR footage is better when your starting horizon line is level. This gives the viewer a firm grounding from which to start their journey. Starting out uneven can be disorienting to the viewer. Thankfully, cameras like the Canon R5 C have terrific built-in leveling tools which make it simple to make sure that you are in balance. This is one of the first on screen displays you should activate when you start shooting VR.
Maintain Your Focus
Focus is critical in any film, but in a VR film, even more so. This is one of those areas where things will take a bit of getting used to. The Canon RF 5.2mm f/2.8 L Dual Fisheye 3D VR Lens is fully manual focus. It has a traditional focus ring like any other lens. But the lens system works by essentially combining two eyes the way human eyes would work. So, you need to make sure that you have critical focus in both eyes. To make matters a bit more complicated, the focus planes are exactly the same. The two “eyes” are working together to show depth. But this does mean that it is critical to get that right. It is good practice to make sure to punch into any areas of critical focus prior to shooting and make use of the focus assist tools such as focus peaking or Canon’s unique focus guide system which allows you to assure focus by simply lining up a pair of arrows. Should you need to further fine-tune your focus, the RF 5.2mm dual fisheye has a small bolt in the upper right side that allows you to make micro adjustments with a small hex tool to make sure everything is spot on. Like most things VR, you are going to want to take your time with this to provide your viewer with the best experience.
A New Meaning of Slow Motion
If all of this is starting to sound like an incredibly slow process, once again, you are right. VR isn’t a run and gun kind of thing. It’s carefully crafted. So don’t expect to take this system straight out of the box and just start running and gunning handheld. Like many aspects of life, it works better if you plan ahead. But, if you have the time, you can create an immersive experience.
Don’t Forget The Ears
Of course, our vision isn’t the only way in which we experience the world. To create a truly immersive world, what we are hearing is just as important as what we are seeing. If you can see 180 degrees, but all the sound is coming from one direction, that too can be disorienting.
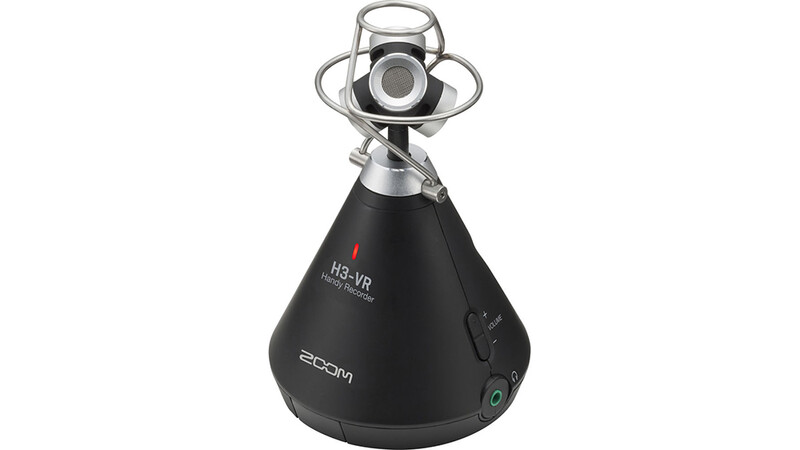
To address this, in addition to VR video, you should consider recording ambisonic sound. The exact opposite of using a shotgun mic to focus sound recording in one direction, using an ambisonic microphone allows you to essentially capture audio in all directions at once. There are several variations available. I picked up a Zoom H3-VR handy recorder. With only a few settings, I can sit it in the environment and it will record sounds from front to back, back to front, top to bottom, bottom to top, side to side. You get it. Then, the recorder conveniently lays all that audio onto different tracks on the timeline when I bring it into the editor. The end result is sound that appears to be coming from all directions. When paired with video that the viewer can experience in virtual reality, it helps ground them in the world you’ve created.
This Is Where 8K Pays Off
Keep in mind that when you are recording with the dual fisheye lens, you are essentially splitting your resolution between the eyes. So, if you start with 8K, for example, roughly 4K is going to each side. Therefore, starting with 8K in a camera like the R5c, or even 4K, is going to give you far more detail in the end result. When creating a virtual environment that a viewer is going to want to step into, the more detail the more realistic the effect.
Speaking of detail, you may also want to shoot a higher number of frames per second. Shooting a higher fps will give you more detailed images as the camera is literally recording more data each second.
How The Heck Do I Get The Footage Into The Computer?
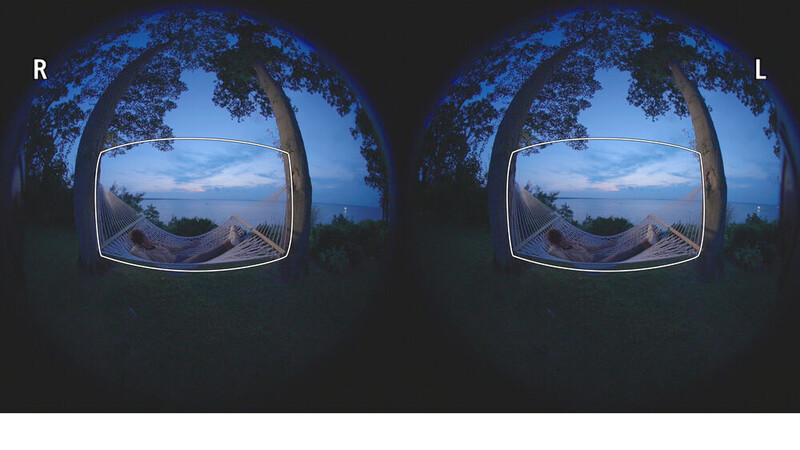
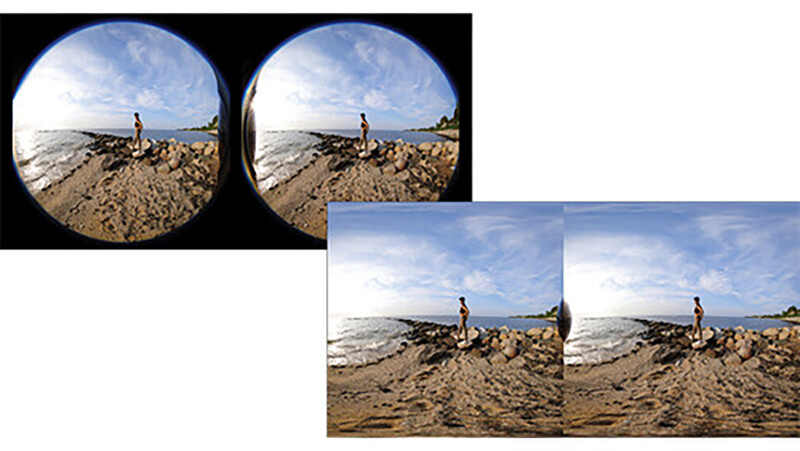
So you’ve carefully shot your footage. You’ve perfected your horizon line. Locked off the camera to keep it steady. Recorded ambisonic sound. Positioned your subject at the perfect distance. And you’ve hit record. Now, you’d like to see all that amazing footage you just shot. But you open up the footage in your favorite editing tool and are met with these strange looking side-by-side circles. What gives?
Well, fear not, this is normal. When the camera is recording with the VR lens, it is creating two parallel image circles. Those images will then be laid on top of each other to create the depth of the virtual reality world. But, you do need to take some additional steps to create the final product.
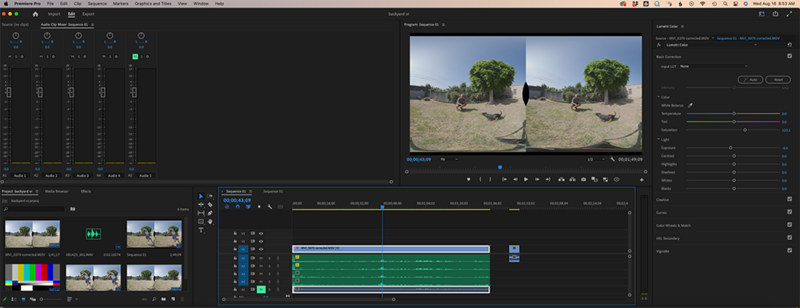
You have two options for first steps. You can use the Canon Utility. The software itself is free, although you will want to purchase one of the paid subscriptions which unlocks many of the features. Or, you can use Adobe Premiere with the Canon Utility plugin. Both solutions require a subscription to get the most out of them. If you do shoot in 60p, the Canon Utility is the better bet.
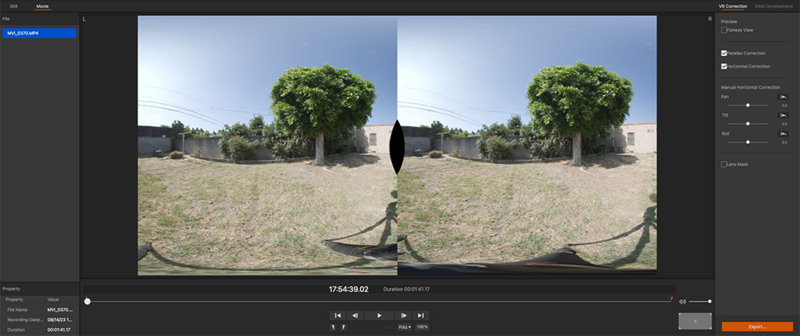
What the software does is convert those two circles into side by side flat images. It also flips the images between eyes in a process that I won’t even begin to try and explain. But, to make a long story short, the software essentially corrects the image so that it can be viewed in a VR format. Once the image has been corrected, you can bring it into an editor like Premiere to do your edit. The image will still look a bit crazy to start as you will still see the side-by-side corrected squares. Different editors will vary, but there should be a setting inside the system that allows you to tell the editor that the footage is a stereoscopic VR image. That should convert the image into a square with the ability for you to move around the frame as the viewer will eventually be able to.
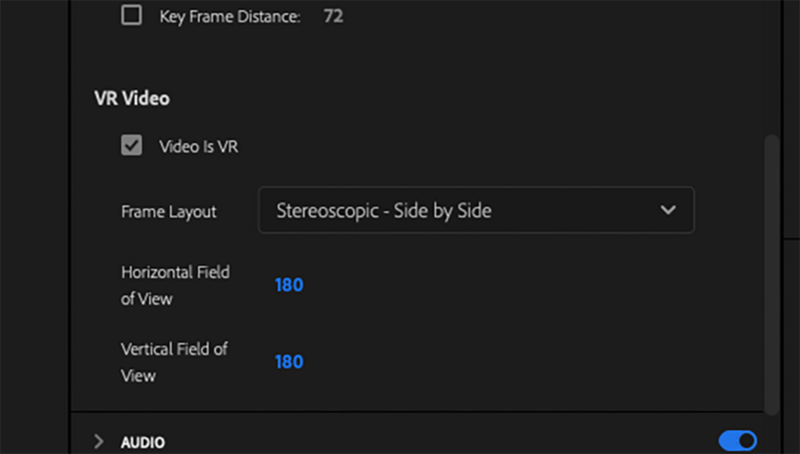
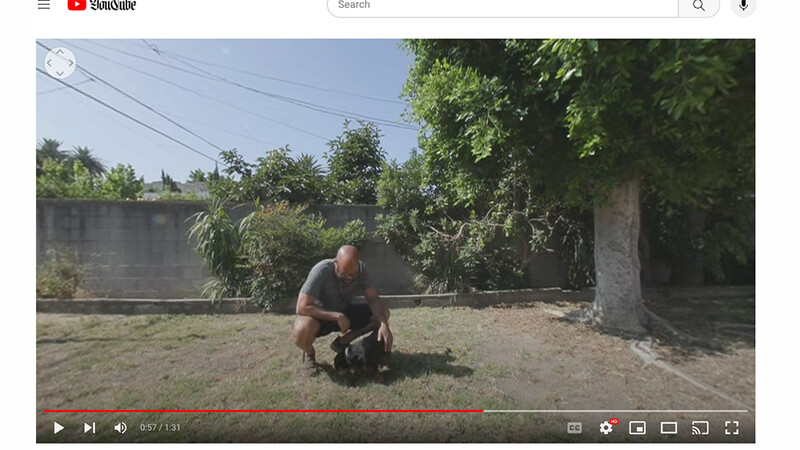
You would then cut the project together as you would any other project, then export the final result in the format of your choice. But, you do need to make sure that you are indicating that the exported footage is VR. And, in the case of this footage, it is stereoscopic side-by-side at 180 by 180. These instructions get burned into the metadata of the file, so that when the film is viewed inside of a headset or uploaded to YouTube or another platform, the player understands the footage is VR and will behave accordingly, giving the viewer the ability to pan and tilt through the frame.

Conclusion
So, hopefully this article has helped to demystify the process of making a VR film and inspired you to give it a shot. The Canon RF 5.2mm f/2.8 L Dual Fisheye 3D VR lens in combination with a camera like the R5c simplifies the process by creating VR video for those already in the VR world and provides an entry point for those just starting new in the space. The process does require a different approach than traditional filmmaking. But the end result is an entirely different experience for your viewer. You aren’t just telling a story. You are creating a world for them to live in.
For experiential marketers, this is a major opportunity. But it also has a plethora of other applications. Imagine a virtual reality world where you can do explainer videos in a real feeling space, or tour a property inside of a headset, experience a vacation without leaving your living room. The possibilities are endless. The only limit is how far your imagination can take you.
This has only been a brief introduction to the technology. I will try to follow up this article with a more hands-on practical step-by-step case study. But, in the meantime, for those of you who are using the lens day-to-day, would love to hear about your experiences in the comment section and any beginner tips I may have missed.


Join the Fstoppers community for free
-
Post comments and join in the discussions
-
Browse the site ad-free
-
Share your work and get featured in the community
-
Compete in the photo contests for fun and prizes
1 Comment
Thanks for the primer! This is the one lens/workflow that seriously makes me consider switching to Canon...