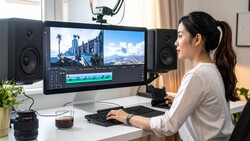
If you have ever wondered how to do a multi-camera edit that easily synchronizes all of your camera tracks and also allows you to color grade each cameras footage to match each other, then you need to check out this tutorial.
In this article and video you will learn how to create a multi-camera edit in Adobe Premiere Pro CC 2019. To make it easier for yourself, it is important to first record audio to each camera track and to clap your hands loudly a couple of times at the beginning of the recording. Clapping your hands on the cameras reference audio track will allow you to use the audio synchronize function in Adobe Premiere.
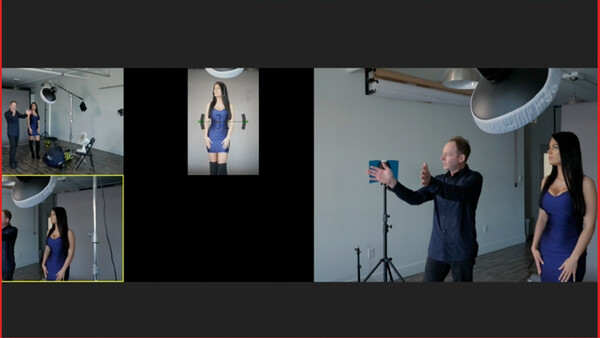
You should also record a better quality audio track to an external recorder like a Zoom H6 using a lavalier microphone like a Sennheiser G4 or boom microphone like a Rode NTG 4 that you can use as your primary audio track in your multi-camera edit. Once you have your tracks recorded, the simplest way to start the edit is to group each of your camera tracks with the primary audio track in the same folder.
For example, put all of your camera angles and audio from one scene and put them in a folder called video one, or use some type of name that makes sense to you or will jog your memory about the contents of the folder.
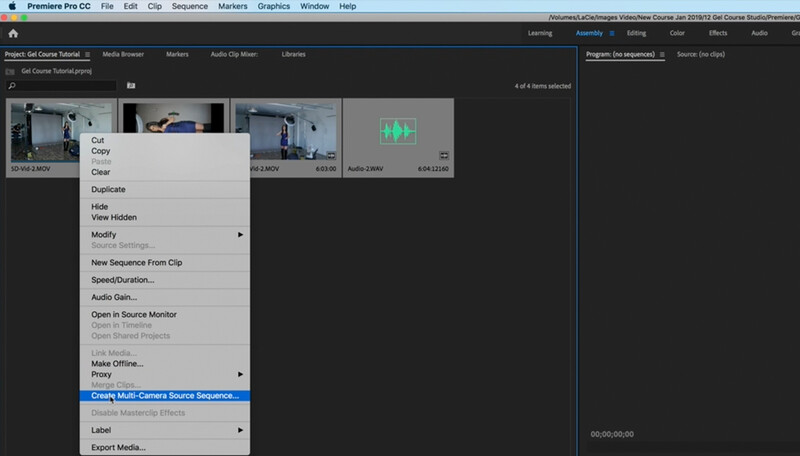
The next step is to import your your separate camera tracks and primary audio tracks into Adobe Premiere Pro CC, highlight all tracks, and then right click and choose Create Multi-Camera Source Sequence.
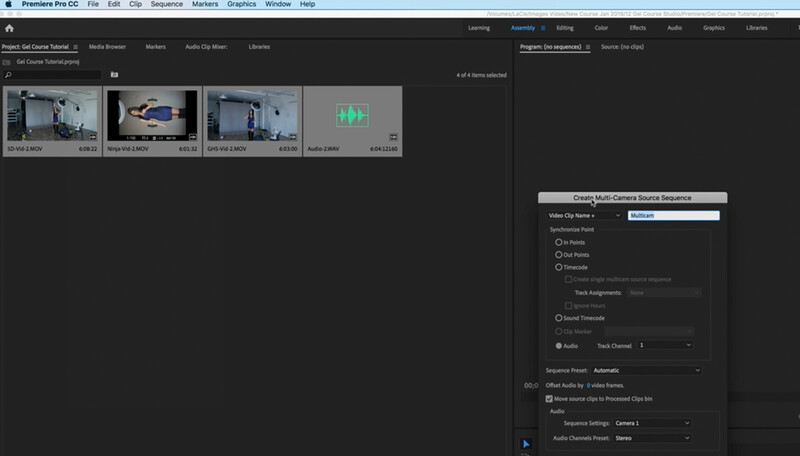
Then choose synchronize audio and the software will auto-align all of your camera angles and primary audio track.
Once you create your master multi-camera clip, right click on it and choose Open in Timeline.

From this view you can edit your audio and make white balance adjustments to each camera track individually. For example, you can use the X-Rite ColorChecker Video to get an accurate white balance for each camera track.
You can also make exposure and other color grading adjustments to your footage prior to creating the multi-camera edit. Once you are happy with the footage you can move onto stage two of the editing process.
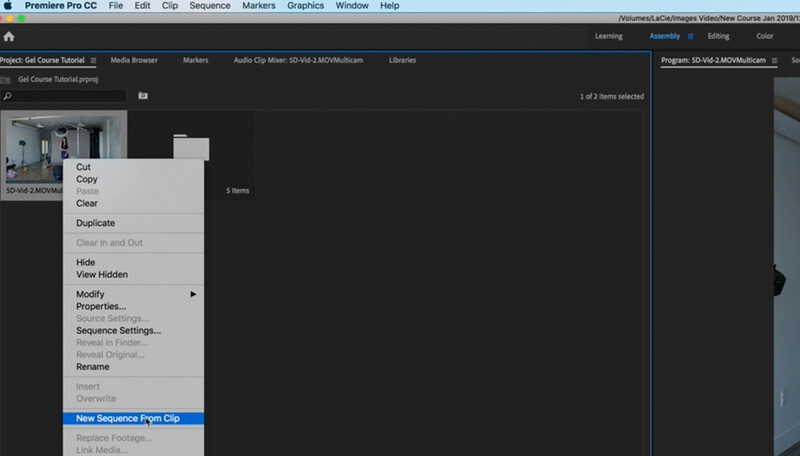
The next step is to right click once again on the master clip and choose New Sequence From Clip.
You should now only see one audio and video track on the timeline. If you don’t see multiple clips in the video browser click on the multi-camera icon and you will see the different camera angles to the left of the viewer window. You can choose between the different camera angles by clicking on the different cameras with your mouse or you can also use the number pad on your keyboard.
Once you have a rough edit you can fine tune your edit in and out points using the ripple tool to refine your edit points. With a little practice you should be able to speed up the time it normally takes you to do a multi-camera edit in Adobe Premiere CC.
If you have any other multi-camera editing tips, please share them with us in the comment section below.


Join the Fstoppers community for free
-
Post comments and join in the discussions
-
Browse the site ad-free
-
Share your work and get featured in the community
-
Compete in the photo contests for fun and prizes
1 Comment
Wow, I have to try this.