
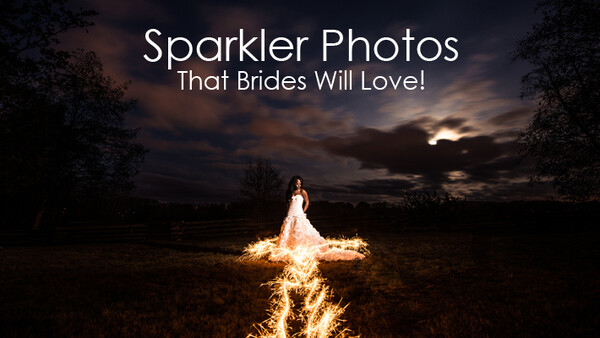
It's a growing trend in wedding photography these days to do photos with sparklers, and yes, you can blame Pinterest. Whether it's sparkler exits, or long exposure sparkler photos, your brides will expect you to know how to do these and will very likely ask you to do them on the spot! With this system, you'll be able to nail them every time!
Shooting sparkler photos for many of my clients has been one of the best marketing opportunities I've had in the past few years. These photos spread like wildfire, and your couples will absolutely love them if you do them right. I have developed a system that allows me to get great sparkler shots every time, and I hope it can do the same for you. Here are the main steps that will help you figure these shots out and allow you to explore your own creativity with them. If you want more, I have some other resources for you at the end of this article.
PRE-PLANNING
It is very important that these shots are done at the right time of night so that you can have your shutter open long enough to get creative with your sparklers. Yes, there are ways of getting these shots done with ND filters and using faster shutter speeds, but in general; the darker the better.
You can show yourself to be the expert by mentioning the idea to your clients and explaining when they must be done. This can sometimes even add extra time to your package if they really want you to stay long enough to do them. You don't want to be surprised by this at 6pm when it's still light out, so when at all possible, plan ahead.
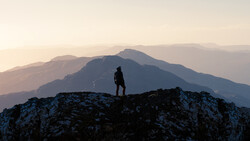
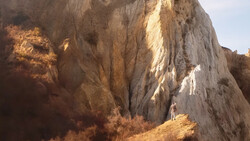
LOCATION CHOICE
Ambient light hitting your subjects is what causes blurry people in your image, so choosing the right location and pose for your couple is very important. When at all possible, have them standing in an area that does not have very much ambient light hitting them front the front.
FOCUSING
It will likely be very dark when you are shooting these photos, and because of that, your camera will have a hard time focusing on them. The easiest solution for this is to have your subject hold up a phone, turned on, and facing towards the camera. Simply have your camera in auto-focus mode, focus on the phone, then switch it into manual focus mode and don't touch it anymore.
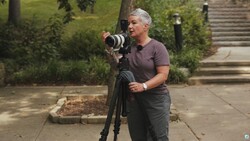
SETTINGS
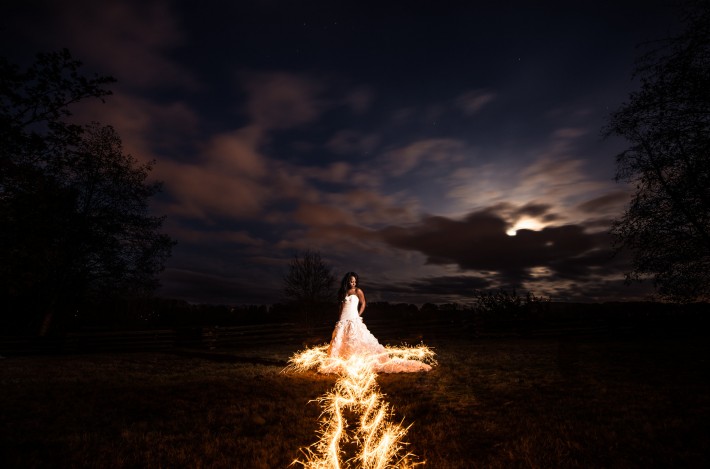
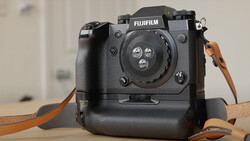
These shots are best done with a tripod and a wide angle lens. I use my Nikon D800 with a Nikon 14-24 f2.8 lens, as well as a Nikon SB-700 in my hand for manual flash.
For long exposure sparkler shots, you'll want to have your shutter speed set to somewhere between 15-30 seconds (depending on what you're spelling or drawing with the sparkler). I usually start off with these settings:
30 sec / ISO 400 / f/5.6
This allows me to have the shutter open long enough to do creative things with the sparklers, and have time to pop the flash as well. The ISO gives me a good quality image so that in post I can pull up some of the shadow areas to make the image really pop without too much noise. An f-stop of 5.6 gives a nice looking depth of field to the image, and also is roughly around the proper brightness level, when combined with ISO 400, for the sparklers that I use.
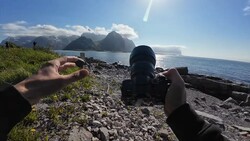
ADDING FLASH
There are many ways to add flash, and I find that there is one way that I get the best results: hand holding the flash and manually popping it while I am in the frame. I am not seen on the image because the flash is not lighting me up, and I'm in and out quickly. With the settings mentioned above, I often stand about 6-10 feet away from the couple with the flash power set to 1/8 as a starting point. After my first test shot I can quickly see what needs to change based on ambient light, sparkler brightness and flash power.
TROUBLESHOOTING
Your first shot may not be the perfect one, so you need to be able to figure out what needs to be done to correct the issues that present themselves. The most common problems I see in various photographers sparkler shots are these:
Ghosting - You are being lit by either the ambient light or the sparkler.
The fix - Hold the sparkler further away from yourself, don't wear light colored clothing, and move faster. Also, you can adjust your settings to get a darker exposure, while keeping in mind the brightness of the sparklers.
Out of Focus / Blurry couple - Your couple is either moving too much and is being lit by ambient light, or your camera is not in focus.
The fix - Give your couple a position they can easily hold without moving, move them into the shadows, hold your sparkler further away from them, and ensure you're focused at the right distance.
Can't see the subject well - No separation between the subject and the background, or they are being blocked by the sparklers.
The fix - Rim light them from behind with either another flash triggered at the same time as the main light, or rim light them with the sparklers. You can also change your position or their position to make for a stronger composition and better subject placement. Also, never let the sparkler go between the faces of the subject and the camera as they will appear to have their heads chopped off by it!
OTHER TYPES OF SPARKLER PHOTOS
There are many other ways to do sparkler photos, and each of them come with their own unique challenges and settings. Here are just a few ideas for you to think about when you're attempting your own sparkler photos.
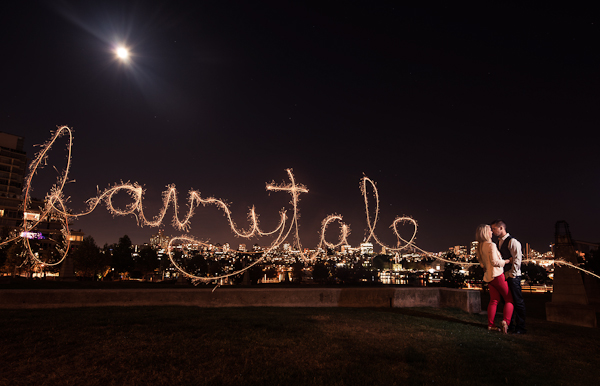
Long Exposure with words - No flash
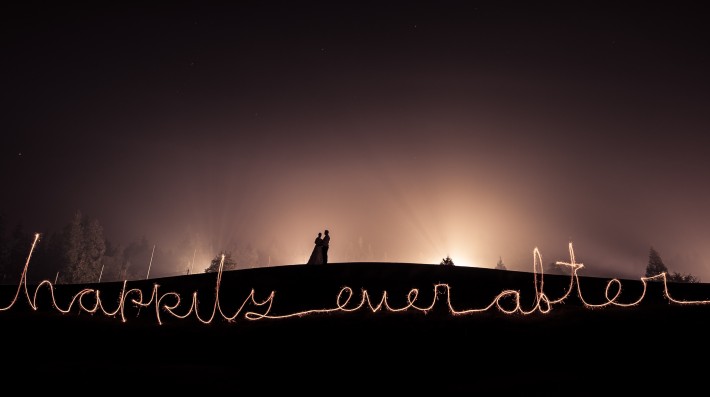
Long Exposure with words - With flash
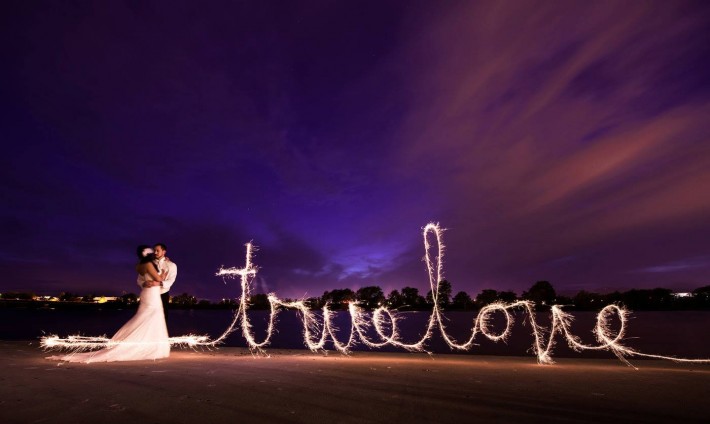
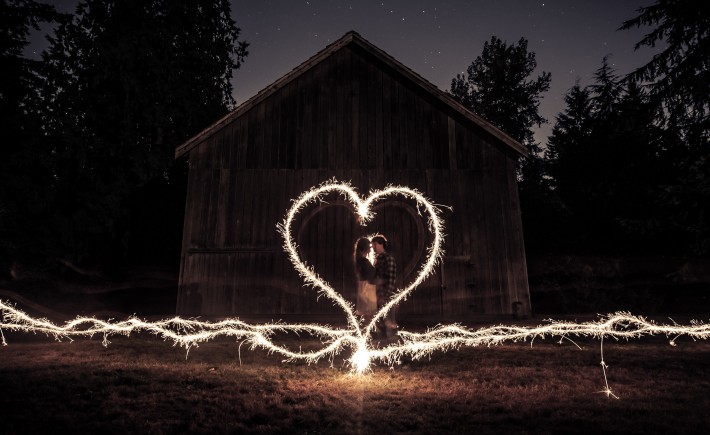
Long Exposure with drawing
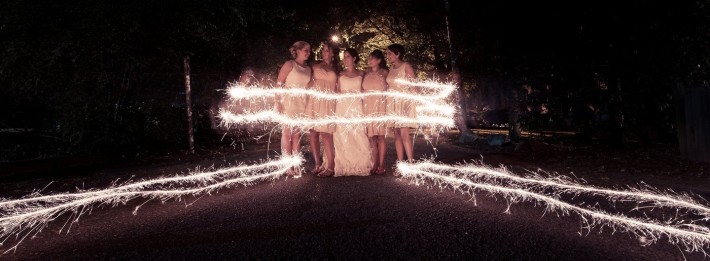
Long Exposure with groups
Short Exposure

Sparkler Exits

MORE RESOURCES
If you're interested in learning more about sparkler shots and how to really master them, I have recently released the recordings of my latest online workshop on Sparkler Shots. You will find these recordings and more events and resources at http://photographers.mattkennedy.ca
Join the Fstoppers community for free
-
Post comments and join in the discussions
-
Browse the site ad-free
-
Share your work and get featured in the community
-
Compete in the photo contests for fun and prizes
31 Comments
I did a similar thing combining multiple exposures and a flash/sparkler with my son:
http://www.jaredcarpenter.com/multiple-exposure-sparkler-portrait/
Your a damn low baller. start upping your rates dude!
Great article Matt!
Thanks bro
Some of these strike me as rather dangerous, depending on the material and fabric texture of the wedding (and/or other) gown(s).
YES! I was sayin' , better have that liability insurance paid up!
There are risks taken when using sparklers, but with risk comes preparation and safety.
did something similar for an engagement session. no flash though... just used the light from the sparklers.
http://www.flickr.com/photos/vinsonimages/9239798784/
Great job yamaha83...if that is your real name ;)
Too bad we can't do that here where we live, it is illegal in Montgomery County, MD, to use any kind of fireworks, and that includes sparklers.
That is too bad...you can use light painting with iphones and such...but ya, not as much fun :)
I did one once with penlight flashlights that came out pretty good. Just have one with a very concentrated beam.
hah i thought these images were familiar :P great seeing u here!
Hey Benjamin!
hey that last one is wedding photographer Matt Whytsell lol!
Fo shizzle!
Not sure I'd have the guts to go within 5 metres of a wedding dress with a sparkler, but here in the UK we like playing with them around November 5th :)
https://plus.google.com/u/0/112855478744426973888/photos/photo/58074483…
Due an improvement in about 6 weeks or so...
Great idea and thanks for the starting points.
I did this shot at a wedding in March in Australia. The location was a burnt out observatory and the wind was howling and it was cold. The prep involved the bridal party and a few others with lighters to ignite the sparklers and then get out of the shot. Not all sparklers worked. The image is lit only with the sparklers. To get the shot ready we had a car parked in the entrance of the building with headlights on. We used super large/long party sparklers as they last longer, this also allowed us heaps of shots. Not as perfect as i hoped with the shot but not too bad (i hope). But as Matt states in this (great) article the key is in the planning and should always cover safety.
EDIT - i cant seem to attach the image :(
:(
Would love to see the shots man! Thanks!
Matt i would love to post here but it just wont do it for me. Try and see if this link to facebook works? https://www.facebook.com/#!/photo.php?fbid=339111312876865&set=pb.12499… If not let me know and i will try again. :)
Awesome Matt! I'm a big fan!
Great article Matt. Every time I've encountered sparklers it's been sort of hit or miss. Sometimes I nail it, sometimes not. I'm going to try writing the letters... great idea and not many in this area are doing it.
Great Richard! Thanks!
Just curious about what you mean by a hand held flash. Do you click your camera .. then run into the shot and fire the flash at them? If so, how? Sorry if this is a dumb question!
yes, I pop the flash with the test button, most flashes have this illuminated on the back. The key is to have it in manual mode and at a setting that matches the camera settings for exposure.
Here in New Zealand, fireworks (including sparklers) are only allowed to be sold a few days before Guy Fawkes day in November. The rest of the year you cannot buy them.
It must take a lot of choreography to get some of these pictures just right. It can't be easy to light a bunch of sparklers and capture this type of writing in such great detail.
hello Matt,
I have recently tried to take such shots, and the problem i encountered (and that i didn't see explanation to in your article) is the sharpness of the couple. I don't quite understand what you mean when you say " you pop with the flash in and out". how do you make the couples SO sharp in your shots? We had car lights on and manual flash hand held all the 30 seconds that the shots were being taken.
I tried a sparkler shot at a wedding a few years back and here is the result (my heart shape is not the best!), thanks for all the helpful tips in this article! I look forward to experimenting at my next wedding!