
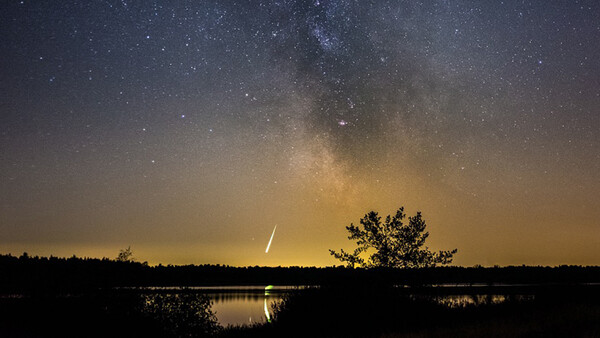
August is the time for photographing the annual Perseid meteor shower. It is one of the most spectacular ones, and definitely worth photographing. If you want to get the best pictures, some preparations have to be made.
Every year in August, the Earth moves through a part of space where the comet Swift-Tuttle has left a lot of dust particles and small rocks. When this debris enters our atmosphere, we witness meteors, which seem to originate from the constellation of Perseus. Hence the name Perseid meteor shower.
During the peak of the Perseids, in the night of August 12th, over 80 meteors per hour can be seen from dark locations. That is why it is so great to photograph this event. With a bit of preparation, and a lot of patience, you can end up with amazing photos. In this article I want to show you how to use the app Photopills, to prepare yourself for the best meteor shower photo ever.
Search for a Few Possible Locations
Before you should look into Photopills for planning, search for a few locations that might suit as a perfect foreground. A dark location is preferable, because it will make photographing meteors much easier.
You can use Google Maps and Google Earth for finding nice places. These programs also have the possibility to show images of those locations, making it easier to find a great spot. Make a list of possible locations.
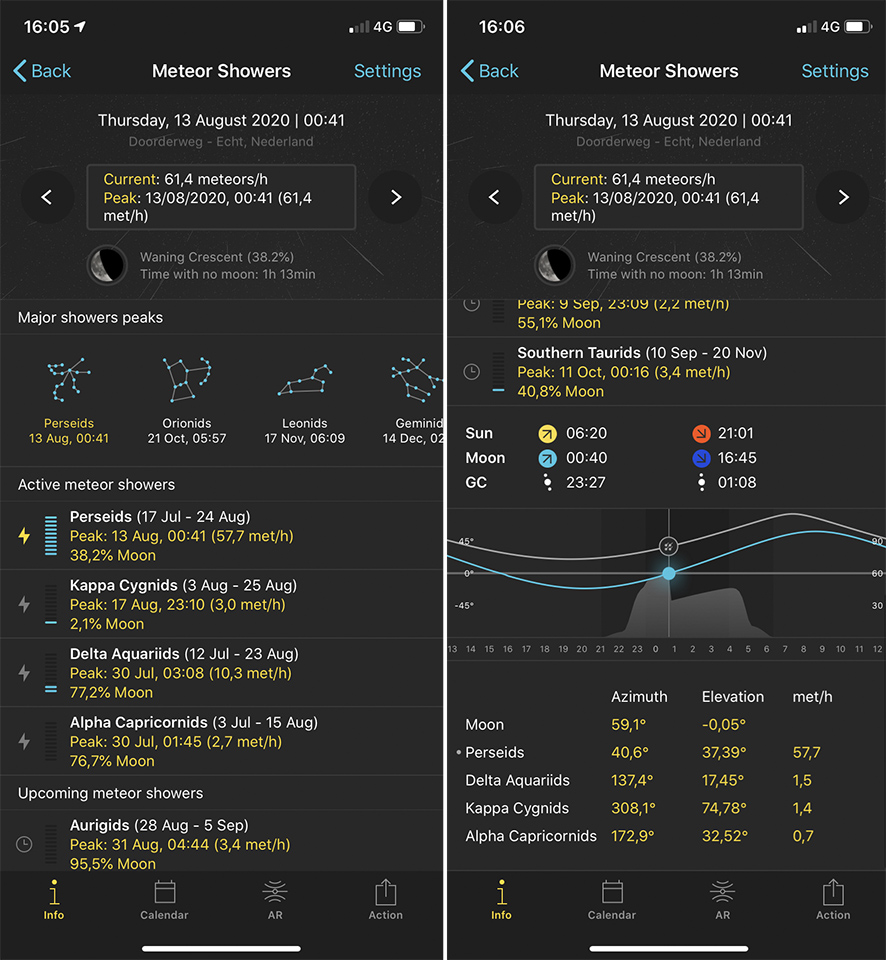
Information About Meteor Showers in Photopills
You can find lots of information about every annual meteor shower. Just open the tab Pills and search for meteor shower. When opened you can see an expensive list of annual meteor showers. A bar in front of the shower indicates the activity. As you can see, the Perseids is one of the most active showers. Just tab on the Perseids and you have all the information about dates, times, moon phase, and the amount of meteors per hour. If you swipe down, you can also find a nice graph showing the activity, together with other active meteor showers..
Find Your Location in the Photopills Planner
If you have used Photopills before, you probably have used the planner also. It allows you to find a location and see the direction of the sunrise, sunset, moonrise, and moonset. It can also show the arc of the Milky Way, if you have activated that layer, that is.
First you have to find the location you have chosen. Try to zoom in on the exact spot from which you want to photograph. Hold your finger on that location for a few seconds, and a pin will show. Choose the date of the maximum, which you have found on the meteor shower information page. At the top of the screen you can find all kind of information. Just swipe to the last page that shows meteor showers.
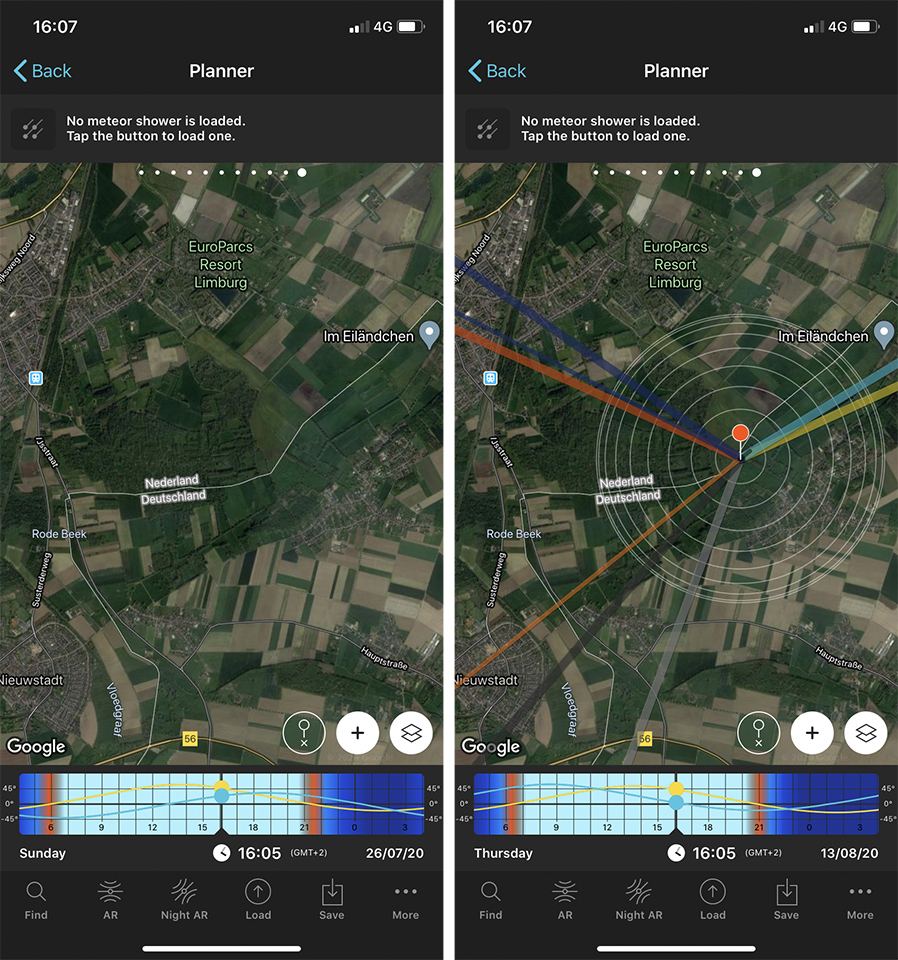
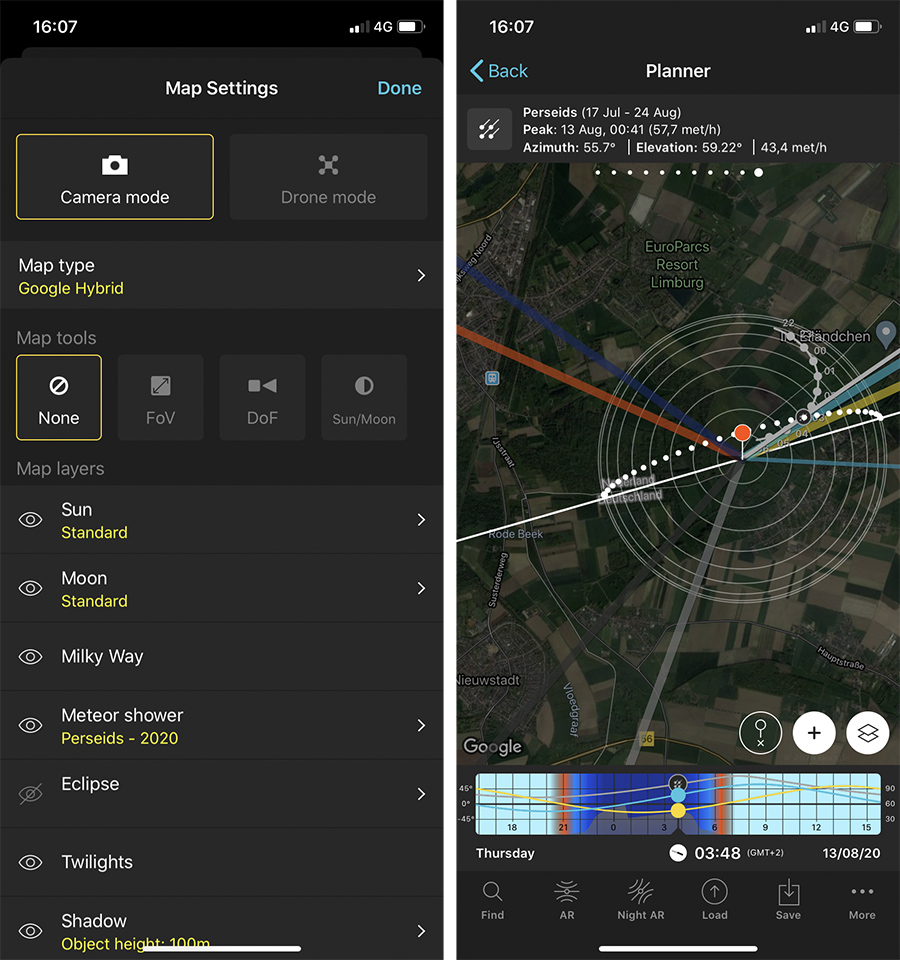
To load the correct meteor shower, open the layers menu by the button on the bottom right, and activate the meteor showers layer. From the list you can choose the Perseids 2020. Return to the map, and you will see an arc showing you the exact location of the meteor shower radiant.
Now you can determine if the location you have chosen is the right place. You can plan were the radiant will be relatively to the foreground. Perhaps you need to fine tune your location, or you might find out it isn’t going to work at all. If not, you can try to find another location. Perhaps one of the others in the list you made in the first step.
Go and Have a Look Before the Perseids Are Here.
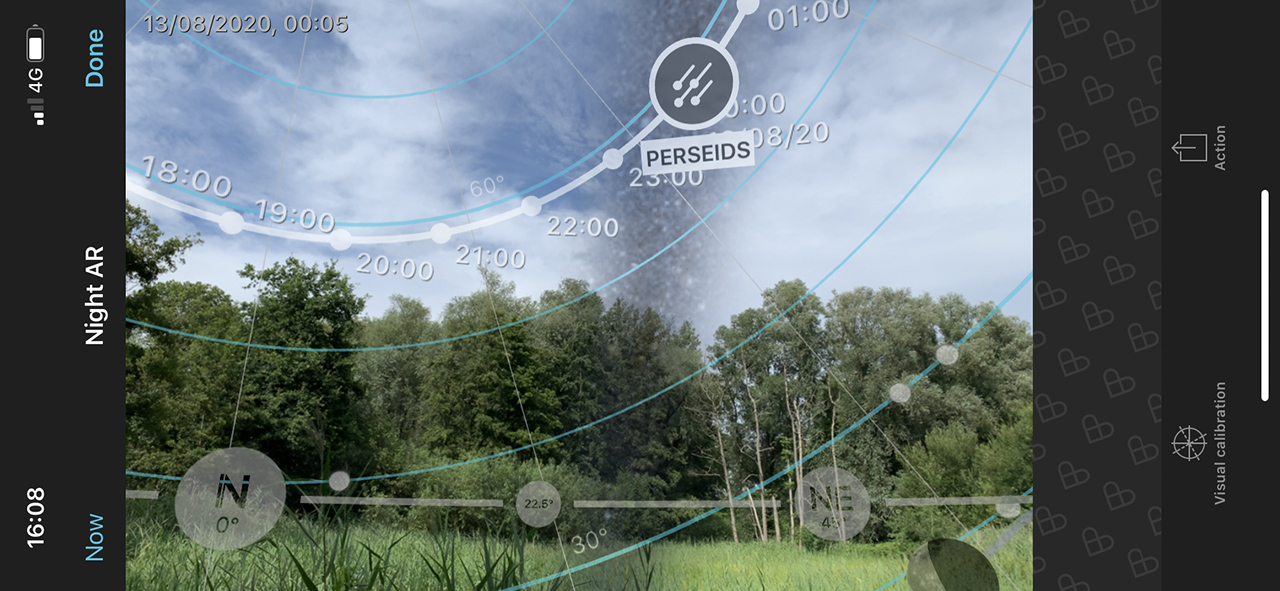
This kind of planning works very well. But sometimes it is good to go scouting. There might be objects that obscure the sky too much, or there is too much light pollution. Find out before the night of the Perseids is here. With the meteor shower layer active, you can activate the augmented reality in the Photopills planner. The movement of the radiant is also projected, to see the exact location on site.
If you have planned a far away location, scouting might not be possible. That is why you should have more than one location at hand. You can save your locations as a Point of Interest, or as a plan in Photopills. This way you have all the information at hand.
Some Other Tips for Photographing Meteor Showers
I have some tips on photographing meteor showers, that may increase the chance of capturing shooting stars. You never know when they fall and where they fall. That means you have to keep on shooting without any delay between each shot. This will increase the change of capturing a meteor.
Use the Highest Possible ISO Level
Because meteors appear in the blink of an eye, the amount of light that is emitted is not that much. That is why you need to capture as much as light as possible. Use a large aperture, preferable f/2.8 or larger, and use a highest ISO level that is possible without too much noise. If you don’t know which ISO still produces an useable image, try to find out. I wrote a nice article about this. Check it out.
Use the Rule of 600 to Find the Best Shutter Speed
You can use the shutter speed to make the exposure correct. Which exposure to use may be determined by the rule of 600, which indicates when stars become stripes. Just divide 600 by the focal length (corrected by the crop factor) to know the maximum shutter speed.
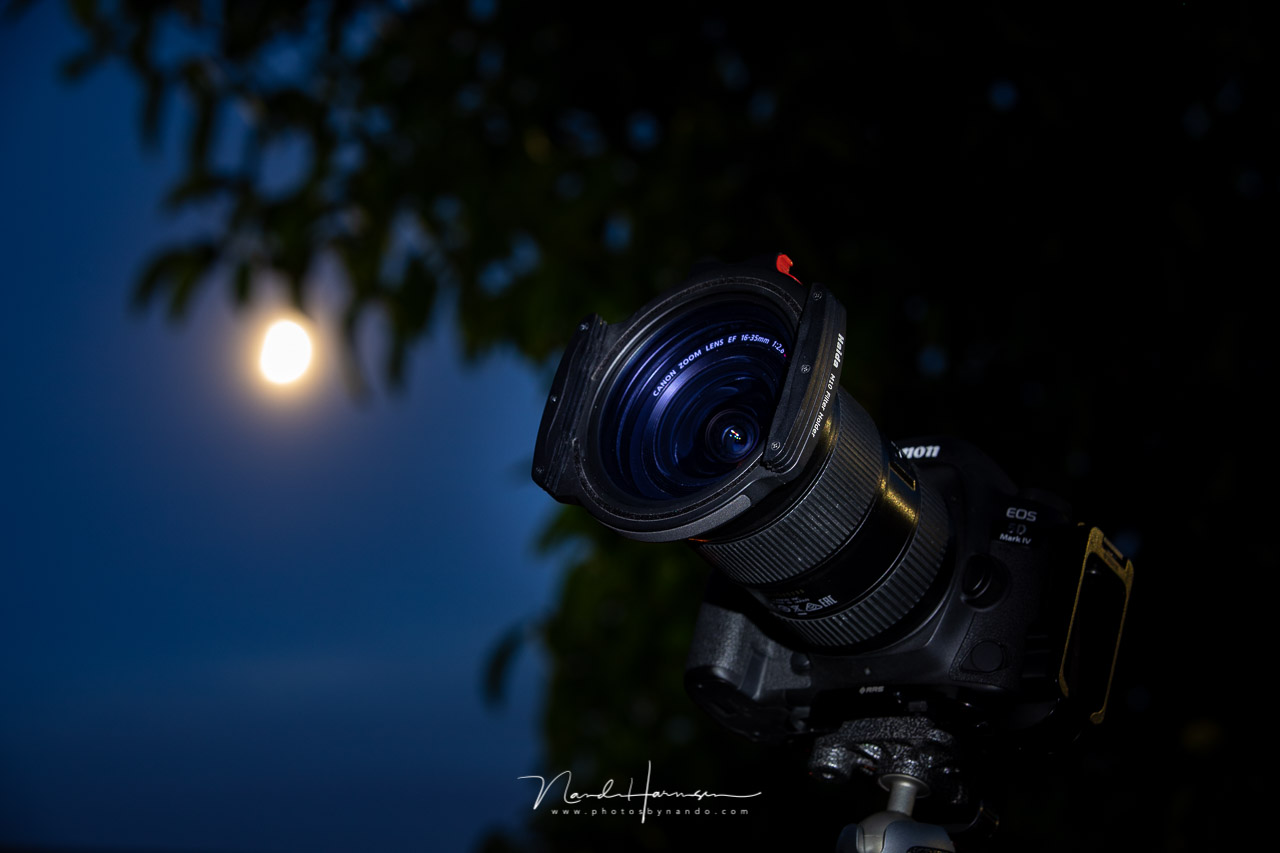
Use a Light Pollution Filter
If you are in an area with a lot of light pollution, the use of a light pollution filter is advisable. These filters block the the light frequency of most street lights, making the sky much more color neutral. I use the M10 Clear Night filter by Haida, which is a good filter to use.
Have You Planned Your Perseid Meteor Shower Photography?
Are you going to photograph the Perseids? Or perhaps you don't plan a shoot like this. Please share your plans on shooting this meteor shower, and any tips for our readers on photographing the Perseid meteor shower. I love to read your comments.

Join the Fstoppers community for free
-
Post comments and join in the discussions
-
Browse the site ad-free
-
Share your work and get featured in the community
-
Compete in the photo contests for fun and prizes
8 Comments
OK newbie question here. My first foray into astro was with Neowise comet, which was a stationary target. With a meteor shower, the meteors are unpredictable as you said in your article:
"You never know when they fall and where they fall. That means you have to keep on shooting without any delay between each shot."
So is the best approach to find a way to set a timer, step back, and set the camera to shoot continuously until it you think you've either captured some or filled your memory card?
Shorter exposure with higher ISO or Longer exposures with lower ISO better? (for reference, I'm shooting with a 16mm f1.4 on an APSC sensor, so maximum exp of 25 seconds according to the 600 rule).
As Willy noted below..."1) Use the NPF calculator in PhotoPills for the best exposures rather than the 600 rule."
I'm a bit of a noob at this as well so I appreciate the article and suggestions.
I just experiment with lots of settings, take lots of pictures, and, as Willy also stated..."5) Go early; stay late!"
Best of luck!
I think you're understanding the article correctly. Try and use the widest lens you have and use the longest shutter speed at the highest ISO your camera can reasonably handle. LonelySpec has a great tool to calculate shutter speed I'd recommend instead of the 600 rule
https://www.lonelyspeck.com/advanced-astrophotography-shutter-time-calc…
I'd also recommend their article on ISO to figure out what works best for your camera
https://www.lonelyspeck.com/how-to-find-the-best-iso-for-astrophotograp…
However, as a general rule of thumb, about 3200 seems to work for most modern sensors fairly well.
Thank you for the links to Lonely Speck. :)
Lower ISO is never good for meteors. They might be bright, but the time they shoot through the sky is like a fast shutterspeed. So you want to capture as much light as possible.
Just as El Dooderino says: the NPF calculator in Photopills works great for determining the shutterspeed
A few recommendations, if I may...
1) Use the NPF calculator in PhotoPills for the best exposures rather than the 600 rule.
2) Go to Blue Marble - https://blue-marble.de/nightlights/2012 - to see the best areas for low light.
3) Go to the light pollution map - https://www.lightpollutionmap.info/ - as an alternative to Blue Marble.
4) Breakthrough Photography makes some dynamite night sky light pollution filters. too.
5) Go early; stay late!
Thank you for the links, Willy.
I am going to do an article about the NPF rule. It is interesting to delve into it