Creases across the front of a t-shirt sit exactly where the eye lands. Clothing wrinkles and backdrop fold lines are the kind of problem you can't always control on the day, and fixing them by hand eats hours you'd rather spend somewhere else.
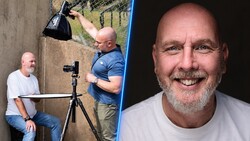
Glyn Dewis walks through his method for pulling creases out of shirts and fabric backgrounds in Photoshop. Dewis has done this work by hand for years and says there's nothing wrong with that, but the manual route is slow. His starting example comes from a portrait shot at the Wex Photo Video road shows, where he first clears a distracting logo using the Remove tool set to Auto, letting Photoshop decide between AI and content-aware technology instead of forcing the AI on every job.
For the creases themselves, Dewis reaches for generative fill using Firefly Image 5, a model built to edit while preserving detail. He makes a loose lasso selection around the shirt, types a plain instruction to remove the creases, and lets it run. Firefly Image 5 returns a single variation because it's a premium model, and at the time of recording it outputs at 2K resolution, which he judges fine for clothing that isn't heavily detailed. He also points to Flux.2 Pro among the partner models as his previous go-to, calling it strong for jobs like removing reflections from glasses while keeping the frames and eyes intact.
On a white t-shirt shot against a vintage gray Westcott X-Drop Pro backdrop, Dewis uses the Object Selection tool to grab the upper clothing, then zooms in and finds the selection edge looking crispy. Photoshop still lacks the feather and edge sliders that Camera Raw and Lightroom now offer for cleaning up AI masks, so he builds an extra step to make up for it. He also proves a point most people would never test: with the shirt selected but no object named in the prompt, generative fill does nothing. Naming the target in the text matters even when the selection is already active.
The takeaway that travels beyond this one tutorial is how you phrase the instruction. When Dewis removes creases from the gray background, he adds a line telling the model not to change the look of it and to keep the texture and canvas effect. That single sentence is the difference between a repaired backdrop and a smeared, plasticky one. Generative models will happily flatten detail unless you tell them what to protect, and the same logic applies whether you're fixing a shirt, a wall, or a sky. Treating the prompt as a set of guardrails, saying what to remove and what to preserve in the same breath, gives you far more predictable results than a vague one-liner. It's a habit worth carrying into every generative edit you make, not just wrinkle removal.
Watch the full breakdown in the video above to see Dewis's Gaussian blur workaround for softening those AI mask edges and the exact prompts he uses on each layer.





Join the Fstoppers community for free
-
Post comments and join in the discussions
-
Browse the site ad-free
-
Share your work and get featured in the community
-
Compete in the photo contests for fun and prizes
No comments yet