
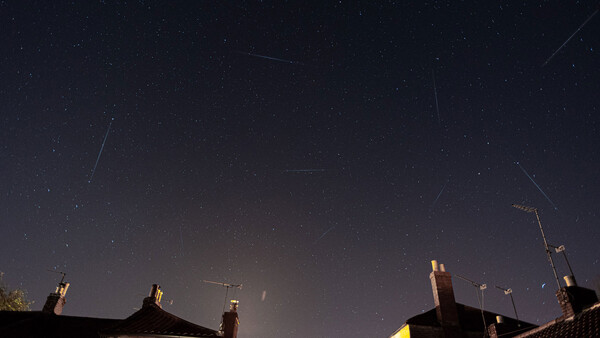
Tonight marks the peak of the Lyrid meteor shower, with plenty of meteors visible from mid to late April each year, so get your camera ready and learn how to capture them in all their glory.
As Earth passes through the dust trail left from Comet C/1861 G1 (Thatcher) from 1861, the tiny comet particles light up as they bounce across the atmosphere, heating to form intense bright streaks of light otherwise known as shooting stars. It's pretty easy to capture these from your backyard, but there are a few techniques that'll help make things easier.
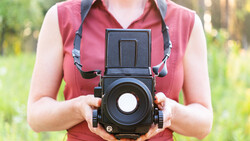
The Kit
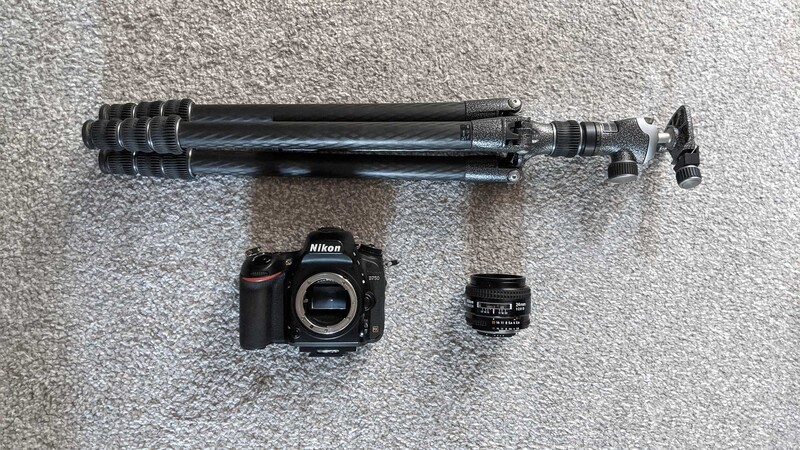
The kit list for a meteor shoot is relatively short, but there are some essentials you can't really do without. You'll definitely need:
- Wide angle lens
- Tripod
- DSLR/Mirrorless/other camera that has a manual mode
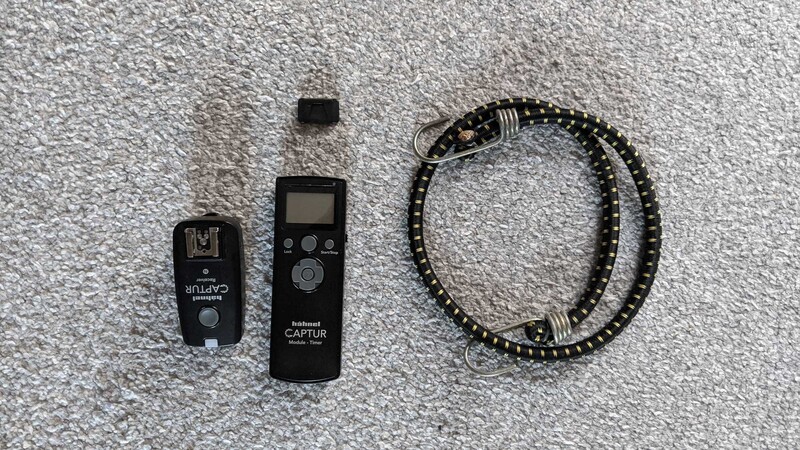
Other things that'll help are:
- Viewfinder cover/cap (unless yours is built into the body)
- External remote shutter release (wireless or cable is fine)
- Bungee cord
The Method
The idea here is to set up your camera to be steady, then take several long exposures in sequence, with the hopes of capturing a few frames of meteors in the process. If you want, you can then load the files into a stack in a Photoshop document and set the blending mode to Lighten to reveal all the separate meteor streaks across the sky.

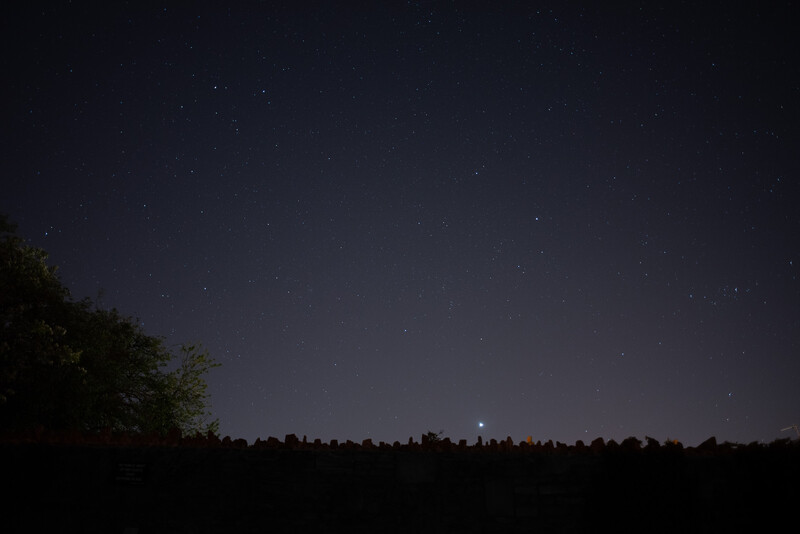
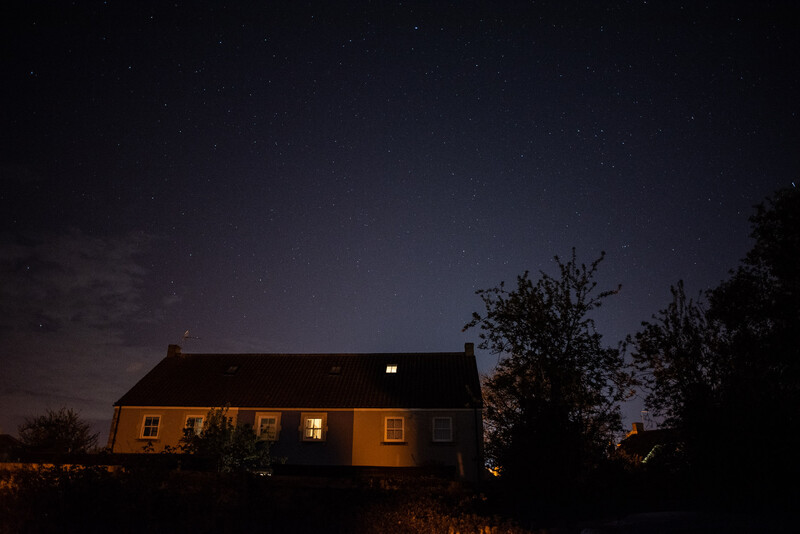
- Find the constellation Lyra (after which the Lyrids are named). In the northern hemisphere, it'll be rising northeast from the horizon as it gets dark. Keep an eye out for Lyra's brightest star, Vega, as most of the action will happen around there. If you're not sure where Lyra is, use an app or a compass to find your way. I recommend Stellarium either on a computer or smart device; it's a solid program with a multitude of features and a simple user interface.

Stellarium is a great night sky app available on desktop and mobile devices. - Set up your tripod in a spot that's undisturbed and unlikely to have passing car lights shined upon it, as you could be shooting for an hour or two (or more if you like). Secure the camera, and aim it towards Lyra.
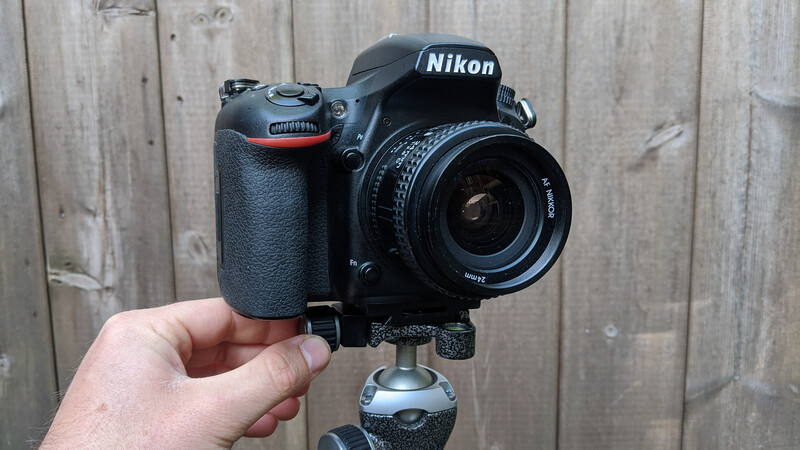
Secure the camera on your tripod and aim towards Lyra in the northeast. - The easiest way to focus is to use autofocus on a distant streetlight, but if you're not lucky enough to have that, then engage the Live View on your rear screen, zoom in to Vega (or another suitably bright body, such as Venus in the west), and engage manual focus, turning the focus ring until the pinpoint of light is small and sharp. Now, keep autofocus disengaged or you'll risk ruining your focus.
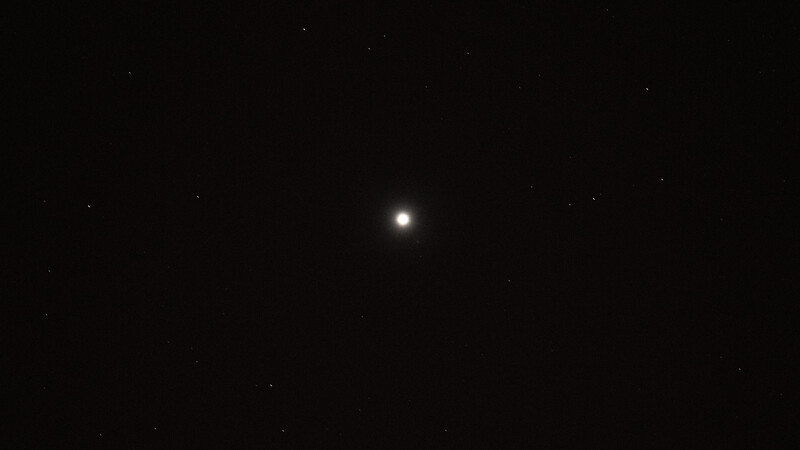
Zoomed in close to Venus on the rear view of my Nikon D750, I engaged manual mode and turned the focus ring on my Nikkor 24mm f/2.8 lens until the point of light was small and sharp. - Ramp up your ISO as high as you dare; I recommend about ISO 1,000 or more. Open your lens as wide as it'll go (for me, that's f/2.8), and set a shutter speed of between 5-10 seconds. Go longer if you think your shots are still a little dark.
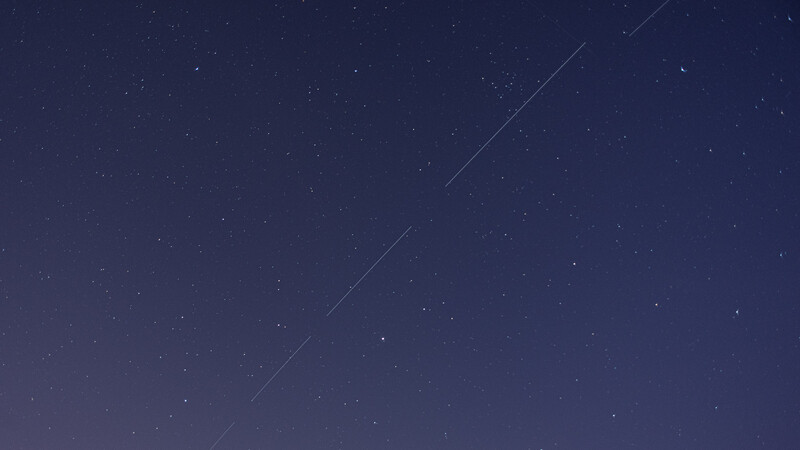
The longer your exposure, the brighter your night sky. However, you'll have to contend with satellites like these Star Link satellites, which ruined a perfectly good astro exposure - Set white balance to tungsten to remove the orange glare of light pollution. Make sure you shoot raw if you want to change this after-the-fact, but I find this is usually a great White Balance to shoot on, as it makes the sky look clear and neutral.
- Use an external intervalometer or external shutter release to trigger your camera. If you don't have one, just set a self-timer or exposure delay mode to avoid wobbling the camera when you press the shutter release button. I use the Hahnel Captur Module Timer.
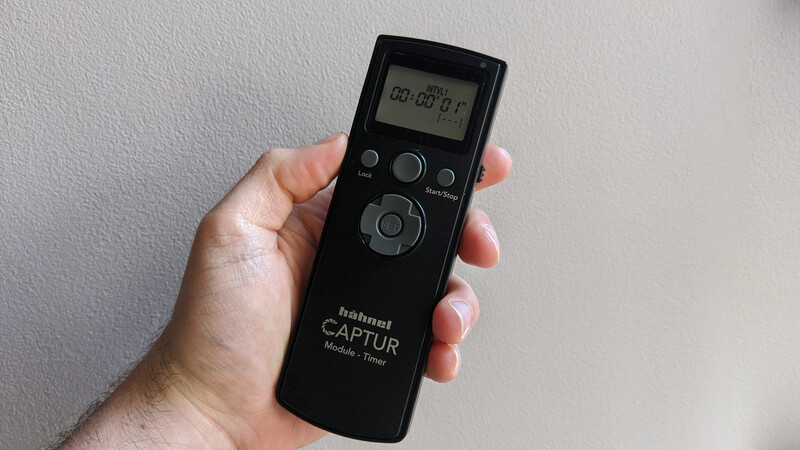
I use a wireless external remote shutter release when I don't opt for the exposure delay mode. Here, I'm using the Hahnel Captur. - Set your intervalometer to take photos every second for as many frames as you like. It should look something like this: 500 X 1 = 500 frames. Some cameras have this feature built-in, such as my Nikon D750, where it is usually called Interval Timer. Canon users also have the option of installing Magic Lantern for access to this feature if your camera doesn't already support it.
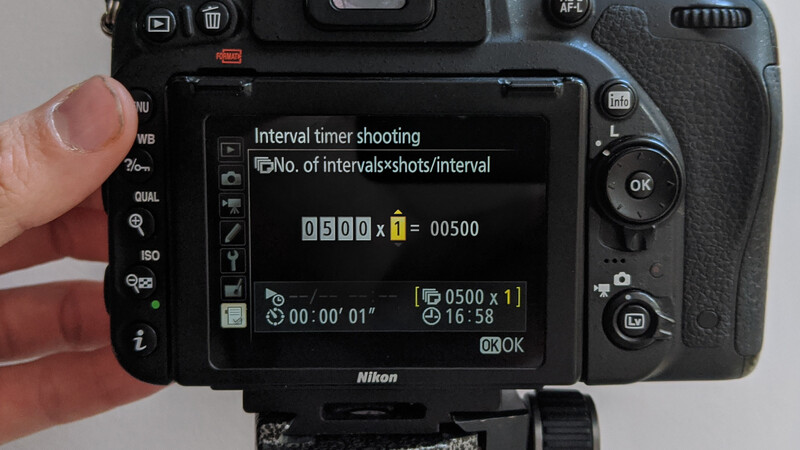
Set as many shots as you want. - A bonus tip is to use a bungee cord or piece of rope to tie the tripod down to your camera bag or something weighty. If it's particularly windy in your area, you'll thank me for this, as even small breezes can move smaller tripods and cause camera motion blur, spoiling the picture.

Use a bungee cord to tie your tripod down to your camera bag to stop it from moving in winds.
Now that you know the technique to nail great meteor shower shots, snap away all night and see what results you get. You may decide on leaving your camera out shooting while you head back inside to warm up, and that's a great idea if you're in a safe area, but keep an eye on the weather forecast, as clouds can quickly roll over and rain on your kit, which, depending on whether it's weather-sealed or not, could prove to be a disaster.
Got any other tips that you've found helpful for shooting the night sky? Share them in the comments down below.


5 Comments
Unfortunately, I lost my 'cloud filter'. :-(
I was out for about a half-hour last night...didn't see a single one. Anybody else have any luck this year? I felt like I was waiting for the Great Pumpkin.
Hey guys, I got lucky with shooting the Lyrids meteor shower. I start shooting from 22:30 and just after midnight (around 00:38) I've captured the biggest meteor I've ever seen. It was blazing thru the horizon, I almost break my neck when I saw it. I had a 16mm lens and it didn't fit into my frame that's how long it was. A truly magical experience. I also will also include here in my post a photo from 2nd night with a different composition.
For two night shooting I saw over 50 meteors all together and I think I missed even more. They were flying all over the night sky.
Wow! Incredible shots! Love the milky way here - what exposure settings were you using, and did you composite?
Thanks, Jason. Exposure time was 15 sec. ISO 4000 and f/2.8, a camera connected to the power bank and on interval time shooting mode, I was shooting both nights around 500 - 700 shots.
Yes, I used composite techniques. On the 1st shot with a huge meteor, I merged 10 photos together to reduce the noise in the sky and connect the panorama together and then 10 more shots to paint in from other photos the tower which I light-painted with my headlamp from inside and outside. On the 2nd photo, I merged also 10 photos together to reduce noise plus I masked in the meteors from different photos and that's it. The 1st one was definitely long sitting and post-processing, the 2nd photo was an easy job, done in 30 min.