
Getting untracked photos of the Milky Way is significantly easier than you may think for both digital and film. The approach for film is much different than digital but still attainable with the right approach.
Before I begin, this is a short guide on shooting the Milky Way without a tracker using gear that you may already have or can get without a great deal of investment. There are, of course, several thousand-dollar lenses that will do the best job but they are far from required to get photographs you can still be proud of. In addition, I am not covering editing your Milky Way photos — just the process of taking the photo.
Prerequisite Gear and Initial Research
Most simply, to do astrophotography you really only need three pieces of equipment: a camera, a tripod, and a remote trigger (though, for a digital camera, you can also use a self timer/shutter cable release (film camera). Some additional gear that could really make a difference in your experience include: an intervalometer, a headlamp with a red light (the flashlight on your phone would do in a pinch) and an app (I use Star Walk) to point out constellations (I most often use this if I’m photographing the night sky sans Milky Way). Further, if you are shooting with a film camera, film is (obviously) required as well and suggestions for which film to use will come later.
Prior to getting out with your camera, you’ll need to do some research first. First and foremost, you want to check the phase of the moon and know the moonrise and moonset as there is no bigger source of light in the night sky than the moon. For this, check the area you intend to photograph on Time and Date. Secondly, you’ll need to find a properly dark area, as devoid of light pollution as possible. There are a couple places you can look for this but I prefer Dark Sky Finder. Keep in mind that depending on the time of year and time of night you intend to be out photographing, the Milky Way’s position in the night’s sky changes so I would use whatever app you’re using to track the stars and I would change the date/time to a day when you intend to go out to get a sense of what direction you need to look in to see the Milky Way. If you’ve got a choice of dark places, I would choose the location with the least amount of light pollution to the south/south-east, depending on what the app indicates for the direction of the Milk Way. Lastly, keep in mind that even if you’re in a dark area and it’s a new moon, the weather may not agree with you. Even on a clear evening, you may not have good conditions to observe faint objects such as the Milky Way or other galaxies/nebulae due to a high amount of water vapor in the air. To check and see whether the evening will have promising weather conditions, I look to Clear Sky Chart.
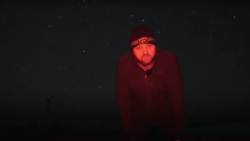
If I were to make one last suggestion for piece of gear that can help get a nice image with less work required to get proper white balance, it would be the HOYA red intensifier. That is to say, it “removes” light pollution only in the sense that it helps prevent light pollution from affecting the white balance of your images – it does not actually remove the effect of light pollution on the ability to see/photograph the Milky Way.
Astrophotography With a Digital Camera
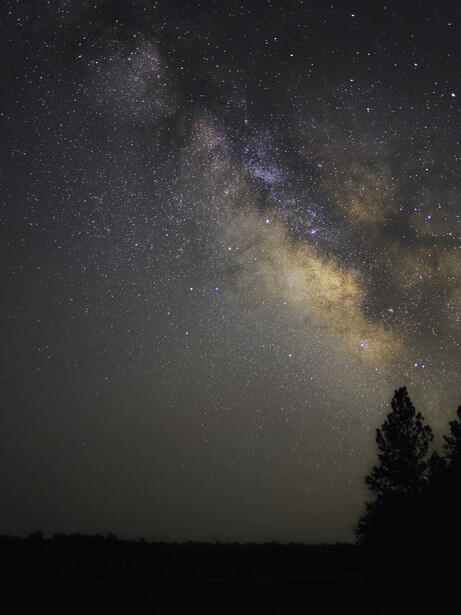
Photographing the Milky Way with a digital camera is relatively straight forward. Once you’ve identified a good night and a good place, and you’ve got your tripod and camera in hand, calculate the shutter speed you need. Set your camera up, point it in the direction of the Milky Way, focus at infinity, set your ISO to 1,600 or 3,200 (unless your camera can obtain good results from an even higher ISO) and take your photo. It really is as simple as that. I would bet just about anything that if you’ve tried photographing the Milky Way and didn’t have any success, you were probably held back by light pollution or less than ideal weather.
Astrophotography With a Film Camera
Photographing the Milky Way on film is virtually the same in practice but the choice of lens is completely different. There is little to no trade-off in choosing a wider, slower lens over a longer, faster lens. This is due to the characteristic curve of film. If you need a refresher on this, I would suggest referring to the article on double exposures as it is covered a bit more there. In brief, as the exposure gets longer, the less sensitive film is light and as such, a 20 second exposure on film is on par with a 12 second exposure on digital. Let us take for example the same lens choices as above and Ilford Delta 3200 as the film. In evaluating the data sheet for Delta 3200, we can see that the function between metered time (MT) and adjusted time (AT) is AT = MT^(1.33). Here, “metered time” would be equivalent to what we would use/observe using a digital camera and the “adjusted time” would be the shutter speed required to obtain an equivalent exposure. Taking the inverse of that equation, we get MT = EXP(LN(AT)/1.33). Circling back to the lens choices, the 50mm lens that gives us a 10 second exposure using Delta 3200 equates a metered time of 5.65 seconds and the 24mm lens gives us a metered time of 9.5 seconds. That is, we no longer get twice the observed exposure and the benefit to rolling with a wider lens is lost compared with the longer, faster lens.
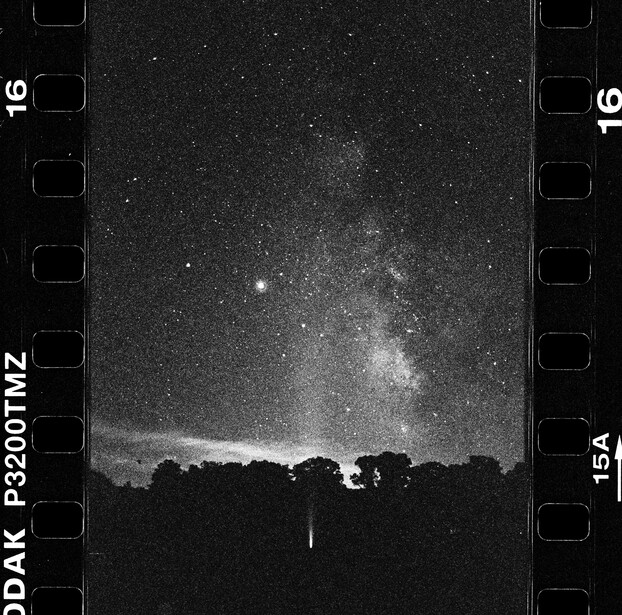
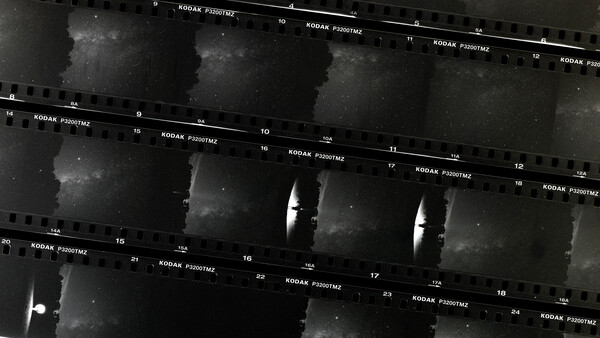
My suggestion for shooting with film would be to follow the same protocol as the approach to digital except go with your fastest lens that is 50mm or wider. If you have multiple lenses with the same maximum apertures, go with whichever is wider. I know that an f/2 maximum aperture will work but I don’t know that I would go for anything slower than that. As for film, I have had some luck using Kodak TMax P3200 for 35mm and Ilford Delta 3200 for 120.
Additional Thoughts and Comments
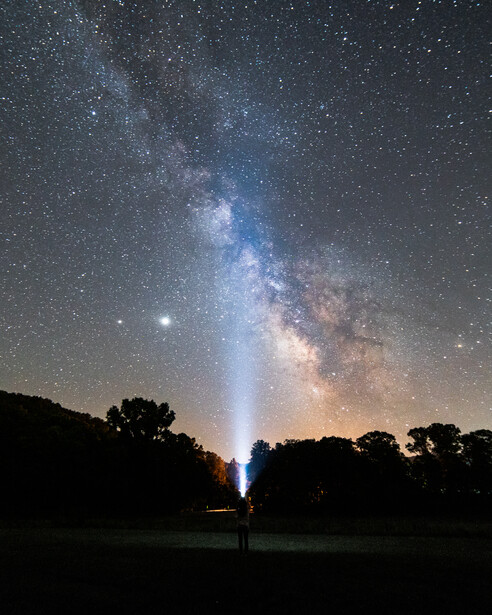
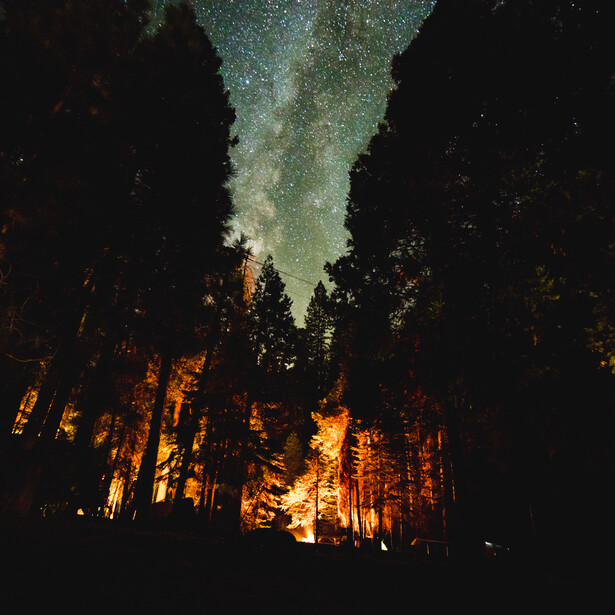
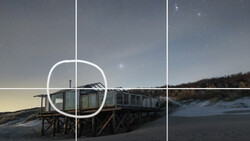
Once you have some practice getting decent to good exposures, you can try incorporating interesting foregrounds to increase the interest of your shots. In addition, you can work on stacking multiple exposures to get a really clear image or even work on creating panoramas using the same technique as laid out previously.
Do you have any additional thoughts or comments? If you’ve tried your hand at astrophotography, please feel free to share your work in the comments.


Join the Fstoppers community for free
-
Post comments and join in the discussions
-
Browse the site ad-free
-
Share your work and get featured in the community
-
Compete in the photo contests for fun and prizes
4 Comments
Unfortunately, most of my days off recently, where I can travel out and away from the city lights, occur on evenings with a full, or mostly full moon! :-/
Thanks for the article though....I'll have dark, clear, moonless nights at some point!
There's us, merely shooting the Milky Way as best as we can, and then there are insane people like @jase.film on Instagram, manually shooting a 2.5-hour timelapse of the Milky Way on four rolls of TMax P3200... Go have a look, it's crazy! :)
The examples you gave include a suggested 2.8 fstop. I'm shooting digital and I have a 16mm lens (Full-Frame equivalent would be 24mm) and its widest is 1.4. Should I be shooting at wide open aperture? or is it better to stop down a bit?
It'll probably depends on your lens. In my (limited) experience some will exhibit coma aberration when used wide open, especially near the corners. Stopping down one or two notches may help with that.