
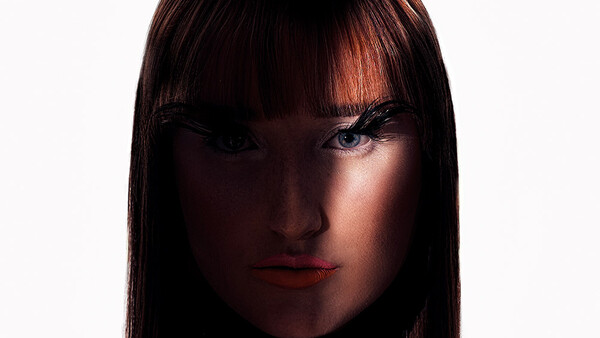
A lot of my work has light placed in very precise spots, just over the eyes, or the lips, or just on one spot on the face. I often get asked how I do it, and instead of just saying the product, I thought I should go more in depth and talk about the ins and outs of how to get the most out of Cinefoil.
What is Cinefoil?
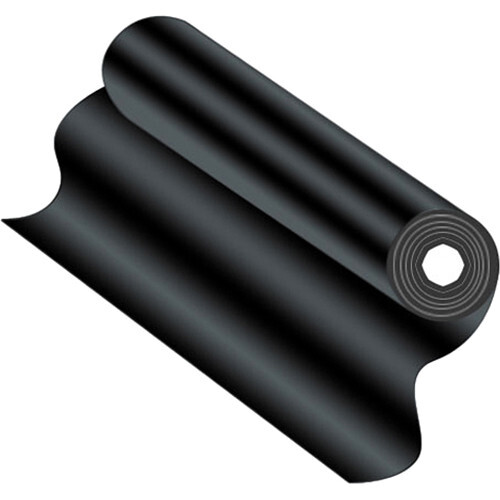
Cinefoil, also known as black wrap, is a thick aluminum foil stained black. It is somewhat resistant to heat, easily cut, folded, and stored. One of the downsides is that it can be rather sharp if it is used and used and used so gloves are sometimes recommended. What I find rather interesting about Cinefoil is that it was basically Film school 101 for me, however very few photographers I’ve met seem to know about it. It is great for small adjustable barn doors on super hot cinema lights, or quick and easy flags. It is also highly reusable so you can have one roll last you a long time. I have also used it to wrap around a speed light and create a tiny little highlight on a product shot.
A small product shot where a flash on camera right is entirely covered by Cinefoil except a small hole to create a tiny kiss of light.
How to use Cinefoil
There are plenty of ways to use Cinefoil, a lot of it can be summed up as “put it where you don’t want light to go” however I want to concentrate on how I usually find myself using it and into a bit more depth to show off how to get custom shapes and precise light placement. To get as much use as possible out of these techniques you will definitely need, obviously Cinefoil, a boom arm, or backdrop stand (really anything that can have a horizontal bar to hang the foil from), and some distance.
The basic concept to getting light where you want it, and with sharp shapes, is that the smaller the light is the harder it is. There are exceptions (you can get lenses for in front of your light, or special lights, which give hard light and being close to your subject) but those are very specialized cases. In general you want your light far away from your subject, fully zoomed in, and the Cinefoil closer to your subject than it is to your light. In the image below you can see a simulation of the light not moving, but the Cinefoil moving closer and farther away from the subject.
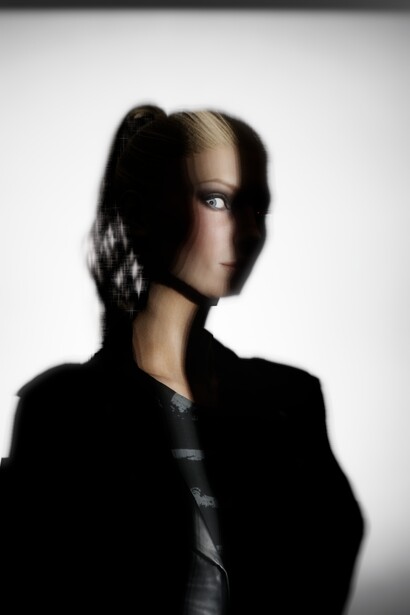
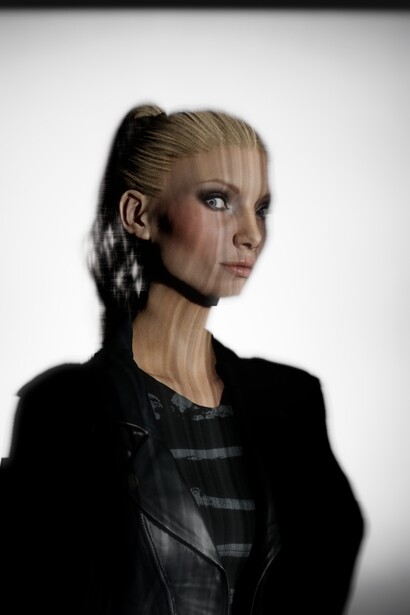
The strips of light on the second image are a result of diffraction
There are three relationships to keep in mind here:
Subject to light: this will determine many things like how hard the light is, how contrasty it is (inverse square law), and how much gets spilled around the room.
Cinefoil to Light: The closer the Cinefoil is to the light, the softer the edges will be, and vice-versa
Subject to Cinefoil: The closer the subject is to the Cinefoil, the sharper the image will be and the larger the shape will be.
Balancing these three variables is key to getting the most control out of your light and Cinefoil. I generally find that placing the Cinefoil about third of the distance from your subject as it is to your light is the best situation. If your light is nine feet from the subject, I place the Cinefoil about three feet from the subject. This is not a hard and fast rule, however. The relation from the subject to the Cinefoil is most important for precise lines, in my opinion, rather than the subject to the light.
Placing Light
You can make place your light in a lot of different ways. From simply hanging strips vertically, to drawing more intricate shapes in the foil with an exacto blade. Now, Cinefoil is not the best art-making medium so it is best to keep things simple. Think box, star, blinds, Plus sign or an X etc. Once your shape is made hang it from a simple boom arm and you want to be sure to use some extra pieces to block as much spill as possible. I usually use three strips. One with my shape/design, and then one to the left and one to the right .
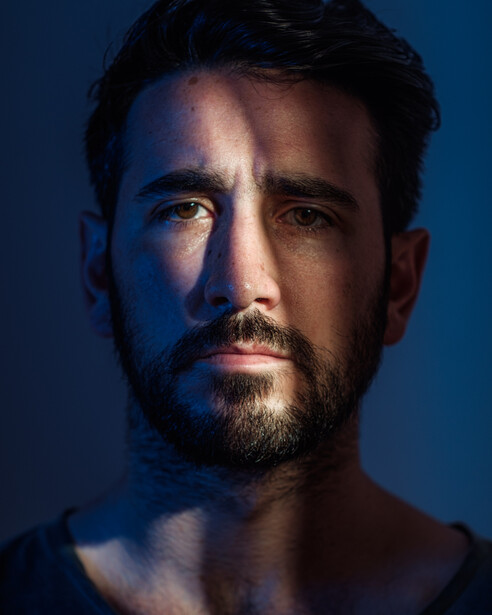
Aiming the light is one of the more difficult things here, I usually shoot with speed lights so I don’t have modeling lights to help me aim exactly where the flash will fall, but since I generally like my light to land on the model’s eyes – I can just have the model tell me when they can see the light through the Cinefoil and I know I’m in the right spot.
Pro Tips
Something to keep in mind is that the Cinefoil will act as an aperture, so you are going to lose a LOT of light doing this and you need to be prepared to pump up that power. It isn't uncommon for the light shooting through my Cinefoil to be at 1/1 or 1/2. Like a lens aperture, if your space for the light to pas through is too small you can run into diffraction where the waves of light can run into each other. You can use this on purpose for effect, or accidentally and screw up your shot. You want to be sure that the shapes you make, and the strips you hang if you’re simply making stripes, aren’t too close together otherwise you might get results you don’t want. I generally try to make sure that my gaps are no smaller than, say, half an inch.
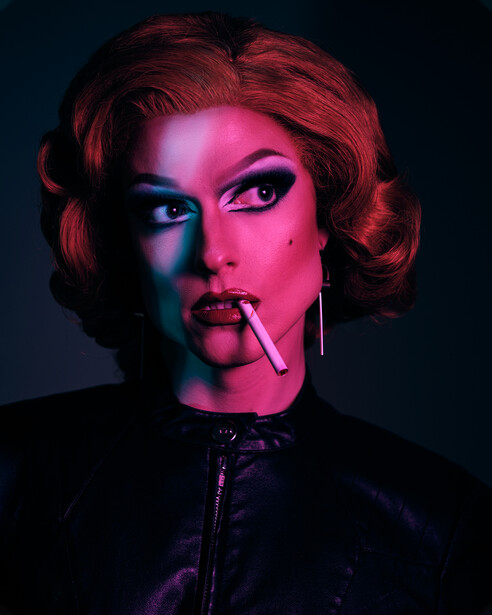
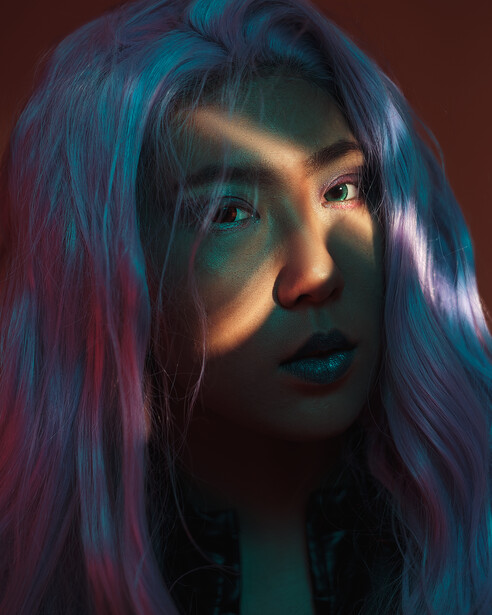
You don’t need Cinefoil to be super super narrow – you can use it as a snoot, a flag, barn doors, etc. I usually use it to create precise placement of light on the face, sometimes coinciding with the use of gels to create pops of color in specific places or, more often, pops of neutral light in a color-washed scene.
Conclusion
In conclusion, Cinefoil is a product that I think should be in every portrait and product photographer’s toolkit to create pops of light and add greater control to your light without big giant flags everywhere. More precise than a snoot and more versatile than a V-flat I think it should be in just about everyone’s bag if they use strobes. Have you ever used Cinefoil before? I’d love to see your results in the comments below!
Join the Fstoppers community for free
-
Post comments and join in the discussions
-
Browse the site ad-free
-
Share your work and get featured in the community
-
Compete in the photo contests for fun and prizes
5 Comments
Is it just me or is it someone just discovering something that has been around and used for roughly 30 years.
As I say in the article - Cinefoil was filmschool 101 for me, but many photographers I talk to have never heard of it so I wantd to write about some of the uses it has
A great example of how still photographers can benefit greatly from working on a film set, even just a little bit. I've even met still photographers who don't know what an apple box is, let alone black wrap. Why the info. doesn't flow more freely has always been a mystery to me. But if you really want to learn lighting, learn from the people who do it for a living: gaffers.
Yes! Also if you want to hear the best set stories - talk to Gaffers
Thank you - I found this very helpful.