A while ago I wrote an article summarizing some of the key tools which are required when shooting apparel for commercial clients. That article served it's purpose to demonstrate the vast number of supporting tools we use on a daily basis, but the magic really happens when we roll out the lights. Today I would like to show you some of the considerations you need to take when lighting clothing for your clients.
Product photographers deal with a diverse array of materials and compounds, each of which has it's own unique properties. This makes the work interesting but also very technically challenging. It can take many years of dedication to a specific niche in order to develop a full understanding of how light acts and reacts to a product.
As an apparel photographer I work with fabric. Fabric can be very tricky and challenging to work with because there are a great deal of variables that contribute to the final product, each one presenting its own challenges when it comes to lighting. Apparel is made from a wide range of fabrics such as cotton, spandex, nylon, acrylic, wool, linen, cashmere, silk... the list goes on. Certain fabrics will have reflective properties such as silk, while others such as velvet tend to absorb light. Even the way fabrics are sown can change their characteristics. A tight weave with a high thread count will give you a smoother surface whereas a loose weave will create a very rough topography that will emphasize hard shadows. As you can see, there is quite a bit to consider when shooting fabrics.
Soft Or Hard?
As much as I like hard light for a lot of my personal projects you will find that diffusion will give you a far more appealing image when it comes to apparel. More diffusion is usually better when it comes to fabric. Though you do not want a totally flat image your goal is not to overly emphasize texture. A hard light source will create harsh shadow transitions and give clothing a rough and wrinkled appearance. Consider soft light a bit like ironing your clothing.
A soft and diffuse light will also retain more detail. With less contrast your shadows and highlights won't be pushed to their limits. As most online stores now include a 100% zoom feature for clothing you will want to make sure there are things for people to see when they get that close.
Lastly, a soft light source will help tone down any glare you might have from reflective fabrics or accessories.
Size Matters
Most of us know that a larger light source near the subject will produce softer shadows. Since we have determined that a softer and more diffuse light is ideal for photographing clothing it would then stand to reason that a large light source would benefit us further. A larger light source will also help provide a more even light distribution across your product without hot spots and minimal fall off at the edges.
The exact size you use will depend on the kind of light modifier you choose, but also on the size of the product itself. Photographing small articles of clothing such as a hat will not require as large a light modifier as shooting an entire outfit or even a group of outfits.
Do not completely rule out smaller light sources however! There are times where you will need to light specific portions of a piece of clothing in a different manner. Often is the case where an article of clothing will be composed of several fabrics each with their own lighting requirements. Extreme examples can include reflective white fabric next to a matte black fabric. In such situations you will want to use smaller lights with grids, snoots, or barn doors to control spill, so that you can isolate the problem areas.
Hard light sources can also be used as a great fill light on an otherwise soft image to help give your clothing that extra bit of punch and flare. Keep it very very subtle.
Show Me Examples
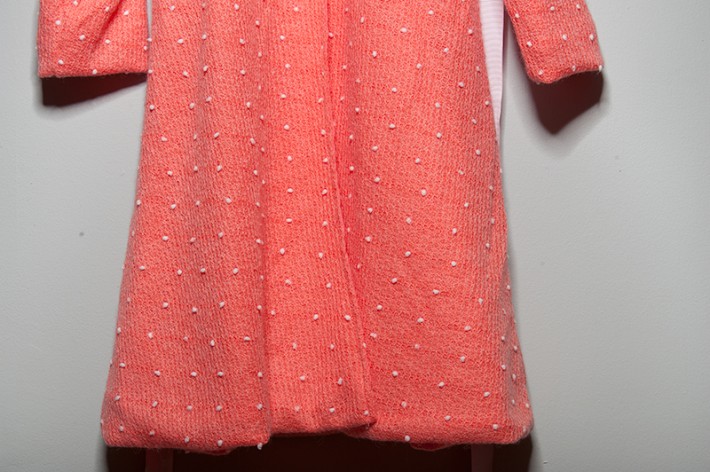
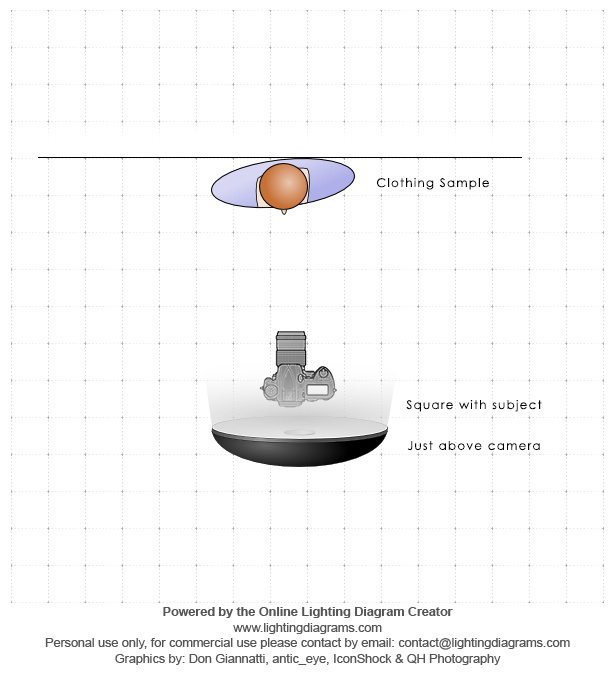
Today I have put together a very quick one light demonstration to give you a sense of the impact that the diffusion and angle of your light source can have on a piece of clothing. For this demonstration I have chosen a random coat I had laying around the studio from a spring line we shot a few weeks ago. The amazing styling you see is courtesy of me and was inspired by my own disheveled Sunday appearance. The coat in question features a very rough fabric texture which will help emphasize the differences in lighting. All images are straight out of the camera. Lets have a look!
Silver Beauty Dish: High Up & Dead Center


Beauty Dish: Lens Level & Dead Center


Large Octobox: High Up & Dead Center


Large Octobox: Camera Level & Dead Center


Final Thoughts
As you can see from the examples above, by using a larger and softer light modifier we are able to reduce the harsh shadows on and behind the clothing. We further reduce harsh shadows in our extremely textured fabric by keeping our key light as close to the lens center as we can. We can also clearly see that using a larger and softer modifier has helped reduce hot spots as well as evening out the light distribution across the image.
This is far from a final lighting solution for our sample piece. Though these examples serve as a demonstration of the considerations we need to make when lighting fabrics, none of the examples on its own has an optimal lighting pattern for this sample piece. To strike the perfect balance and pull out maximum detail while preserving a soft and clean look we will need to introduce multiple light sources.
The next article in this series will introduce multiple light sources into the mix. We will go from simply analyzing the effect light has on a fabric to sculpting the entire product top to bottom and side to side with a variety of light sources. Stay tuned!


what if the client want his product flat on the ground?
Just shoot overhead.
The angles of the light relative to your subject do not change. If the surface is on the ground as opposed to the wall just move your lights accordingly.
Unless specifically asked for, I typically advise against this (although clients often approach thinking this is how it's done)... garments like to hang free and you get the natural drape of the textiles and accessories in a hanging position.
thanks the client is stuck and always had her collection shoot this way i never did the on the floor technique im not super please to do it since i don't know how i will light the background so it pure white.... i told her that hanging will be better but she stick to her point.
I book end 2 large white polyboards in the top left corner and fire a light into them with reflectors bookended in the bottom right corner to even out the shadows on the garment and create a nice soft shadow along the bottom and right hand edges of the product.
I light the product from the side with a large, soft light source, use a white large reflector on the opposite side to bounce light back onto the shadow side and use a large soft fill from the front. I can then adjust the side light to show texture, sheerness, or sheen/reflective qualities of the product. I also will sometimes take away the diffuser from the side light to give it a "sunny" natural light look. lighting from the side also gives you a much more attractive/ natural shadow if it is not being removed in post or if there is more than one item side by side.
8' silk scrims for diffusion makes the light source very nice.
The light directly over/behind the camera is too flat for my customer. They prefer to see more of the characteristics of the garment. Lighting in-line with the camera can also cause problems with beading, shiny embroidery, or sequins (not to mention satin fabrics.
This work is my everyday bread and butter for the last 10+ years and it definitely takes a lot of tweaking and trial and error to get perfect. whether it is harsh contrast and shadows like a&f or the flat graphic look of the 'zulilly' type shot above.
can't wait for the 2nd part