Creating realistic composites in Photoshop can sometimes be tricky. It is imperative that your selection process is spot on, and that your subject so perfectly matches the new background that you’ve placed it in, that not even the trained eye will be able to tell that it’s a composite.
In this video from Photoshop guru Unmesh Dinda of PiXimperfect, we learn how to create a realistic monochrome composite, even when the subject is in vivid color and lit completely differently than the chosen monochrome background.
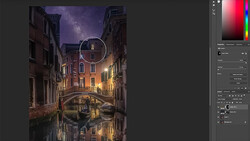
Dinda walks us through the process completely from scratch in Photoshop. He demonstrates the use of the Select Color Range option for selecting the subject, and he perfects his selection using different methods involving blend modes. Then, he places this perfectly selected subject into its new background, using gradient maps to match everything up.
Through this process, we learn one of the most important aspects of realistic composition; reading the direction of light and making adjustments so that the subject is completely cohesive with the background. This involves creating realistic shadows, as well as removing light reflections that would not exist with a given lighting scenario.
Finally, we are shown how to marry everything together by applying adjustments to the entire image to make them blend even more realistically together.
Be sure to check out part two, another great demonstration from PiXimperfect featured in this article.


Join the Fstoppers community for free
-
Post comments and join in the discussions
-
Browse the site ad-free
-
Share your work and get featured in the community
-
Compete in the photo contests for fun and prizes
2 Comments
I never thought about using a backdrop for a photo
By the models expression.. "I cant believe im being copy pasted into some weird background"
His other tutorial should watch this to get some tips.