
Photography can sometimes become a bit of a gear measuring contest. Who’s got the biggest lens? Which body has the most megapixels?
To counter this narrative, I’ve recently been getting into cameraless image-making. In 2020, everyone took on different “Covid projects”, including baking bread, growing a garden, knitting, etc. All of my Covid projects, obviously, ended up being photography-related. For Waiting, I created a series of over 60 scanographs.
For this article though, I want to go back towards the infancy of photography and talk about anthotypes. What is an anthotype? You see, cameras weren’t invented as a singular thing. Instead, different people were working on different projects (towards different ends), which when combined made the cameras we know and use today.
What are Anthotypes?
What many inventors were focused on was simply getting an image onto a medium—and to this end in 1842, Mary Somerville used plants and plant dyes to capture images. She went on to share the technique with Sir John Herschel, who is incorrectly credited with inventing anthotypes (although he did invent cyanotypes or blueprints — and shared that technique with Anna Atkins who made the first photobook.)
An anthotype comes from the root word antho, which is related to flowers. Anythocyanins are pigments that give plants (and flowers) their color.
Basically, you’re taking a substrate (such as paper or cloth) and painting it with plant dyes. Then you leave that out in the sun, but you block out parts of the sun. The parts that are blocked retain color and the parts that are exposed start becoming lighter. That’s the basic gist of it, and I’m only touching the surface of the technique, but I thought it could be cool to share some of what I’ve learned.
How To Make Anthotypes
What I absolutely hate is when I’m reading a recipe and the author spends at least four pages talking about their life story and giving an in-depth history of the recipe they’re making. Well, I already turned around and did a bit of that above so I’m just going to jump straight into the ingredients and recipe now.
Ingredients
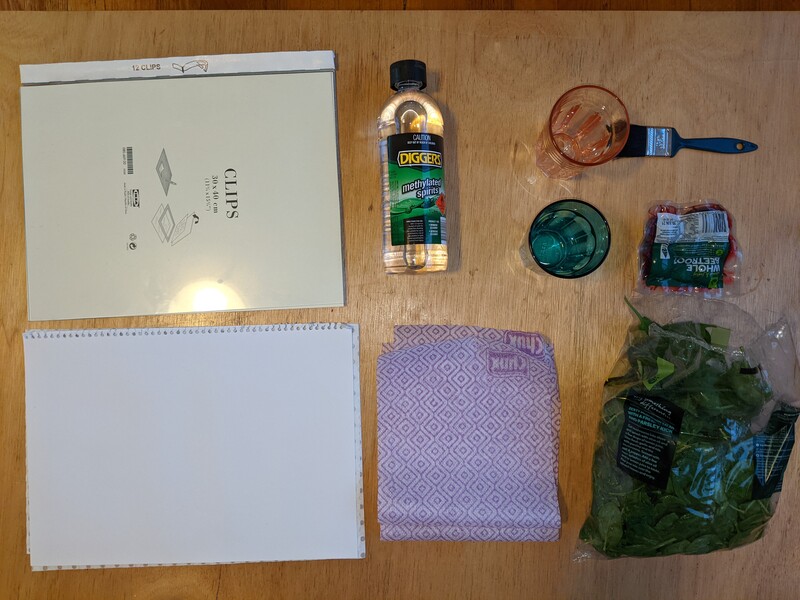
- Methylated spirits
- Chux
- Glasses
- Glass
- Large paint brush
- Plant matter (for dye)
- Plant matter (for exposure)
- Substrate/paper
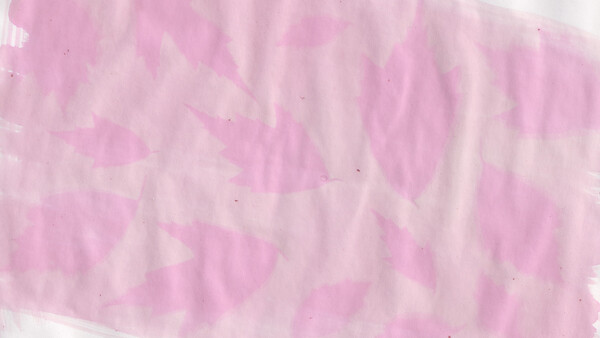
Some things to note here are the plant matter (for dye). I used about three or four small beetroots and these gave a really nice “millennial pink” color. I am planning on trying out spinach next for a green. I’ve been told that you can try various flowers (such as dandelions which you might be able to forage) or red rose petals (which your wallet might be able to forage). I’m still learning the process as I go, so this might be a cool way for us to all experiment together. If you do end up trying something else and it works, please share out in the comments below.
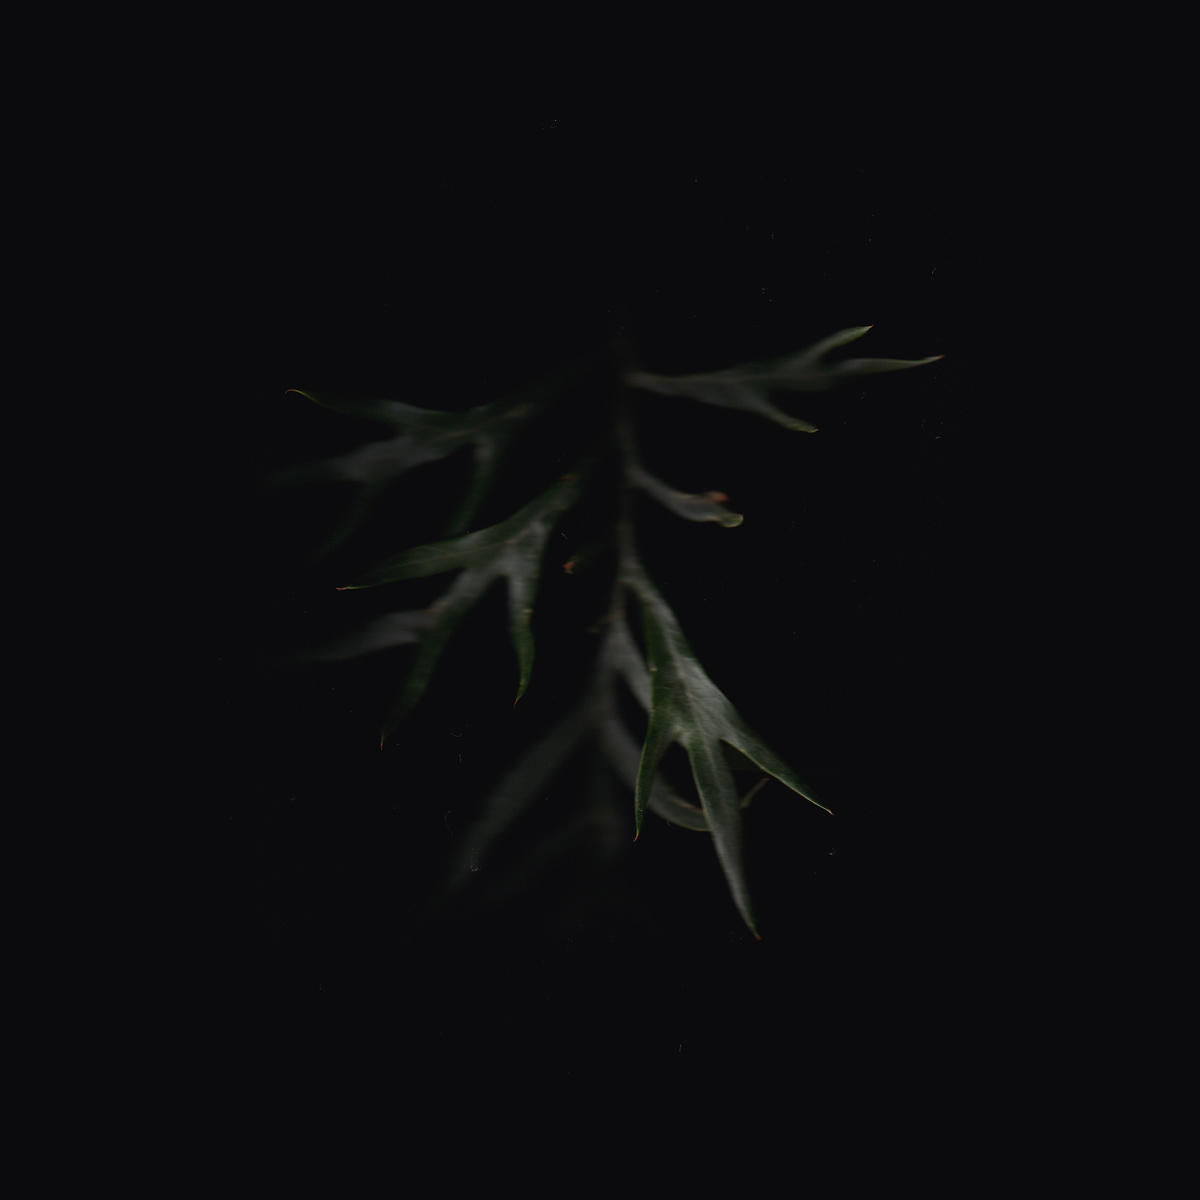
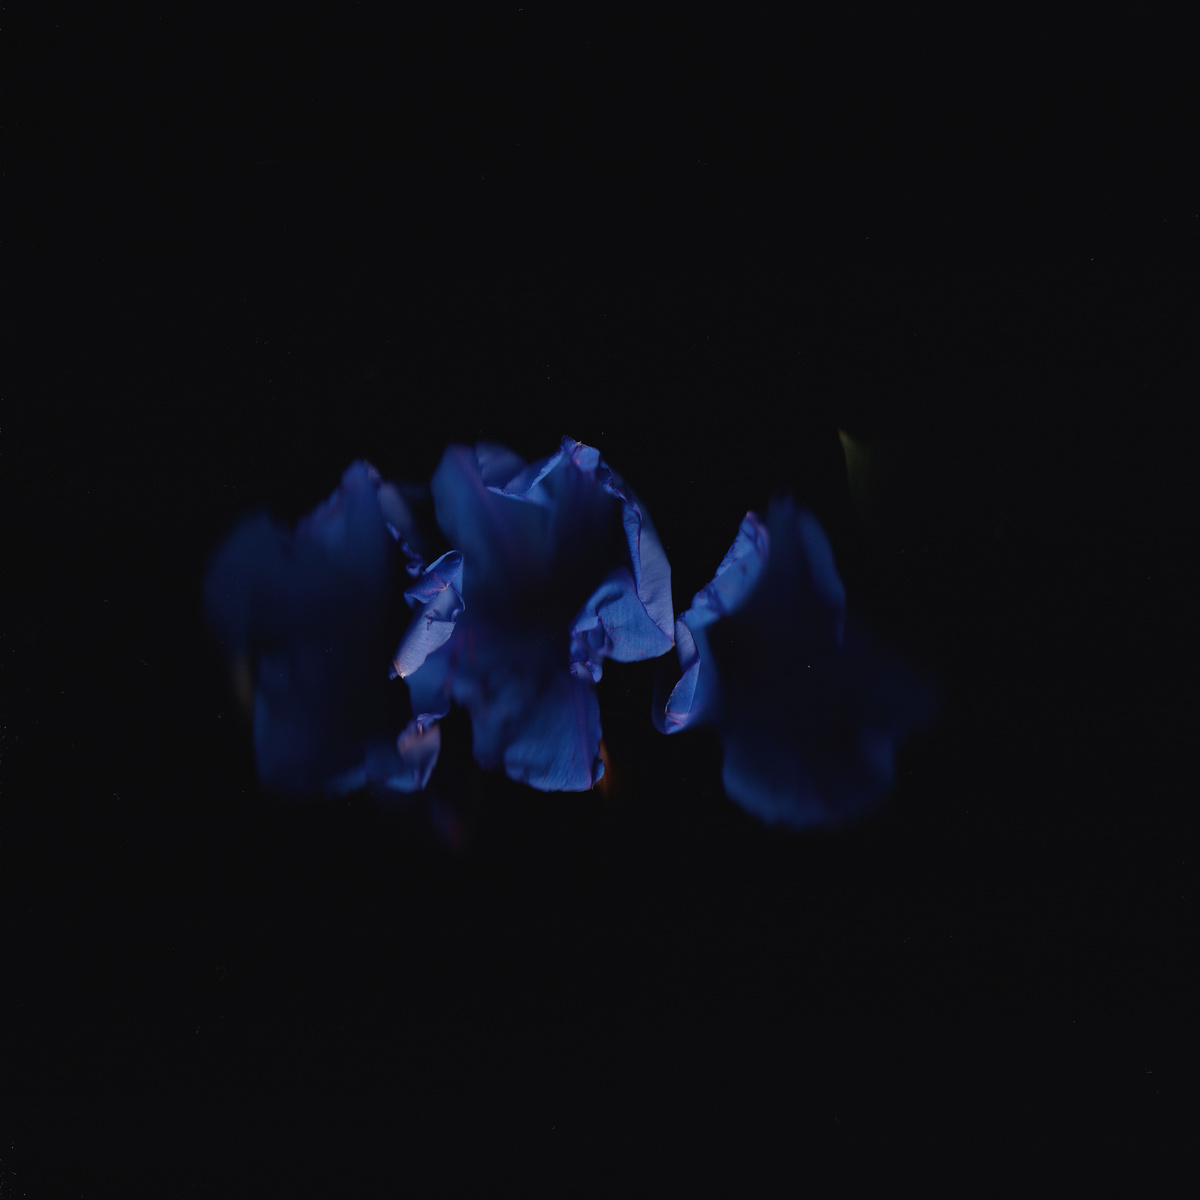
Additionally, I mention plant matter (for exposure). These are the “negatives” that will be used to print. I opted for leaves and dainty flowers which I foraged for in and around my neighborhood. You are welcome to try other things (generally anything flat and with “texture” such as feathers, lace, or even prints on cellophane or photography negatives could work). For this article, I’ve termed this plant matter (for exposure), but you really can use anything. The main reason I opted for this is that traditionally, this is what was done for anthotypes. There really are endless possibilities!
The other thing of note is the substrate or the surface you’ll be painting on. I used cheap sketchbook paper which ended up rippling. I think you’ll want something that’s fairly neutral (and acid-free) so it doesn’t react with the plant dyes. But also probably something thicker like a decent watercolor paper. If you want to step outside the box even further, you can try things like white cloth (something like a natural cotton) or even make your own paper. Anthotypes are more about the process than the end result.
The Process
The process for anthotypes can be broken into three parts. Making the dye, coating your substrate, and exposing to light.
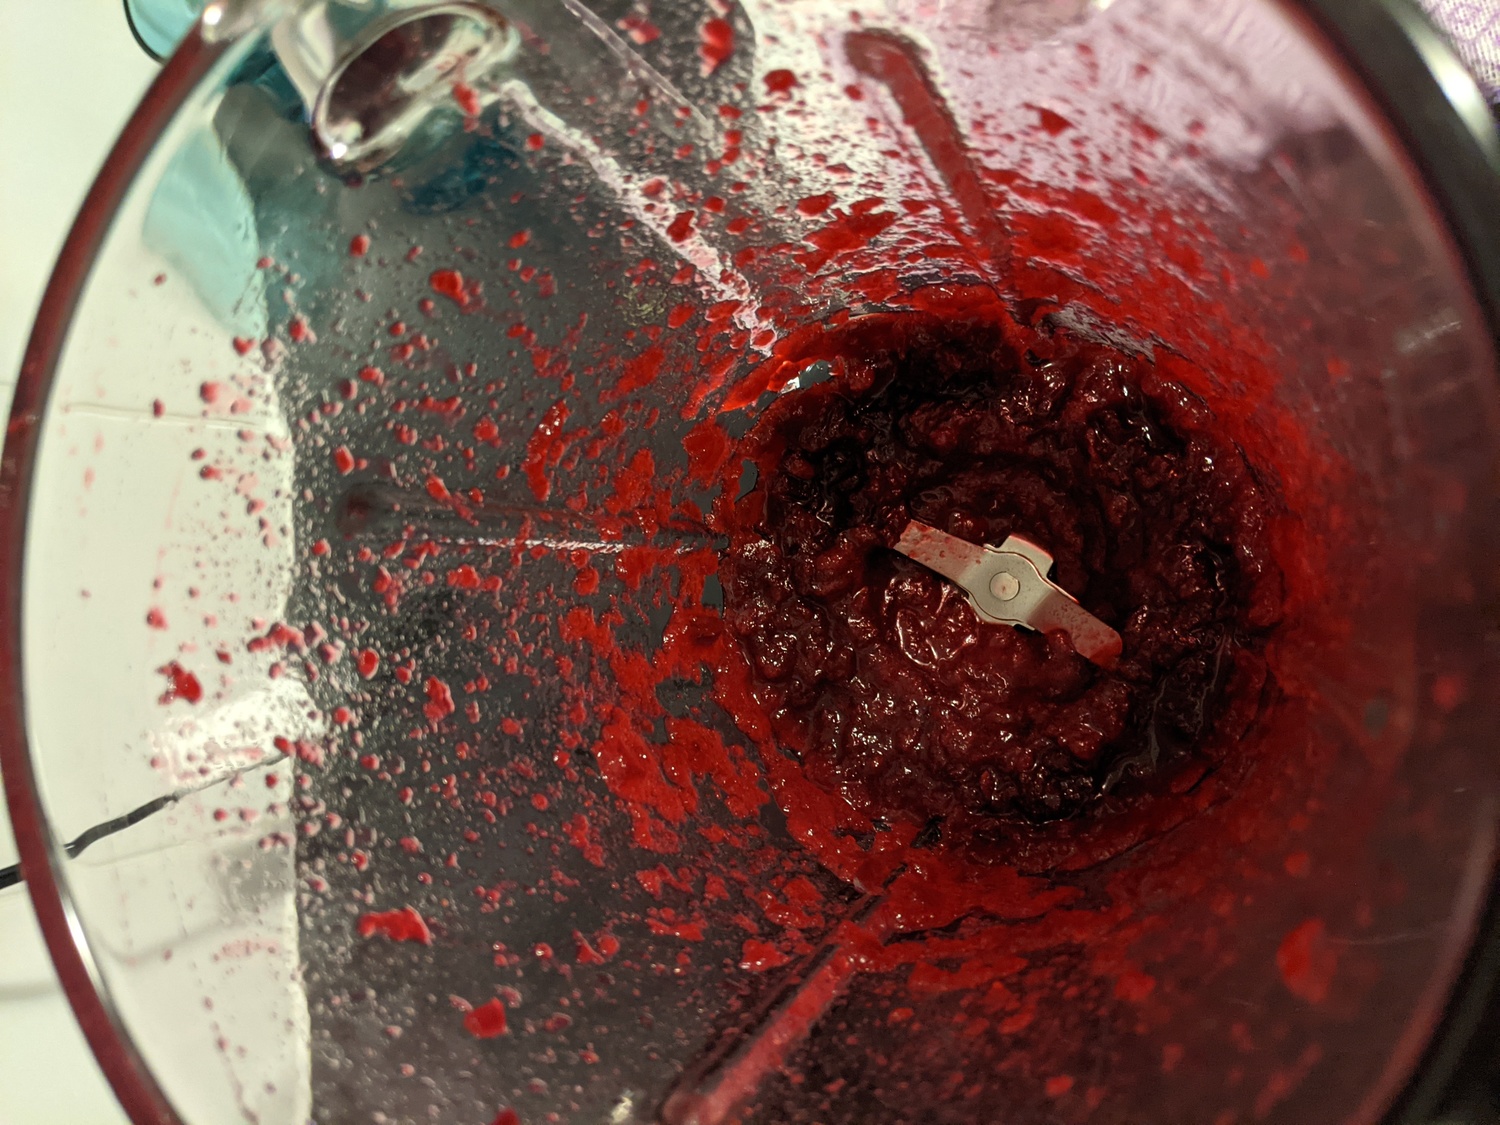
To start, you’ll first make your dye. You will want to “juice” your plant matter. I personally did this in a blender, but you can also use a mortar and pestle. You’ll want enough juice/dye to cover your substrate. I used beetroot and found I was having trouble blending it (it kept sticking to the side). If this is the case for you, you can dilute it down with a bit of methylated spirits. About two tablespoons (30 ml) worked for me. Just keep in mind that the more you dilute it, the lighter your color will be.
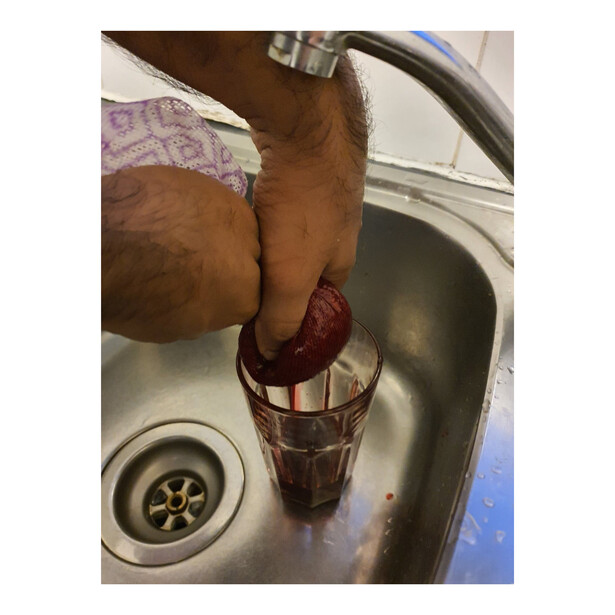
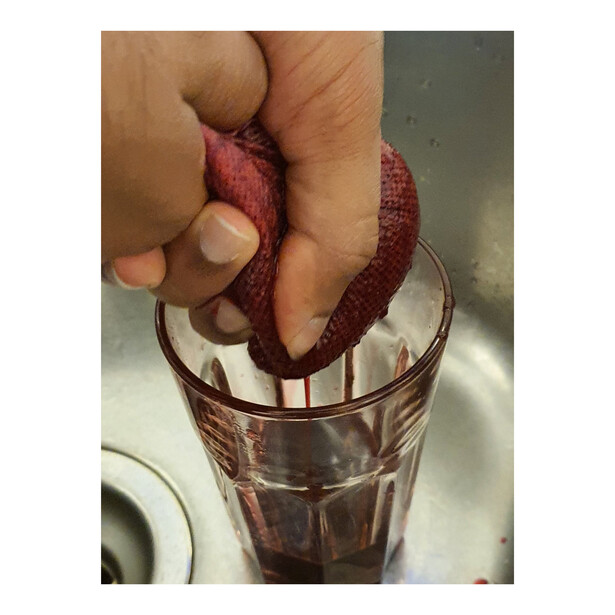
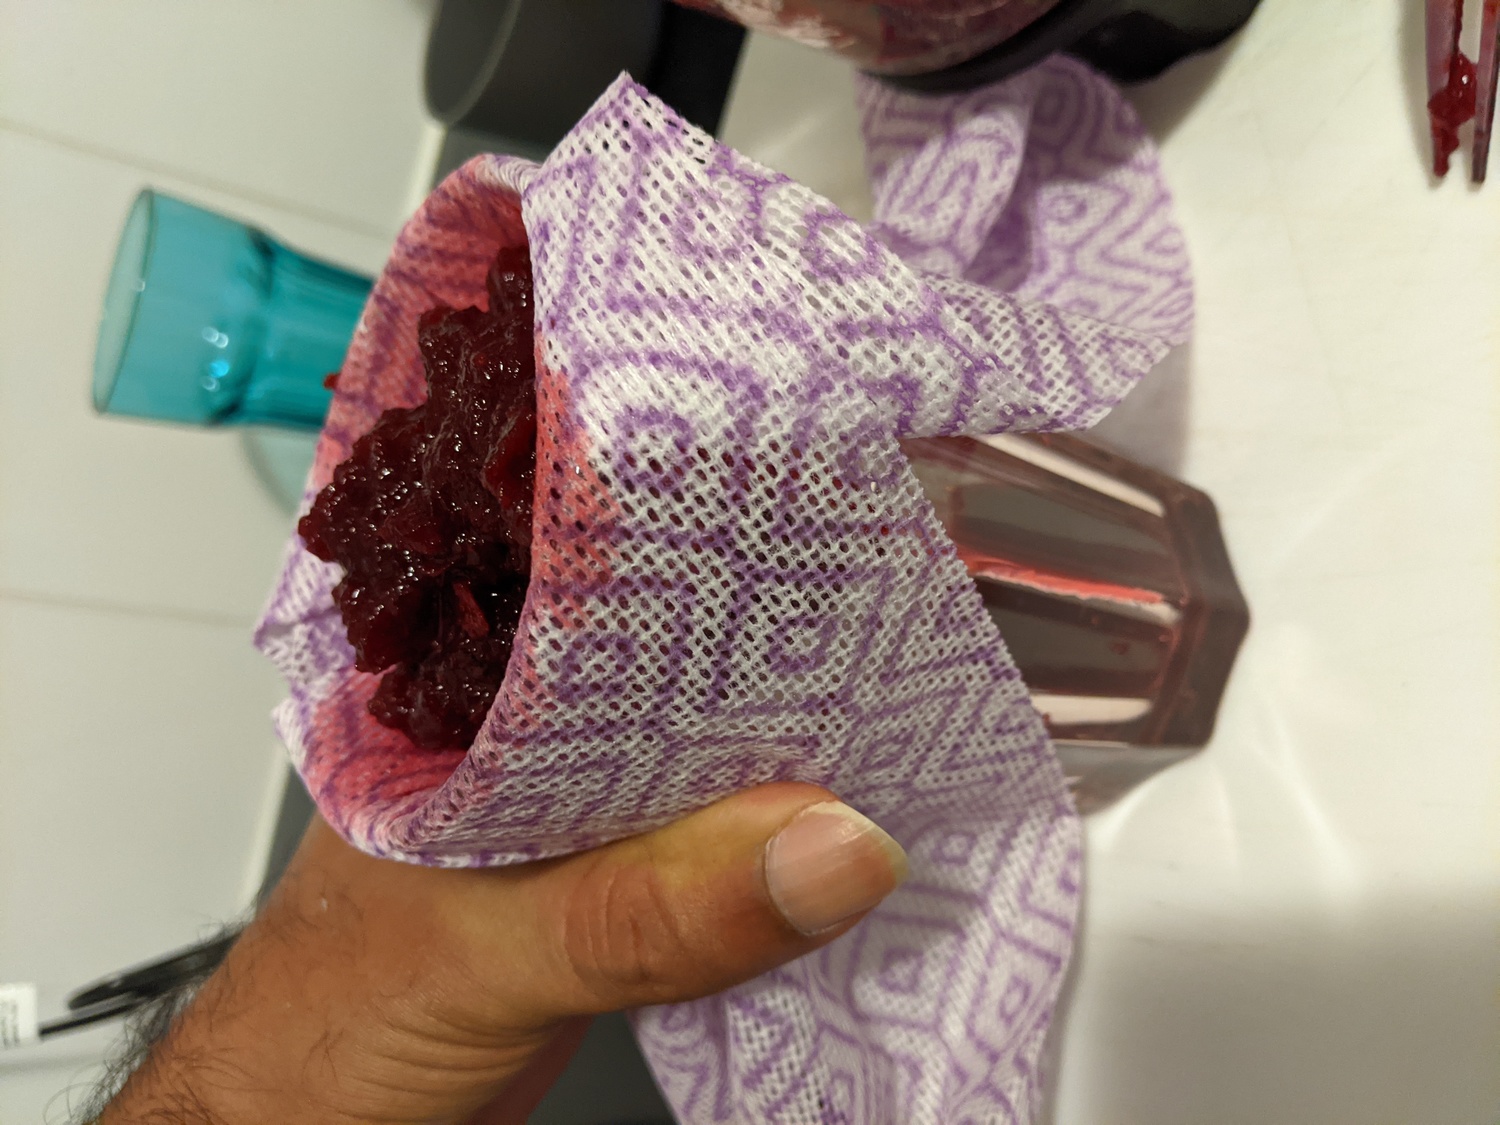
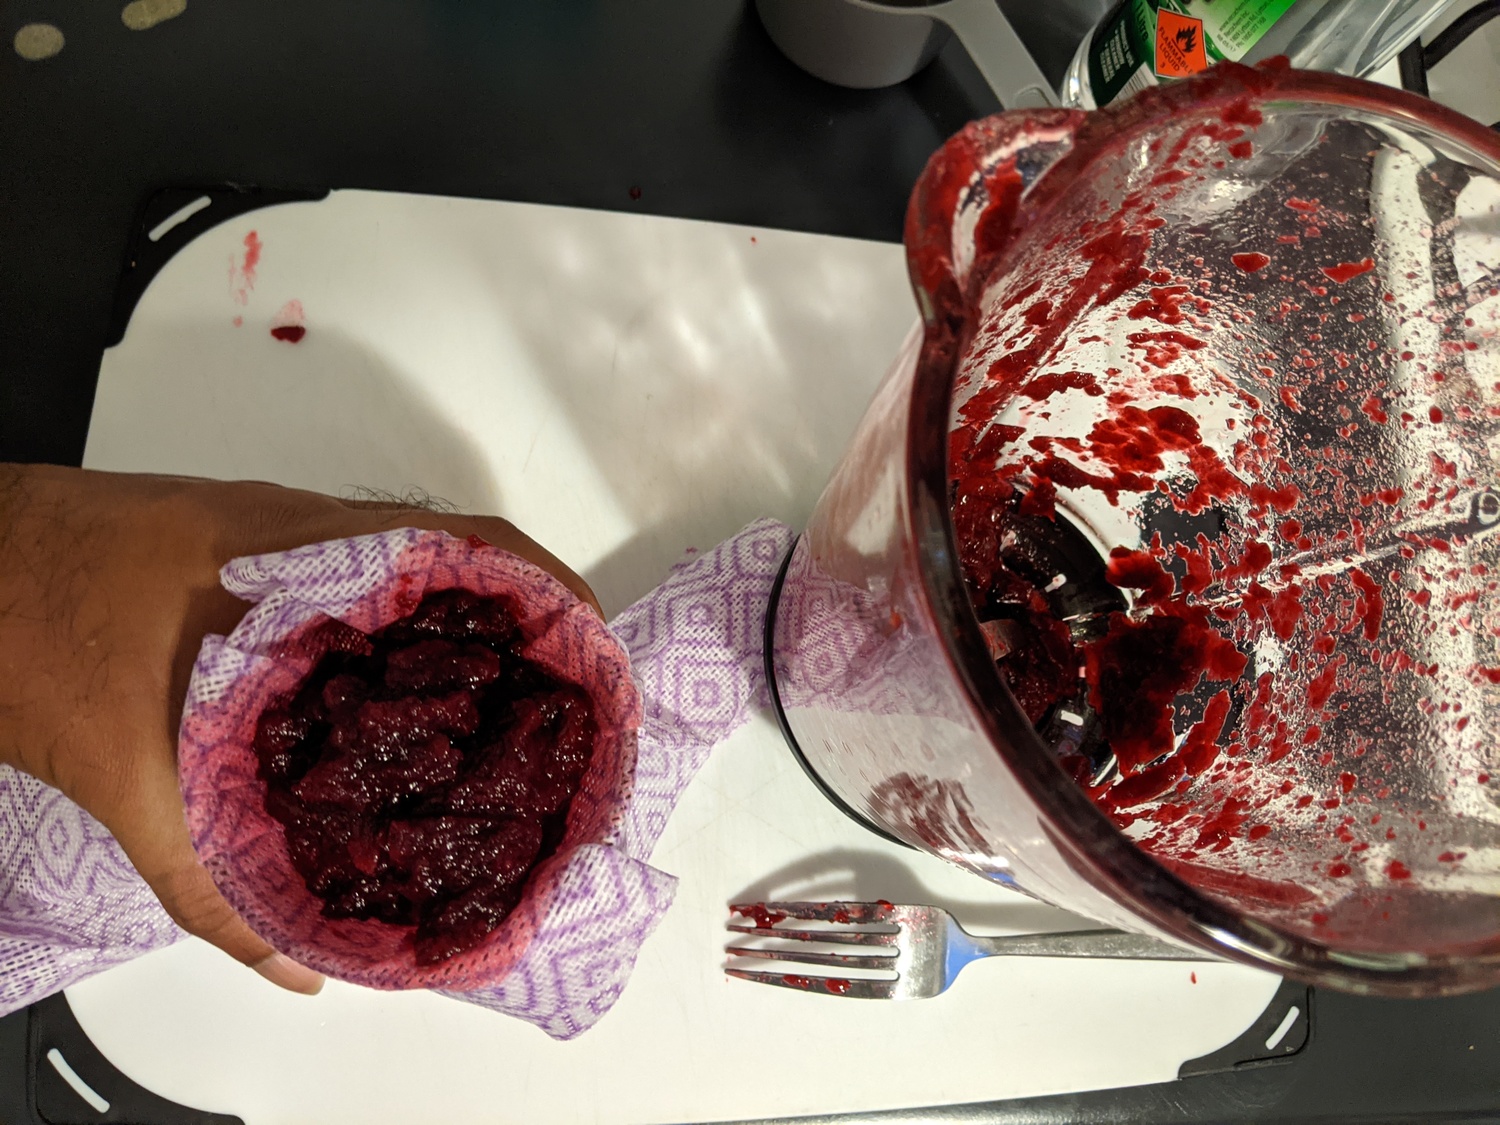
To remove the mixture from the blender, I covered a drinking glass with my chux. I’m not sure if these are just an Australian thing though, so you might want to just use a tea towel or piece of fabric. You want to get as much of the juice into the glass without any of the “pulp”. I ended up literally “milking” my chux.
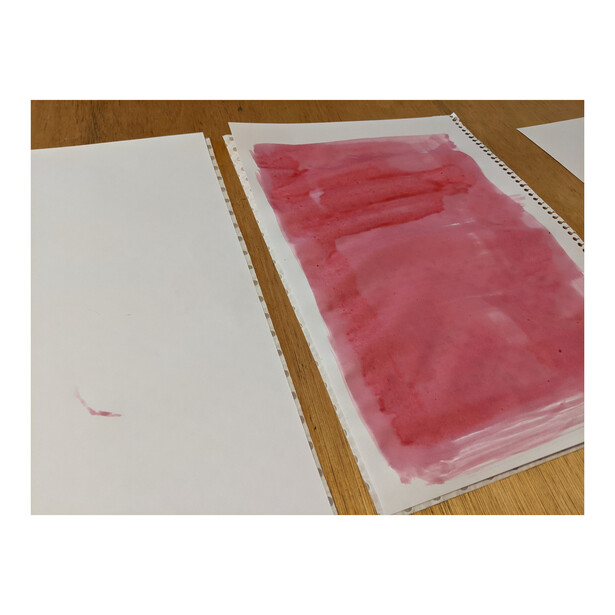

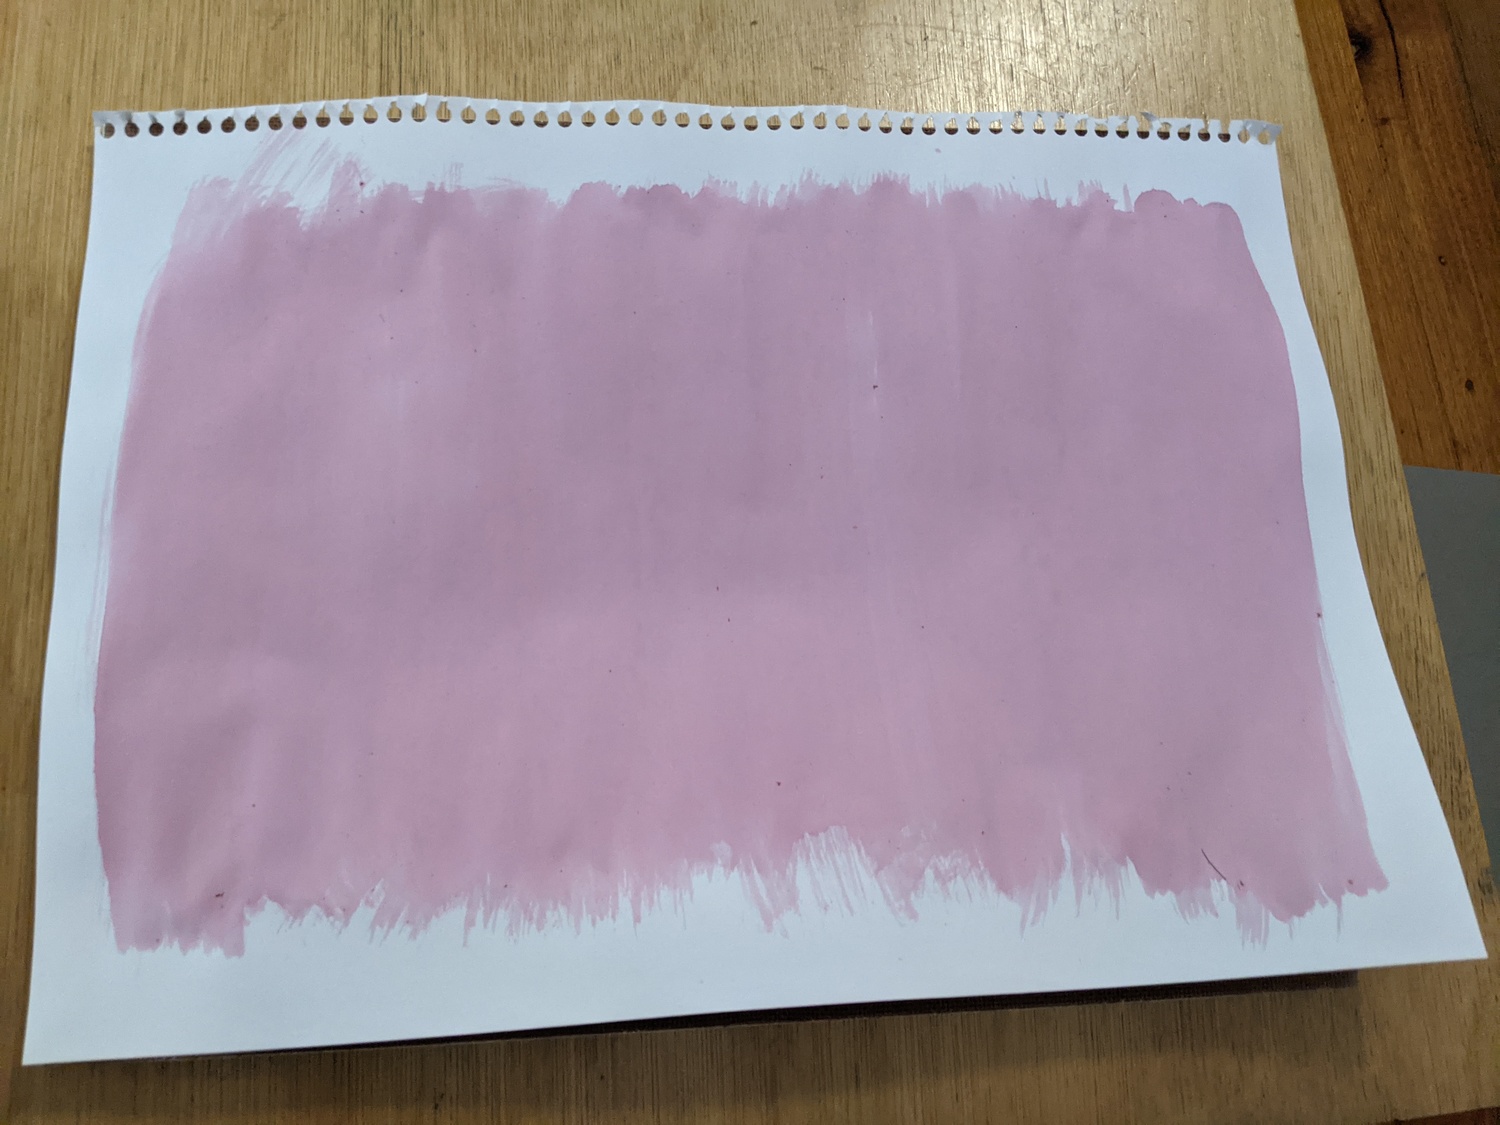
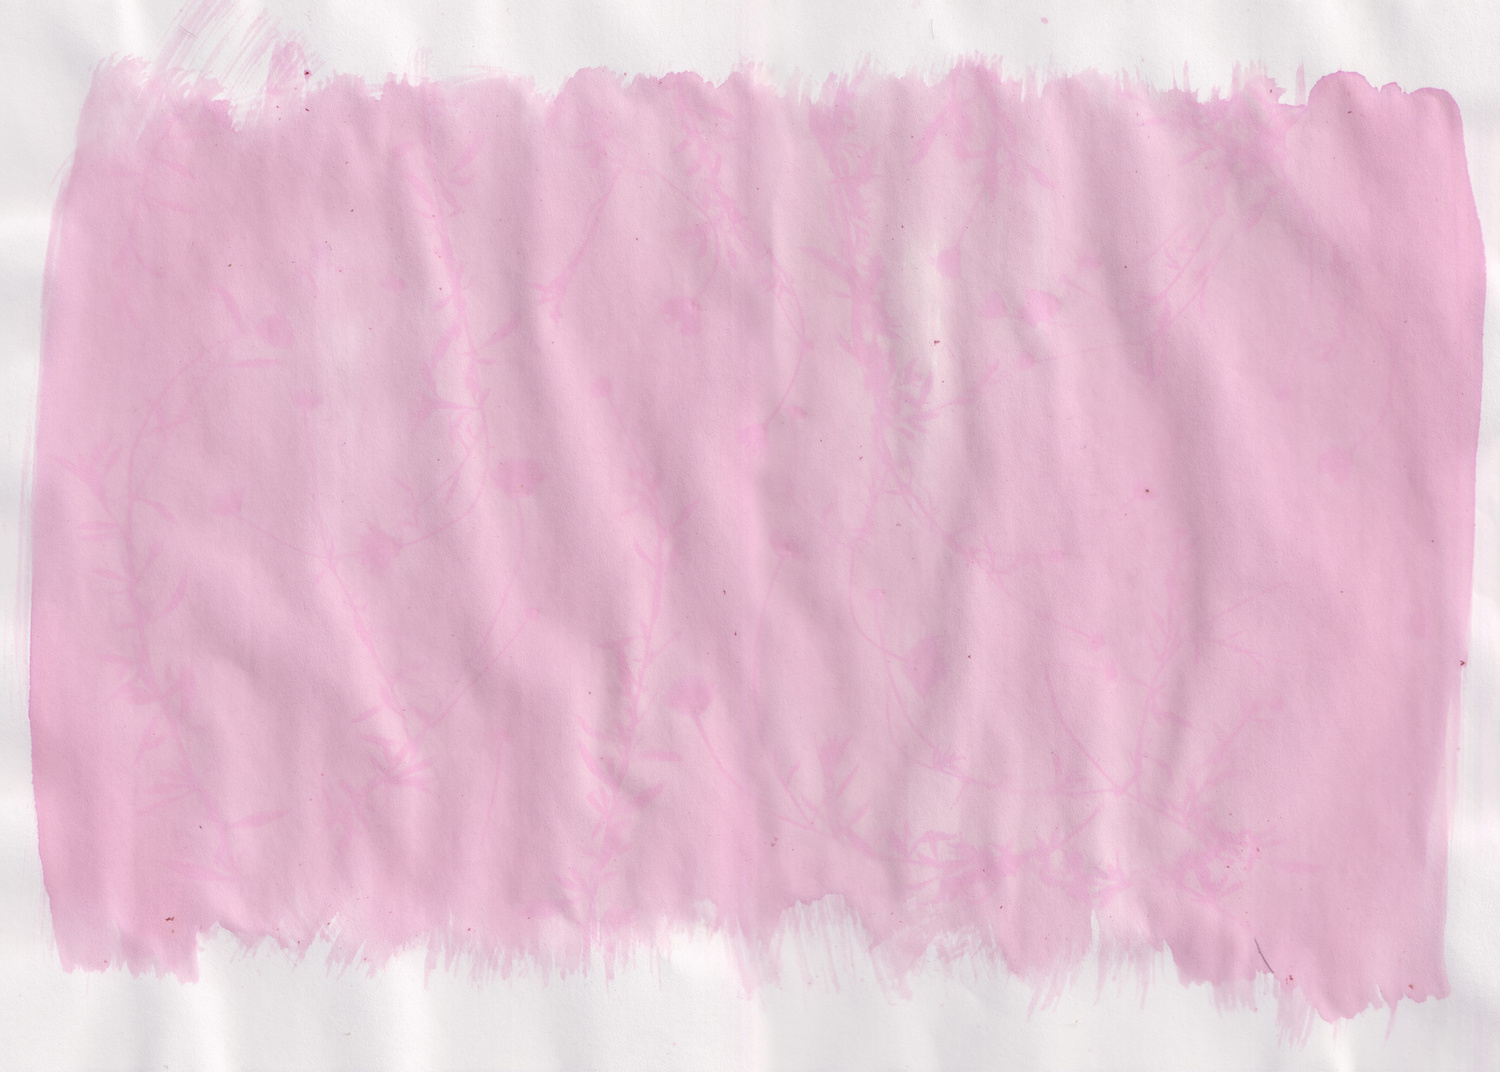
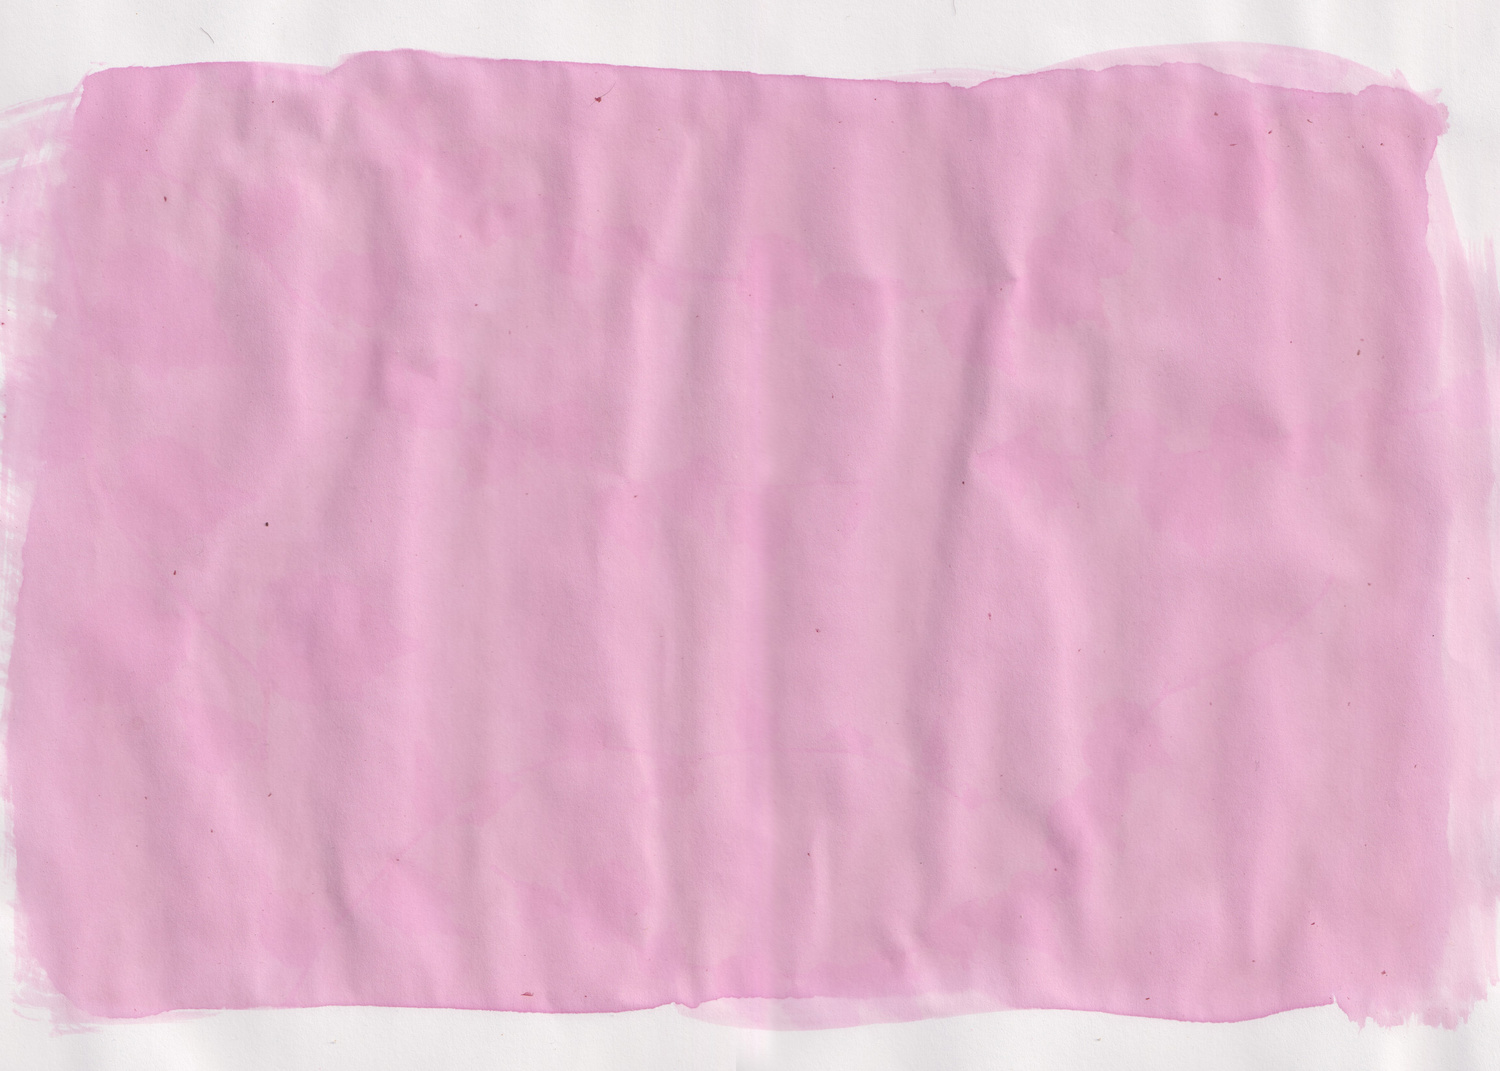
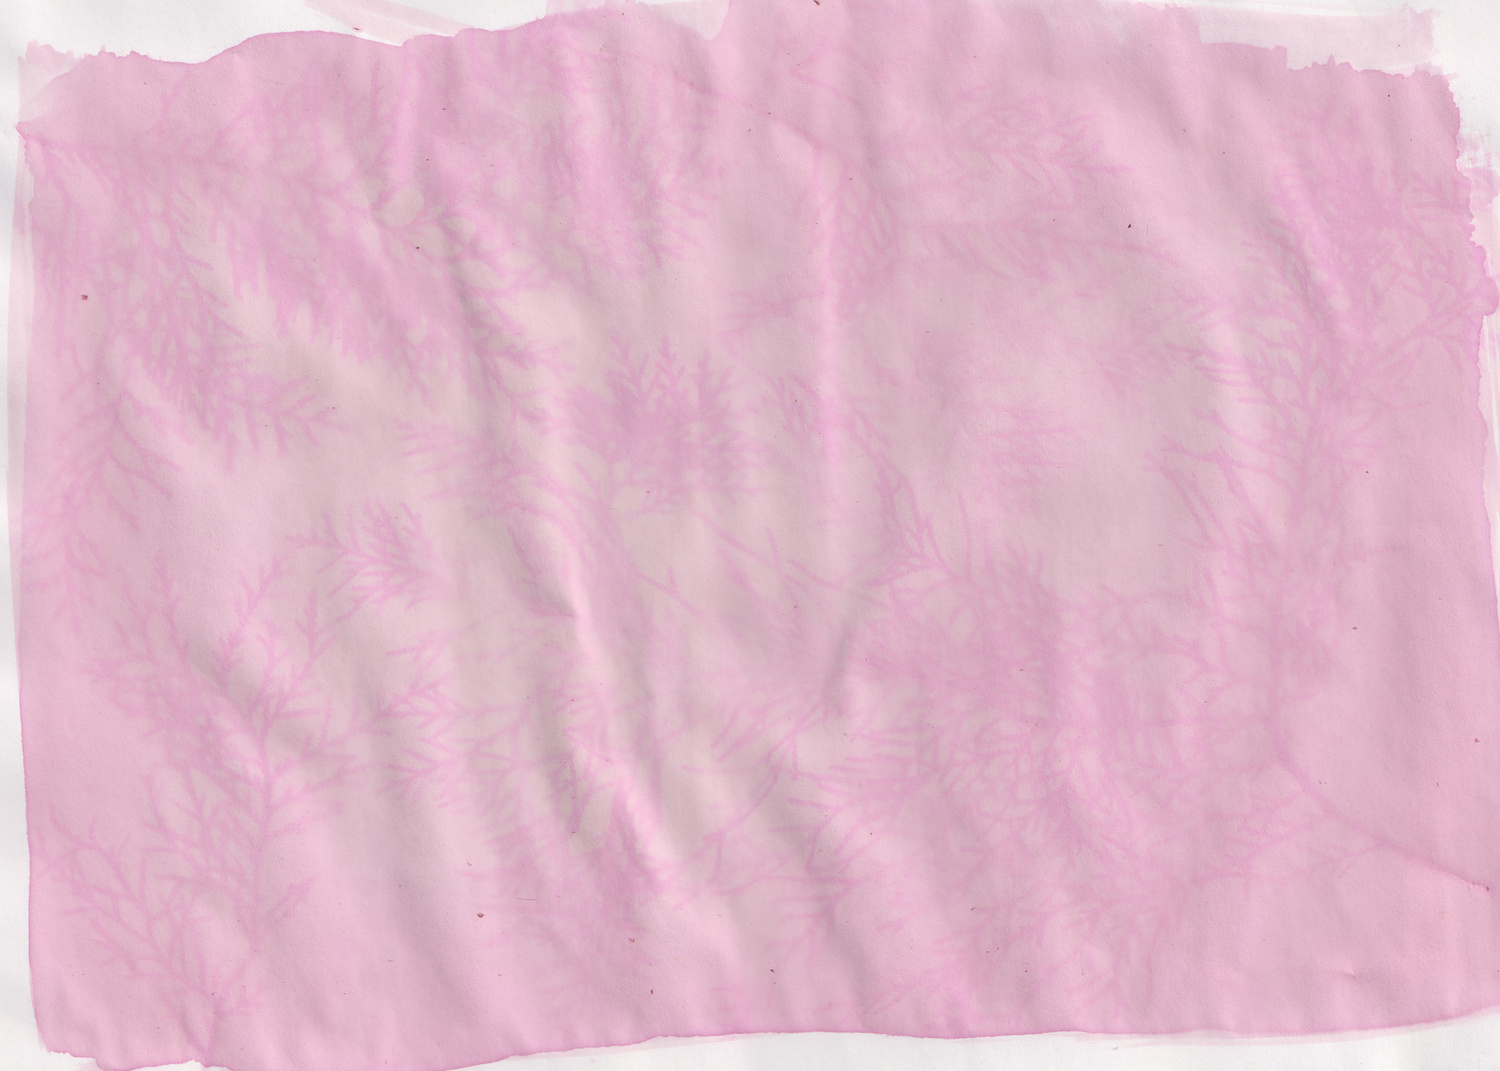
Next, in a dark or very dimly lit room, you’ll want to paint your substrate with the dye you’ve made. You want to cover with big broad strokes, so a large brush is better. If you’re working with thicker papers or fabric, you can try dipping them in dye instead; however, for what I was doing I opted to paint my substrate. If you want a deeper color, you can wait about 15 to 20 minutes until your painting has dried and then do multiple coats. I personally did some with a single coat and some with a double coat but found that with the paper I had that a single coat worked better. Do note that you’ll want to avoid any “lumps” in the substrate, as shown in the sample images.
These you’ll want to let dry in a dark room. Avoid direct sunlight at all costs. I ended up leaving them in my studio overnight and this was just enough time for them to dry to completion.
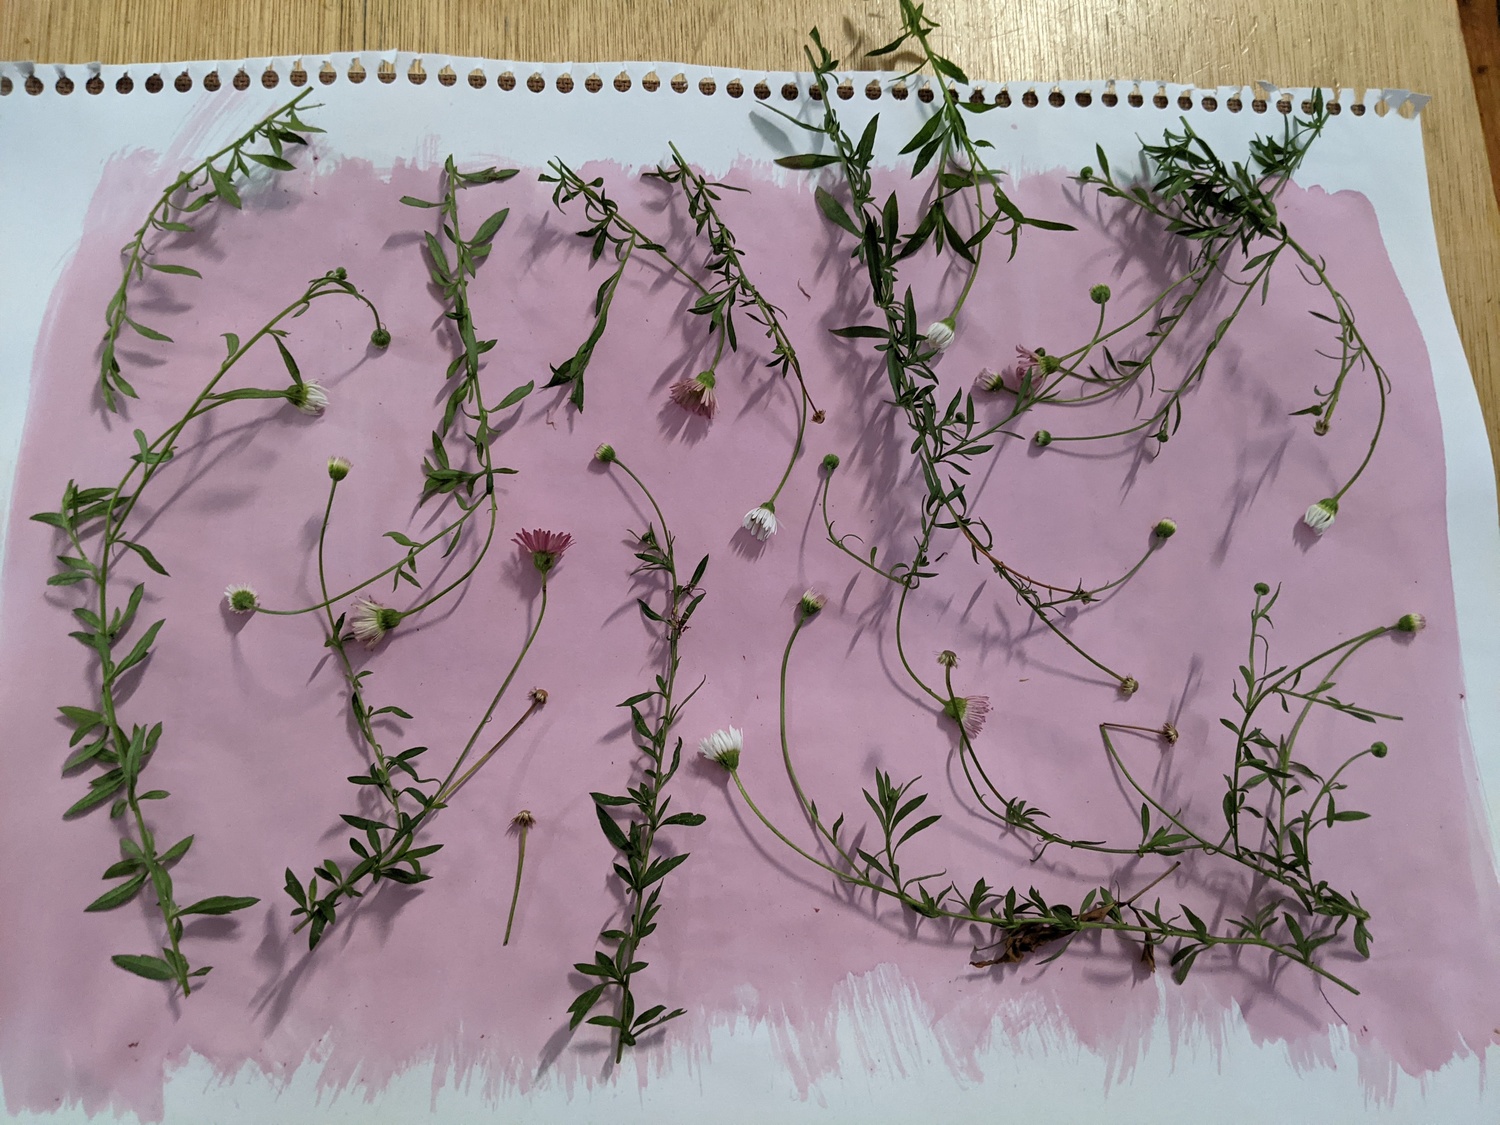
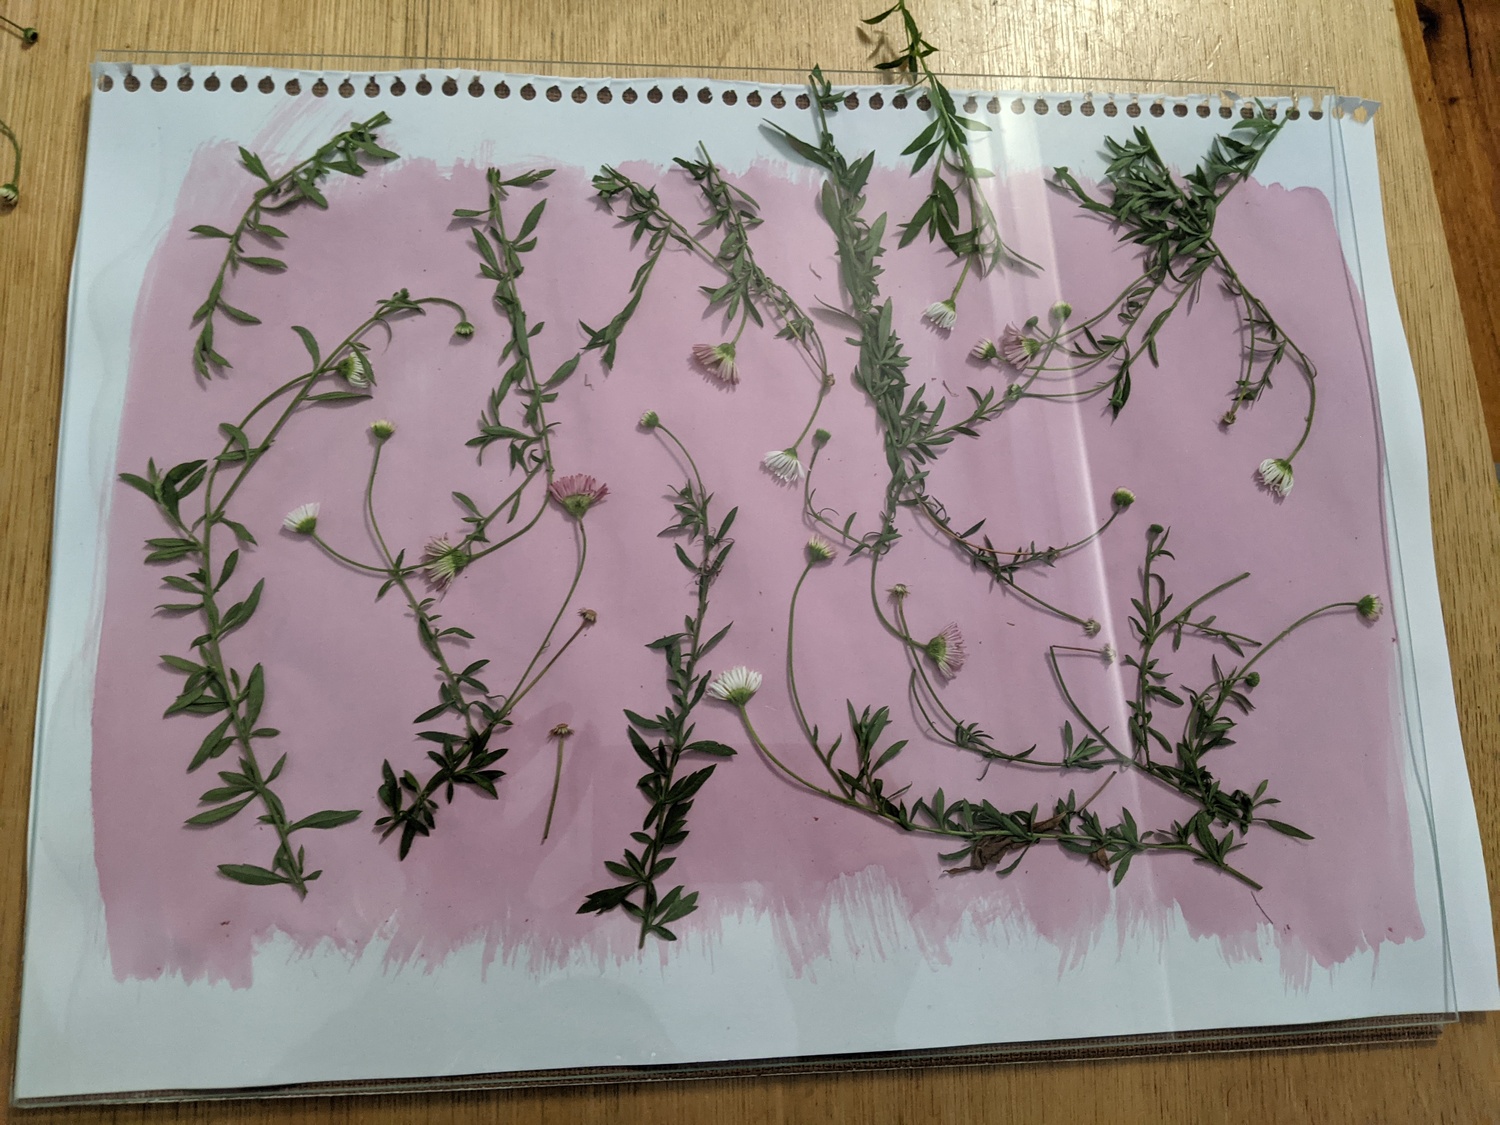
Once your substrate is painted and dried, you can begin decorating it with your plant matter (for exposure). This is the time to experiment and get creative! Do note that the parts which are covered will be dark and the parts which are exposed will be lighter. After you’re done and are happy with your arrangement, cover it with your glass. I got mine from a picture frame (from the thrift store) but you can use any piece of glass large enough to cover your substrate.
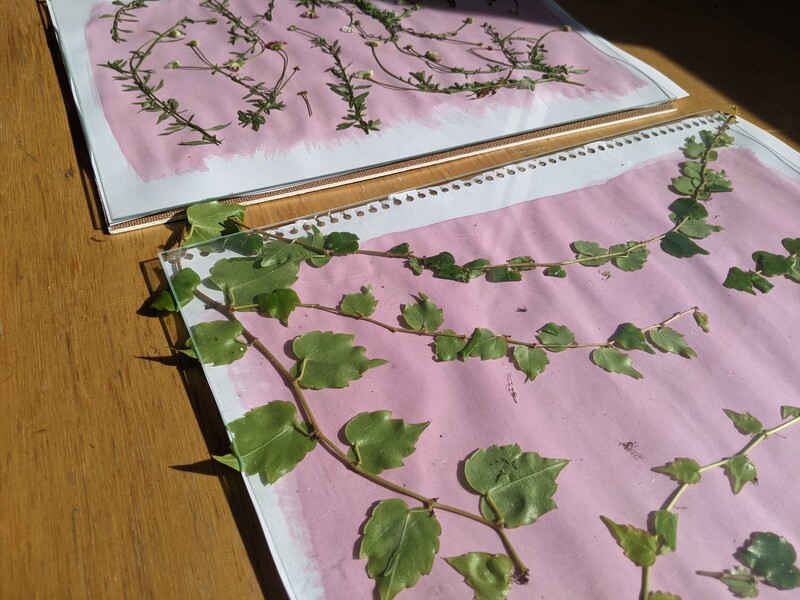
After you have done all this, it’s time to find a nice patch of direct sunlight and leave your work there. I have tried leaving mine out for one day as well as two days and found and found the longer exposure time to yield more contrasted images. I have heard that you can leave your substrate out for just an hour or two with results, but I’ve been a bit afraid to try this out myself given how time-consuming it is to make these things. Hopefully one day I’ll have enough courage to do that (and share the results), but until then these are some of my multi-day images (shown below).
Conclusion
Once you have your image, really enjoy it. Enjoy the process of making it. And don’t rush. The reason I say this is because it won’t last. Anthotypes cannot be fixed; what this means is that eventually what you have made will fade. This usually happens over several weeks. If you do want to preserve your image, now is probably a good time to scan it or take a picture of it. “It’ll last longer.”
With photography, and I suppose also with life, I often forget to really slow down and enjoy the journey. Often, it’s always about moving onto the next thing without even taking in the last one fully. Anthotypes, because they fade quickly, challenge this idea. They really are about the journey and trying different things.
Join the Fstoppers community for free
-
Post comments and join in the discussions
-
Browse the site ad-free
-
Share your work and get featured in the community
-
Compete in the photo contests for fun and prizes
5 Comments
...
I'm glad you enjoyed the article!
What non-photo thing is next week? Pottery?
This IS photography. Pottery, in the sense of throwing pots, really isn't. :)
You need to read up on some history