Growing up in the family's studios and labs, I learned a thing or two about mounting and framing prints, and I also ruined a lot of them in the process. In this video, I'll demonstrate a version of my process so you can skip the lab and mount your own prints, fresh from your home or studio printer.We start by creating a blemish free print on our favorite inkjet paper. In the video, I'm using a 24" wide roll of Moab Lasal Exhibition Luster which is then coated with Moab's Desert Varnish spray. The spray provides a durable top coat to the prints, which prevent scratches or fading, and protect them from splashes, spit, or whatever else may hit your image. I normally apply three even coats and let it dry overnight.
Next we pick our substrate; I typically use Gatorboard instead of foamcore for anything larger than 11"x14" as it tends to stay flat and won't warp over time. One of the other issues with foamcore is that it dimples if it's handled wrong, and those dimples will show through in your print. I precut our piece based on the size of our print (we buy it in full 4'x8' sheets) and file the edges with a straight file to eliminate any burrs or rough areas. Before applying our pressure sensitive adhesive, I always clean the surface with a rag or brush, followed by high pressure air (either an air compressor or canned air).
Now we roll out our pressure sensitive adhesive. As I mention in the video, not all are created equal. The cheaper ones tend to leave air pockets or lift over time, while the better quality stuff gives even, uniform, long lasting adhesion. Over the years I've tried most of them, and these days Neschen Gudy 831 is the only stuff I'll use. It's quite a bit more expensive than other brands, but it's hands-down the best stuff I've found. After rolling out the material to expose the tacky surface we carefully place the substrate, making sure to align the factory edges. If you screw this part up, the whole print will be crooked and you'll have to start over. Once we get our substrate positioned, we can trim the excess and separate it from the roll.
We can use a rubber brayer to apply pressure to the adhesive material, establishing a bond between the substrate and the adhesive. Don't worry if you see small air pockets or ripples at this point, as long as there aren't any creases, it'll work out fine when we remove the release paper and attach our print. I like the wider brayers over the smaller versions, especially when mounting larger prints.
Once we've got our adhesive on the substrate, we can use a straight edge and tear off about a 1"-2" strip of release paper, exposing the tacky surface of the adhesive. I usually avoid removing the entire piece of release paper at this point to prevent dust from sticking to our adhesive. It also helps position the print just right, since we only get one shot at this!
With an exposed edge, I line up my print with the edge of the substrate/adhesive and begin to apply pressure. Next we roll back the print to reveal the torn edge of the release paper and start to peel it back about 6" at a time. While using the brayer to apply pressure (activating the pressure sensitive adhesive) we slowly continue to peel back the release paper until the entire print is in contact with the adhesive. You may see minor air bubbles at this point, but with a few passes of the brayer, they'll slowly begin to disappear and you're left with a perfect lab quality mount.
After our print is mounted, we can fasten it in a frame using a point driver and framer's points. I usually place one point every 6"-10" around the frame. You can either attach a framing wire or other wall mount to hang the frame and I like to add little rubber bumpers to the bottom corners so it doesn't scratch the wall it's hung on.
Lastly, I glue one of my business cards to the back of the print so the client will always remember who made the piece and where they can reorder.


Hi Tony, great video. I watched the other video too on Jewelry shooting. So what's the advantage to photo stacking? How different is it than shooting with a large aperture like F16-22. Does that still not get everything in focus because of how close you are to the subject?
Paul: Because diffraction: http://www.cambridgeincolour.com/tutorials/diffraction-photography.htm and https://fstoppers.com/studio/fstoppers-original-what-lens-diffraction-an...
Kevin is right. Stopping down more will cause the image to actually lose sharpness. But even at f/16-f/22 it still wouldn't be enough DOF to get the entire thing in focus. Each lens has a sweet spot, and it's rarely stopped all the way down or wide open.
I enjoyed seeing how others tackle this mounting thing. The Gudy 831 seems like a winner for the 'forgiveness' aspect of things. Will have to try and locate that here.
I really appreciate you taking time to produce these videos Tony, many thanks.
Thanks John! They're fun to make, and it gives us a reason to use our video gear. ;-)
Nice article that i can learn later on.
Slightly out of topic. But can someone share what type of printer (brand/model) you guys using for printing mostly ? i'm into Black&White.
Michael, I'd suggest the Epson 3880. I have one of those I use for smaller prints (up to 17") and it's incredible for B&W.
Thanks Tony!!!
Have you ever tried to facemount to acrylic?
Yea! It's a pain. I haven't quite perfected it yet. Once I do, I'll share the technique.
Quite an informative and helpful video. I'm not a pro by any means but when I listen to you I can feel that you know what you are doing. Keep up the good stuff!
Perfect video! I just bought myself a Canon ipf8100 and was curious about the best way to mount images. Thank you for this one!
Good advice in general, however do not do a contact mount for a print that's worth anything in the long run because...
1) possibility of warpage with humidity fluctuations
the paper is not free to "breathe" as it swells or contracts with humidity at a different rate from the substract
2) possibility of acid damage - depending on adhesive. most are not truly acid free, many accumulate acid from the environment.
for better archivability it should be matted and adhere to a substrate with a T hinge method on a print border
http://www.logangraphic.com/blog/basic-hinge-mounting-for-picture-framing/
You are absolutely correct. First thing I thought of when I started to watch the video - and then stopped watching.
Good points! The adhesive we use is acid free. We use Gator so it's less likely to warp vs FoamCore. Been doing it this way for about 20 years and never had a single issue. Clearly there are more archival methods out there. This will get you lab comparable results which are suitable for most applications.
@Tony - rigidity helps prevent minor warps but if the adhesive/print material is not strong enough it will still ripple/tear. I think it might have worked for you guys because the humidity in the US might not fluctuate much, but it is a severe problem if used in the tropics where I live
Grey, clearly you're dealing with extreme conditions there in the tropics. Having said that, I've never had 1/2" Gator warp on me due to humidity. I have also never had a print lift, ripple, or tear from this method. I have had matted and framed prints under glass ripple due to humidity though. I personally think this method is more durable. But again, that's only my experience.
Exactly what I was looking for a few months ago.
Sorry I was late. ;-)
You're not late, I was too early. :)
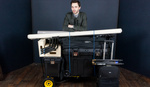
Great video. It's good to know much hasn't changed since I was doing it. I have one request....would it be possible for future videos for them to be a bit more stable? I almost felt like I was watching the Blair Witch Project a little.
LOL HAHAHAH! Vincent I said the same thing. My studio manager was handling the camera and when I saw the footage I thought he may have been drunk while filming (wouldn't be the first time we got hammered at work), but he blames it on the fact we were using a 115mm equiv lens (we just picked up a Blackmagic Cinema and are still waiting for our new lenses to arrive). He promises the future vids will not require Dramamine. ;-)
I need to mount a number of very large prints (30"x45") "full bleed" as in the print goes all the way up to the edge of the substrate. The Gudy is too narrow and I would have to lay two strips to get to 30in wide. I am afraid that the seam would show. Any ideas?
Yea, the seam will show. I think you may be able to buy the Gudy 831 in a 48" roll. If not, you could try spray mounting it. I've had luck with that as well, and the process is similar . . . clean substrate, use a brayer to roll out the print, etc. If you're not into that, the right way to do it is with dry mount tissue and a vacuum press. We can do up to 30x40 in ours, but it's not something everyone has, or has room for. In which case, you're back to a lab.
Try calling http://www.artgrafix.com. They're super helpful and may have a wider product than the Gudy. I buy all my mounting supplies from them (except the Gudy 831).
Thanks so much for the reply Tony. I will call them tomorrow!
Jeff, I tried this today with various papers. Using a thick Fine Art Matte Paper no seam was noticeable. With a thinner (Luster) paper, you can see the seam. Hope that helps.
Tony, why use the pressure sensitive sheet of sticky stuff instead of spray glue?
I know my framer and neighbor (artist) uses spray.
Thank you for the post, awesome and relevant, every time!
Spray glue may work (like 3m Photo Mount), although not as good of a bond and I've had prints actually peel up over time. We actually use that when we want to tack a print in place temporarily. It's also messy as heck and less consistent coverage than adhesive sheets. Your framer friend probably mounts a lot of prints under glass with mat board over the print edge, this is less of an issue.
enjoyed both videos - is it a personnel preference not to use glass in the frame, is that why you sprayed varnish over the print ?- looks good!
Yea, I don't use glass for anything over 11x14.
Tony. What is the process for trimming the Gator board so as not to damage the print?
Score it lightly, then apply increasing pressure with each pass of the blade. It may take 5-10 passes to cut all the way through. Don't attempt to cut it through in one cut, you'll just screw up the Gator and end up with jagged edges. I normally trim the Gatorboard to size BEFORE mounting the print. Then I only have to trim the print if it hangs over the gator slightly after mounting.
Thanks
Awesome and informative video, Tony. Can't wait to put this information to good use.
Good luck dude. Let me know if you run into trouble.
Another awesome BTS Tony, great job. One question- Do you sign the image before or after the varnish? If after, what kind of pen/brush pen/sharpie do you use that doesn't bead up/smear/bleed? Keep up the great work man!
I usually try to sign before the varnish. I use a special two-ended pen that is made for writing on photographic paper. It won't smear and dries instantly. I'd avoid Sharpie or others that could smear. This one has large tip on one end and a fine tip on the other. I'll try to find the one I have online and let you know the make/model. I've had it for years and hope it doesn't dry out b/c I haven't seen them around in a while.
Awesome. I used to watch my grandmother framing prints in the basement as a kid. Great to know the full process.
Have you ever tried a product made by Breathing Color called Glamor 2? It's a varnish that they say can be used to mount your prints. Just wondering about its adhesion properties.
Never heard of it Larry. If you try it out, let me know how it works for you.
Great article Tony - would you care to share your source for purchasing the Gudy 831 ? ... Thanks!!
Joseph, you can go to Neschen's website and find a local distributor. I get mine from my local plexiglass distributor. Laird Plastics. I've also been lucky enough to get from eBay direct from manufacturer.
Tony, Is 3/16" Gator Board ok for prints 12x18 and smaller or do you always use 1/2" Gator Board. I bet there is a market for more printing related videos. Hope you make more.
3/16 is great for anything in that size or smaller. Any bigger and I'd go with thicker. Gator is rigid, but even large prints will have tendency to warp over time if they arent thick enough.
Thanks for replying back.
Some comments after practicing this technique on Canson Baryta 310gsm print sizes around 32 x 40", mounting to 1/2" white Gatorfoam. These prints are made on a heavy paper roll and have a lot of curl.
1. The Gudy 831 can be pulled off the Gatorfoam - it cannot be pulled off the back of the print.
2. Don't use Gudy 831 after it's been pulled off something (anything) - it won't stick to the Gatorfoam well enough to overcome the curl of the heavyweight Canson Baryta. It will still stick to the print well enough to ruin it.
3. Panels wider than 2 feet can be covered with multiple aligned strips of the Gudy 831. Leave a small gap - an 1/8th of an inch - between the Gudy strips to make sure they don't end up overlapping after rollering.
4. If you trap any dust under the Gudy 831 pull it off and throw it out. Start again with that strip.
5. I tried using an inexpensive 6" black rubber brayer made by RollRite, but it would occasionally give off black specks of carbon which would smear if I tried to brush off the print - very bad. I am now using a lucite roller, and I have a wider not black one on order.
6. I use a counter I can walk around (an island) to work on the mounting. To apply the Gudy 831 to the Gatorfoam I tack the end of the Gudy to the edge of the island, then pull the roll up and over the Gatorfoam from the opposite side of the counter. This makes it easy(er) to keep tension on the Gudy and see where it's aligning. Once the Gudy is rolled on I trim it from the Gatorboard and throw out the trimmings (see #2).
7. Be very careful pulling back the release material - don't lift the glue layer from the Gatorboard. If you do, it won't stick to the Gatorboard properly. I use a length of 3/4" PVC pipe with a slot cut along it to roll up the release material. As the release material is initially pulled back from the glue I work it into the slot, then roll it on to the PVC pipe. This makes it possible to control pulling the release material while standing on the other side of the print.
8. The most critical step is the alignment of the print on the Gatorboard. Before peeling back the release material I align the print on the board and use a spring loaded clamp to hold one far corner. I then move the clamp about an inch or so towards me so that there's room under the print for the pipe. I make sure the long edge of the print stays aligned with the Gatorfoam board. I let the print curl away on the near short side and start peeling the release material, wrapping it around the PVC pipe after inserting it into the slot. Then I pull the print back over the PVC pipe and try to align the edge with the Gatorboard. This is hard because the curl in the print means that even if the two near corners are aligned, the center of the print edge will recede from the edge of the board. Starting from one corner, I stick down the print all along the near short edge. The clamp should keep the long edge more or less under control. At this point print alignment is committed.
9. Then with one hand on the PVC pipe I roll up the release material (it will stay if let go), and with the other I roll the print onto the Gatorboard. The pipe helps keep the print from contacting the Gudy 831 until the roller pulls it down. Be very careful not to roll a wrinkle into the print - don't use too much pressure until the print is down.
10. If there's more than one strip of Gudy 831 make sure to stop rolling the print while there's still some of the current strip exposed. Pull back the print in a gentle curve (I hold it in place with a weight), roll up the last of the release material from the current strip of Gudy, and start rolling release material from the next strip. Let the print back over towards the far side, and continue rolling it down on the Gatorboard.
11. If the print overlaps the Gatorboard (most of mine do on two sides), I turn the whole thing over and trim along the edge of the Gatorboard with an Exacto knife.
I wrecked several prints getting to this stage. Your mileage may vary. And thanks to Tony Roslund for showing how this can be done.
Tony! This is a a great video, very informative and super helpful. I just wanted to make sure I understood that your print is NOT behind acrylic or glass? Maybe it is and I just missed it, but I wanted to clarify that. In all your years of selling prints this way, have you had customers come back with damaged prints? I realize this is not "archival," but I love the process, and I love being able to do this in my own studio. Thanks in advanced.
Great video, thanks. For anyone interested, the Neschen Gudy 831 can be obtained for quite a descent price, with fast and relatively affordable shipping, from Germany. Check out https://www.fotomayr.de/.