There have been debates circling the internet lately on users abandoning Adobe’s eco-system of photo applications for a new player in town. Macphun, soon to be Skylum Software, has been making waves lately with their latest release of Luminar 2018. The once strictly Mac-based software company has branched out (part of the reason for the renaming) to include Windows users as well, and people are stoked. With a seemingly endless list of features and upgrades to the latest version, many have considered that it may be about time to try something that’s just different than the industry giant, Lightroom. However, users are still perplexed on how exactly they would make the change, what would they miss from Lightroom, and is it really necessary.
One cause for hesitation for many users is the ability to utilize the custom presets that they either have spent endless hours perfecting, or spending their hard earned cashed purchasing. There’s finally a solution, albeit a little time consuming, but it’s finally possible to utilize your presets in Luminar with the use of LUTs (look-up tables). LUTs are commonly used in video work for color grading, however, we can employ the same technique for use with our dearly beloved Lightroom presets.
The Explorographer, A.D. Wheeler, has a step by step tutorial on his YouTube page to guide you through the process. Now, while this is a great solution, I can only hope the developers over at Skylum are working on their solution for importing the .lrtemplate files we utilize to expedite our editing.
The steps in the process are simple but plan on enjoying some music and spending some time on a rainy day importing as many of the presets as you’d like. Oh did I mention you have to import one look-up table at a time into Luminar? Let’s dig in.
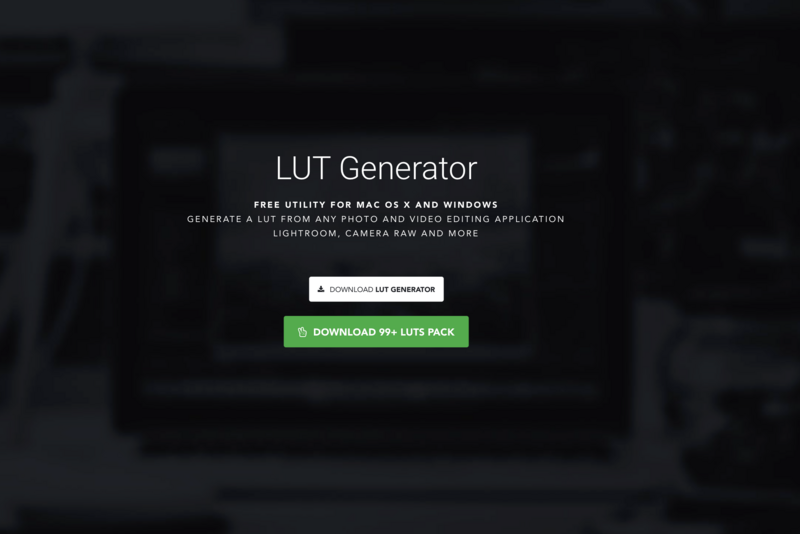
- Visit the LUT generator website here to download the generator for your operating system. Let me be clear, I do not know the developer behind this project, but fill free to donate if you find this application useful. Once you submit your email address you’ll receive a link to download the software. The software has worked flawlessly for me thus far.
- Once you're all set with the LUT generator you’ll create a PNG HALD file, I saved mine to my desktop for easy access. Think of the PNG HALD file as a carrier for your preset data.
- Import the PNG you just created into Lightroom, then apply your favorite preset to the PNG. Important to note; a look-up table can only affect colors, contrast, brightness, gamma, etc, so you can’t add grain, noise reduction, vignetting, sharpen, or any other dynamic effects.
- Next export the PNG file out as either a PNG or JPEG at 100%, 72 DPI, and I’d recommend giving it a custom name to keep yourself organized.
- You’ll now head back over to the LUT generator application and select the second button “Convert to CUBE.”
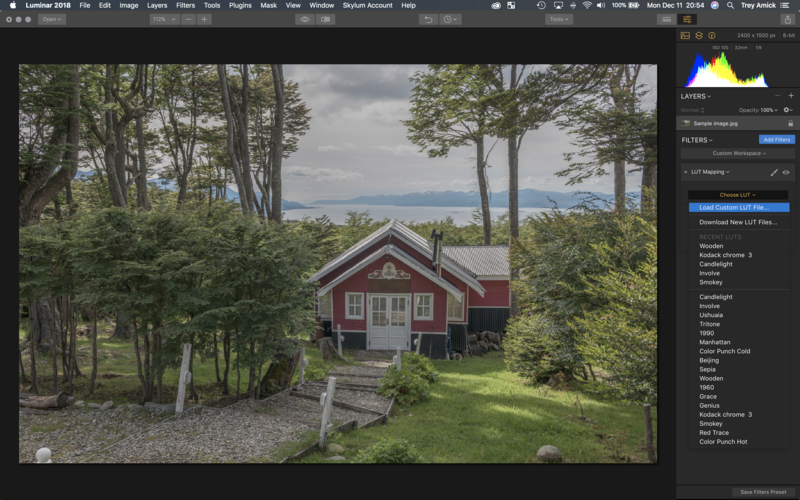
- Open Luminar, select LUT Mapping under the filters selection, load custom LUT file, and select your newly created cube file.
- Your LUT file will now be under the Recent LUTs list in Luminar.
As I mentioned earlier, this is a great option if your wanting to utilize your Lightroom presets in Luminar now, however as you can see, it’s not as quick of a process as many would like. Thanks to the Expolorgrapher's video on making use out of our previous Lightroom presets in Luminar!
Check out more of Wheeler's work on his website, Instagram, or YouTube Channel.


Join the Fstoppers community for free
-
Post comments and join in the discussions
-
Browse the site ad-free
-
Share your work and get featured in the community
-
Compete in the photo contests for fun and prizes
4 Comments
meanwhile reallyniceimages (RNI) updated their styles for capture one which are amazing
-or got with Capture One, the actual industry standard; and best option for speed and color handling, and everything else.
Hey Trey, thanks for the shout out! I also have 5 LUTS for free in my shop on my site: https://www.theexplorographer.com/universal-tools/