
Dodge and burn is a well-known technique amongst the retouching community. Most retouchers will use it to smooth out transitions and micro-contrast on portrait, fashion, or beauty images. However, it can be utilized for any genre of photography and broader uses than just skin cleaning. It can be used to direct the viewer’s eye and create more compelling, dramatic images with a few clicks. If you shoot and edit weddings and are looking to step up your post-processing game, this article is definitely for you!
Shoot to Process
Current digital sensors give us a large dynamic range to play with in post. To get the most out of it, knowing your camera, nailing the exposure, and shooting raw are all essential. Different cameras will react differently to a similar scene. For example, while most Nikon’s retain a lot of details in the shadows with little noise, most Canon’s keep much more details in the highlights. Thus exposing with a Nikon or a Canon may differ if you wish to get the most out of your sensor.
What you usually want to do is expose for the brightest highlights in the frame without clipping them. You probably know this technique as ETTR (exposure to the right). This is where knowing your camera’s sensor is necessary. Because while some can handle slightly clipped whites, others will do much better with a bit of space on the histogram’s right. I know for example that my D750 at base ISO does much better with a histogram pulled to the left rather than pushed to the right. Now that you have a more or less proper exposure for your sensor, let’s talk about the editing process.
Dramatic Yet Efficient Editing
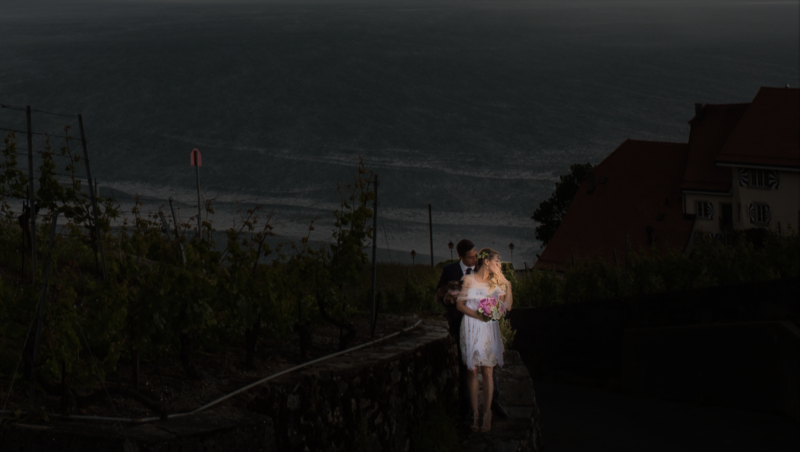
Bring your files in your raw processing software of choice. As I guess most of you use Lightroom for weddings, let’s go with that! Note however that Capture One or any other app will do just as good of a job as long as it offers local adjustment brushes or filters. My image for this example is the following:
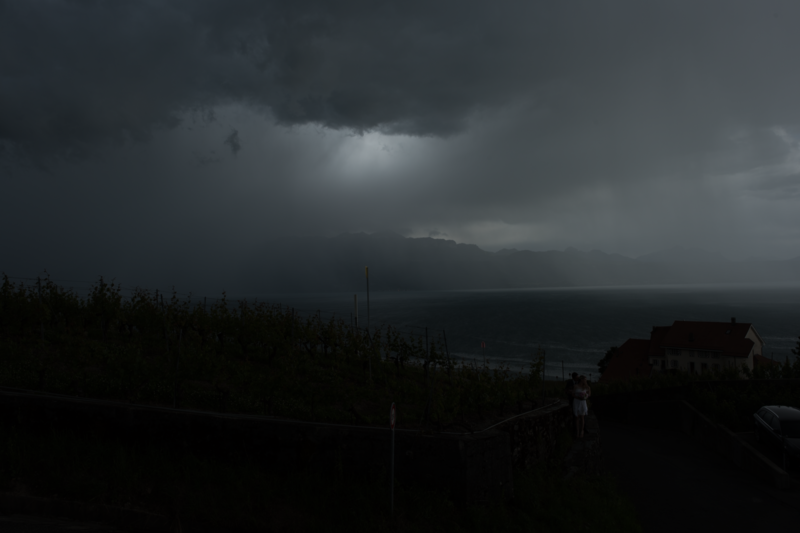
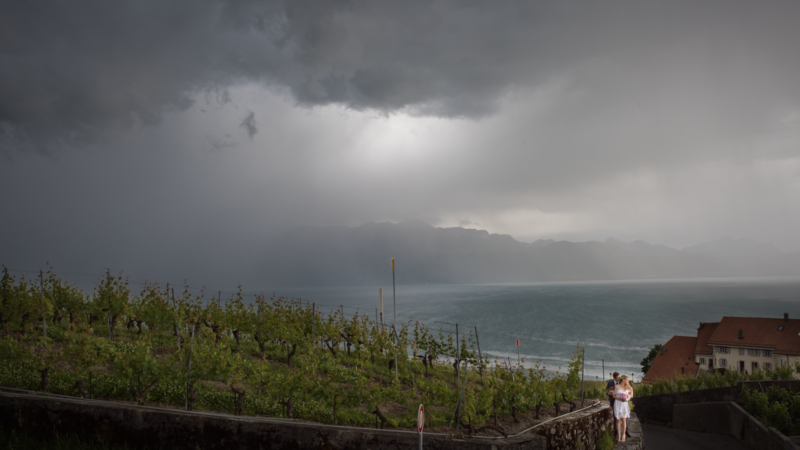
As you notice, it’s very dark. In fact, it’s almost hard to distinguish the bride and groom. I exposed for the sky. While I could have pushed my exposure more to the right, I knew I could bring back details from those dark tones without having to edit the sky. And this is an important point: stay efficient in your retouching. Pushing my exposure to the right more would have forced me to burn the sky down and dodge the couple back in. Instead, with this exposure, I’ll just dodge the couple and save a bit of time. It’s the reason why I don’t really like to say that you need to use ETTR, but rather expose for your sensor dynamic range and your post-processing needs. But before working the dodge and burn magic, let’s correct the white balance, do the basic color correction, and the other primary adjustments:
Now that I have cropped my image, applied my standard color preset, and tweaked the highlights, shadows, blacks, and whites, I can go further and use my local adjustment brush to paint back what needs to be. In Lightroom, press K on your keyboard to access the local adjustment brush quickly.
This tool can be used in many different ways. But let’s try to keep it as efficient and easy as possible. We are going to enable automask and define the different zones that we want to bring back. On the sample image, there is the vineyard on the left, the couple in the middle right, and a wall on the right. I could brush everything back all at once, but I want my couple to be the brightest point of the image. So instead of estimating opacity and flow, I’m simply going to create a pin (layer) for each zone. This way, I can then adjust the exposure and other sliders for each of them independently and quickly. I usually start with a local brush that brings the exposure up by one or two stops. This way I see what I paint without using the annoying red mask overlay.
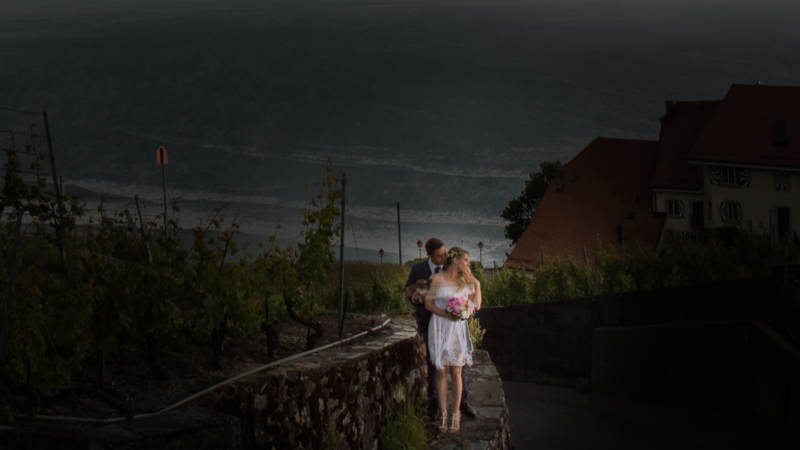
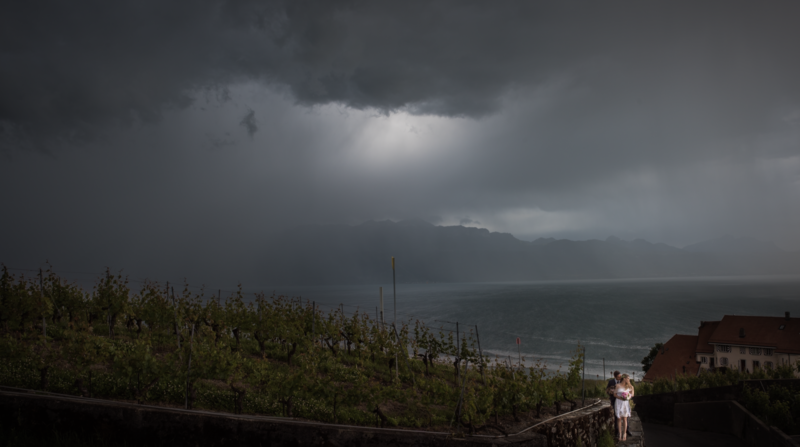
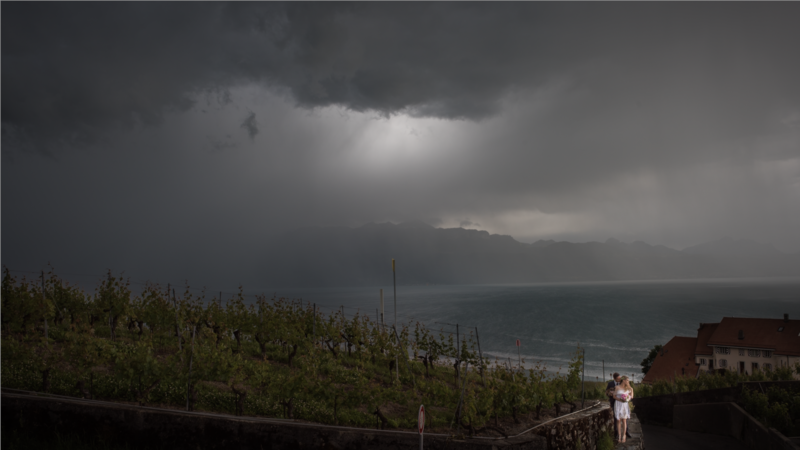
Automask can sometimes be a pain to work with. As you see here, some of the brightest tones on my couple were left out. To solve this problem, you can either create multiple pins for one zone and have lighter adjustments, you can make your selection a bit wider so that the automask algorithm selects more areas, or you could disable the automask and paint the missing zones manually. In this case, I used a combination of the three solutions, and it’s already looking much better:
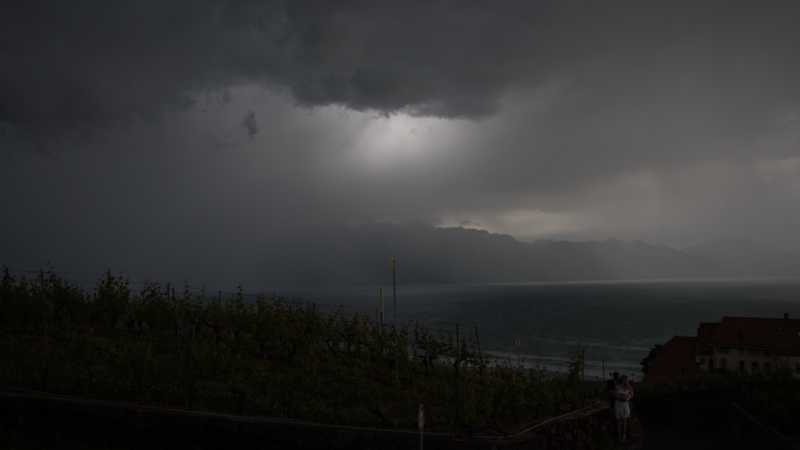
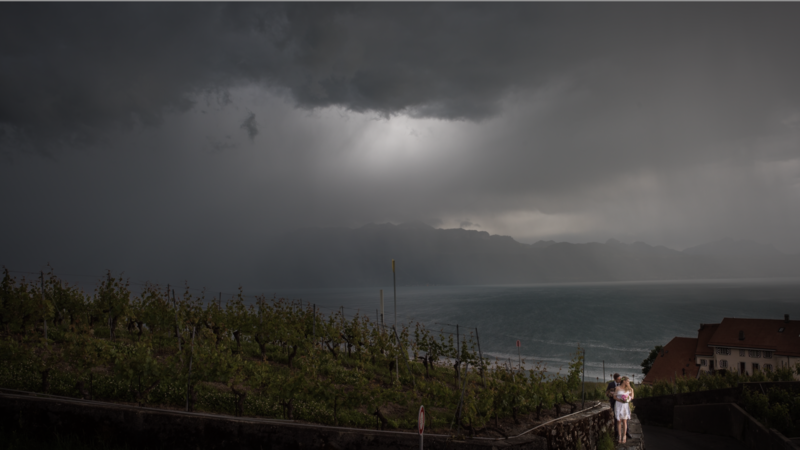
Let’s do the same with the two other zones so that the couple doesn’t look "photoshopped in" like they currently do.
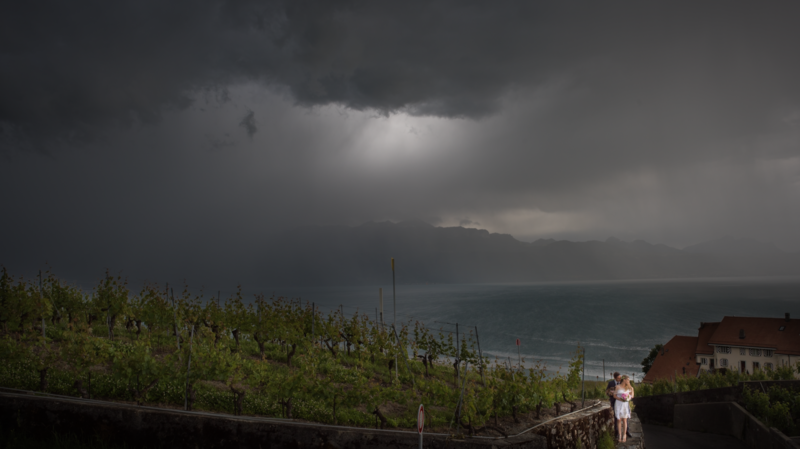
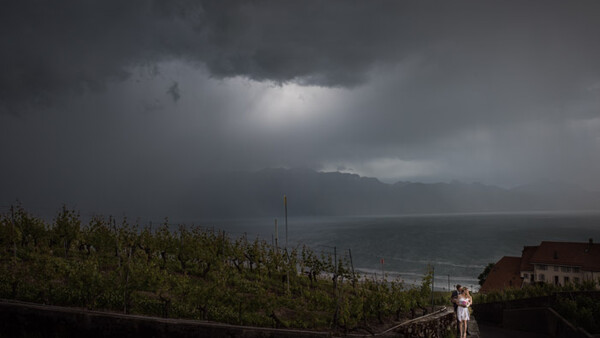
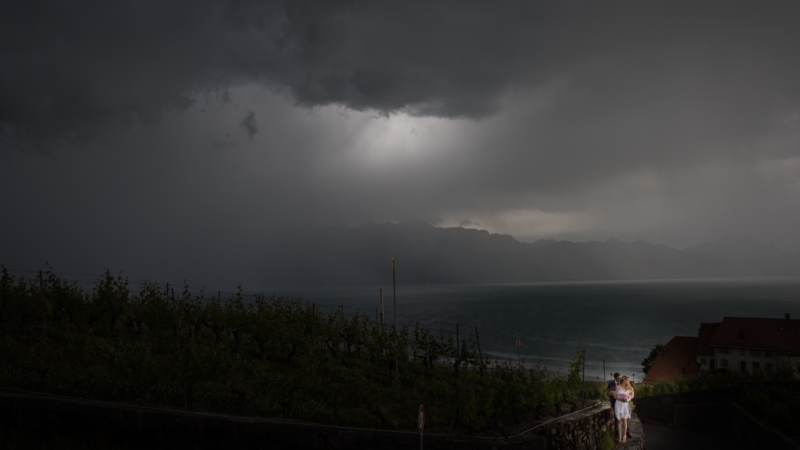
And here we have it. A dramatic image achieved with just a few clicks. This look might not be for everyone, but it can be tweaked to be more or less punchy. You could have a more neutral initial exposure and make the dodging less visible like so:
Refine and Adjust
The adjustments can actually go as far as you want. For a more dramatic look, you could choose to desaturate the whole image. Then, when adding more exposure with a local adjustment layer, the saturation will be brought back a tad. So, if you desaturate the whole picture, the zones that you dodge will be a bit more saturated and direct the viewer’s eye even more. But if that’s not enough, you can add saturation manually in your local brush adjustment settings.
Bringing back exposure, however, might in some cases decrease contrast. So, don’t be afraid to boost the contrast and clarity a bit when dodging back part of an image.
Another idea to strengthen the contrast between your subject and the rest of the picture would be to play around with the white balance. Making the overall image cooler and the dodged part a bit warmer will help separate your subject from the background. And before going into Photoshop (if needed), don't forget to do as much as possible in Lightroom or Capture One. In the example below, I remove the pole that was distracting. The remaining ones will be easier to remove in Photoshop. My final image in Lightroom looks like this:
Keep in mind that this technique is not meant to be perfect. The automask will probably be far from spot-on. If printed big, the images might need a bit more refinement before going to the lab. To keep your workflow efficient and fast, make sure to expose in camera for the environment like you would when shooting with strobes, and then bring back your subject in post.
I am sure some strobists will die of a heart attack reading this article. Dodging and burning should not replace strobes! In some situations, however, a flash cannot be set up, either for timing reasons or because a location doesn’t allow the use of one. Anyone who has shot a wedding in his life will know that. This is when dodging and burning this way comes in handy. It’s also great to help give more dimension to a picture and direct the viewer’s eye.

Join the Fstoppers community for free
-
Post comments and join in the discussions
-
Browse the site ad-free
-
Share your work and get featured in the community
-
Compete in the photo contests for fun and prizes
No comments yet