
Did you know there are some tools in Lightroom that can help replicate a flash color gel modifier? I love the drama and interest you can create in what would otherwise be a throwaway image.
My busy life doesn't allow much time to go shooting these days. When I do get out, my photography becomes sort of like a shopping spree where I'm trying to capture as much as I can in a small window of opportunity. This means not passing up on details shots and photos that might make people wonder what the hell I'm photographing.
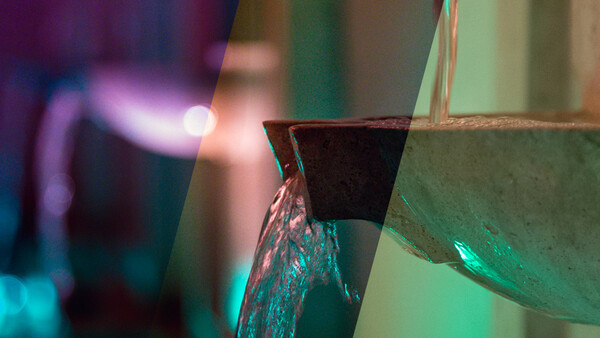
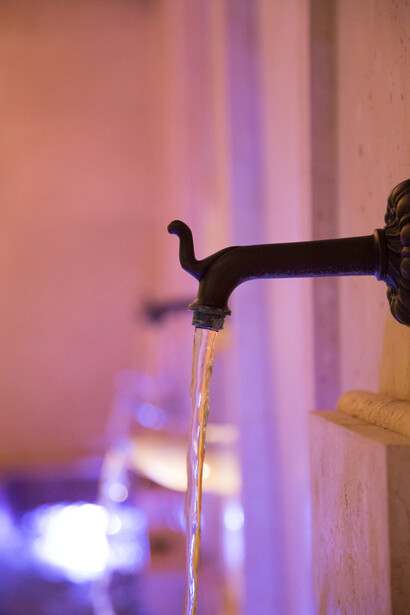
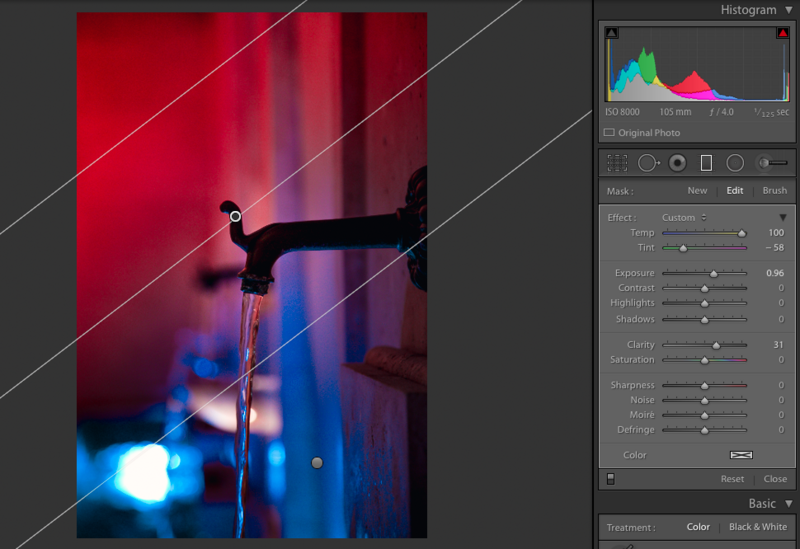
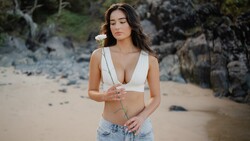
After an awesome anniversary date night in Buffalo, New York, my wife and I spent some time taking shots of the cool restaurant we ate at. The entrance had an ornate fountain with some very cool lights. I always enjoy photographing water because of the infinite variations you get from the liquid itself and the way it reflects light.
I treat almost all of my captures like a ball of clay. A raw material to create with. The beginning point will often have no bearing on where the edit may end up. This freedom to experiment and explore different looks and techniques is one of my favorite aspects of modern-day digital photography.
Using flash gels is something I'm familiar with but never tried. The Fstoppers community is full of great shots using off-camera flashes with translucent colored gels placed in front of the lights. I hope to try it someday when I get more time, but until then I've found some decent ways to spice up the colors in your images.
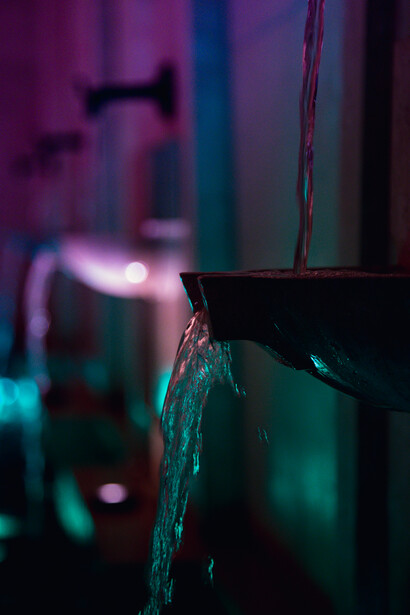
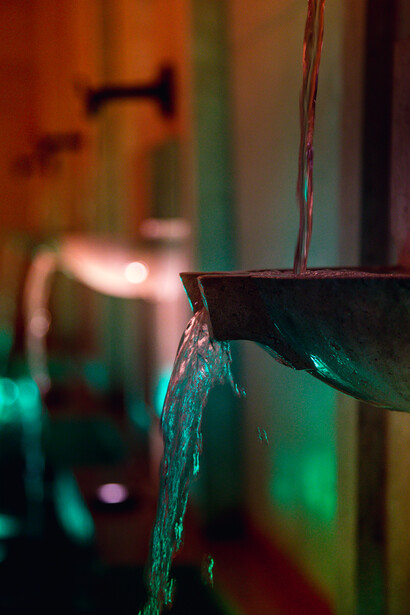
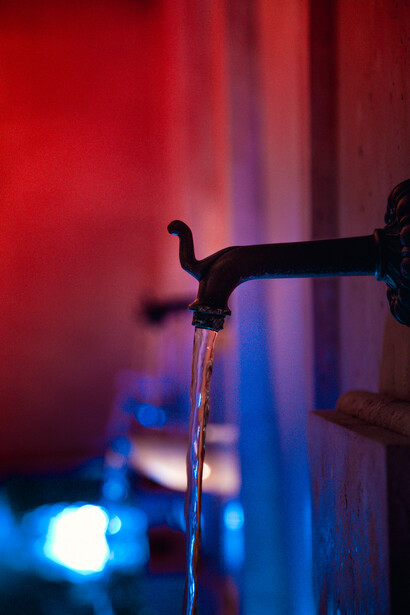
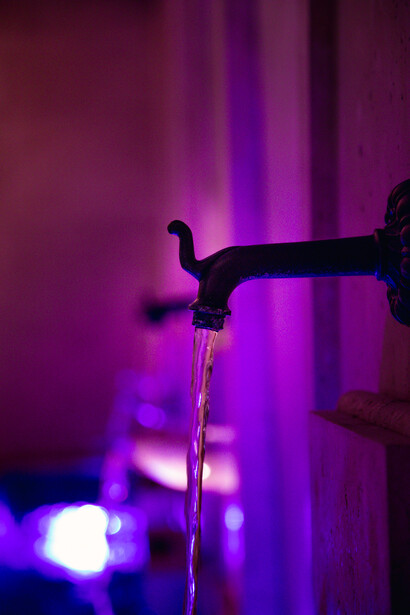
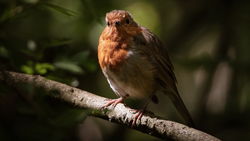
Check out these alternate color shots of this photo.
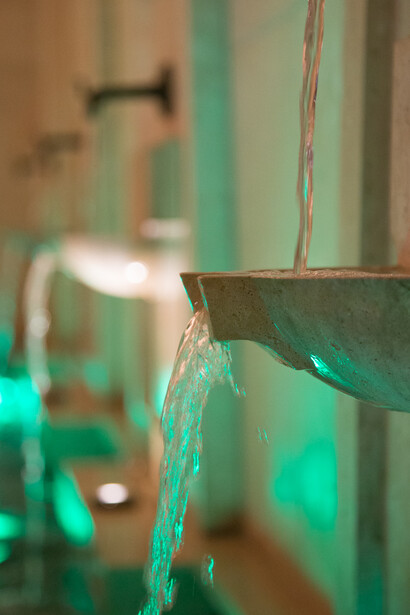
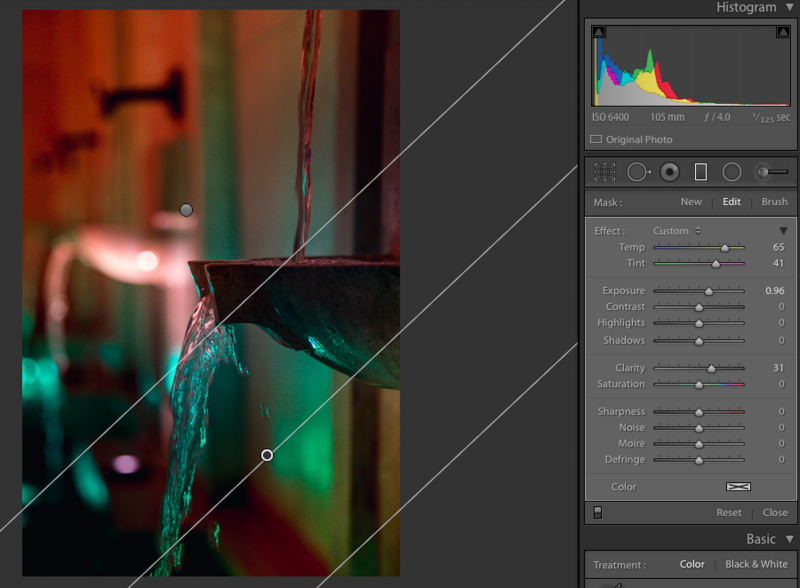
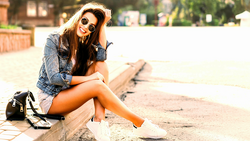
Most of the magic is simply done using the graduated filter and white balance sliders. I prefer using the temp and tint instead of actually adding a color effect since it is adjusting the existing tones in the image instead of layering a color on top.
I used the same technique with this photo but went with some different colors.
The distance between the two lines determines how sharp or gradual the changes you apply are applied. I like everything to look realistic and not be obvious. Sometimes peeking at the smaller image in Lightroom's navigator is a good way to see if your adjustment looks unnatural or too sudden.
Your results may vary, but being able to create a lighting effect while post-processing can expand your capabilities and change the way you think about the existing conditions when you shoot. If you give this a try or have another color trick feel free to share in the comments.
Join the Fstoppers community for free
-
Post comments and join in the discussions
-
Browse the site ad-free
-
Share your work and get featured in the community
-
Compete in the photo contests for fun and prizes
8 Comments
Amazing !!!! Thanks
Hah, nice ones ;) I'm waiting for channel mixer in LR - I want to swap channels, to emulate Lomochrome Purple and Turqoise films without PS :P
Agreed! It seems like such a no-brainer feature. Thanks, Konrad.
I wish they would allow HSL adjustments with adjustment brushes.
I think we all do, David. It would make for so many more editing opportunities.
It's wishful thinking though. They don't want to give too many features to Lightroom since that might stop some people from needing Photoshop
I do this all the time, especially after using jells. When you don't have to worry about persevering skin tone, just push whatever color you like.
https://fstoppers.com/photo/221926
Nice! Yes, if the skin tones need preserving you have to watch things a bit for sure. Thanks for the comment.