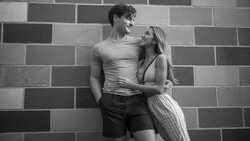
A lot of photographers look for ways to give their portraits a three-dimensional "pop," whether that's through the lens used or some sort of post-processing technique. This great video will show you a quick and effective method for getting that look using Photoshop.
Coming to you from Unmesh Dinda of PiXimperfect, this great video shows you a fast and easy way to give your images a bit of a three-dimensional pop. The technique relies on something called "bump mapping," which is normally used in computer graphics to give the impression of texture on a given object. However, by leveraging this technique for portraits, you can use it to give your subjects a real pop that can really catch the viewer's eye. As Dinda mentions, remember to mask the effect in, as it can make undesirable changes to things like eyes and leave halos around the outline of the person. And of course, as with any such technique, it can be very easy to go overboard and create something that looks unrealistic or a bit tacky, so be sure to step away for a few minutes and take a second look with fresh eyes so you can adjust the opacity if needed. Check out the video above for the full rundown of the technique.


Join the Fstoppers community for free
-
Post comments and join in the discussions
-
Browse the site ad-free
-
Share your work and get featured in the community
-
Compete in the photo contests for fun and prizes
15 Comments
Very interesting. There are only 12 steps and it can come in handy for the right portraits.
Yeah, this is definitely something for a specific kind of portrait, but I think it's very neat in that context.
This will also work for some product shots. In fact, I tried it (very lightly) on a shot with water droplets and I was happy with the result.
works great to enhance texture with side-lighted images
Awesome tutorial dude! No stupididly long intros no s*#t talk, straight to the topic. Very helpful, thank you!
He definitely improved his videos - I watched some of his videos maybe a year ago or so and videos were full of intros and long talks something like - "...but before we start let me explain...". Now its much more condensed and right to the point of the lesson he wants to deliver.
I agree now he does it much better.
He has found a balance. Sometimes it was nice when he went into great detail so you understood exactly why something was happening.
Agree. I was thinking like to split: some lessons are pure hands-on practice but others like theoretical stuff. )
Great concept brilliantly delivered.
I liked this video so much that I added it to my "Photoshop Quick and Easy" YouTube folder. Thanks for sharing!
What I will primarily try with this technique is to "fix" some of my flat woodland images :)
Umesh is surely the best Photoshop teacher that you can find on Youtube. All his tutorials are really very interesting and everything is perfectly explained!
I could say that we need more people like this… but him is really unique.
Buy Zeiss less, not cheaper but efficient
I spent the first 2 mins trying to figure out his hair.
I'm on a 2017 iMac Pro with a top of the line graphics card and I can't get the preview of the bump map to update as I move the sliders. Any ideas?