
A basic understanding of the physics of light can help us to achieve the best possible photographic results. Here are some very simplified explanations of how what we learned in school science lessons can affect what we do with our cameras.
There’s a lot more to light than meets the eye. Okay, so that’s an awful pun, but it is both metaphorically and literally correct. Not only is it a more complex subject than we need to know in our everyday lives, there is a lot more light hitting you than your retina can convert into nerve impulses that are sent to the brain. There is less light than that landing on your camera sensor that gets turned into an electronic signal and transmitted to the camera’s processor.
In other words, our eyes can’t see all the light there is, much of it is invisible to us, but they see more than our cameras.
Get to Grips With Your Camera's Dynamic Range
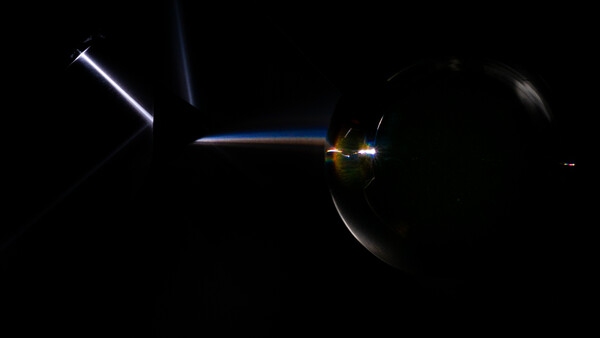
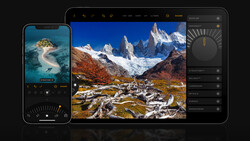
On a bright day, you will see most of the details in both the bright highlights of the sky and the deep shadows under objects on the ground simultaneously. Your camera, with a single exposure, can’t see as wide a range of tones. However, modern sensor technology has improved dramatically and, as you can see from the image above, they have the ability to see both highlights and details in darker areas. It wasn’t that many years ago when I would have had to bracket the exposures of that scene and then combine them to create a high dynamic range (HDR) image to be able to see the top of the lighthouse when pointing the camera directly at the sunrise.

As we get older, our eyes gradually lose our capability to see as wide a range of tones as we did in our youth. Nevertheless, we should see between 18 and 20 stops of tonal range between black and white. Top-of-the-range cameras are between 12 and 15 stops, although a recent sensor developed this year claims 24.6 stops. Don’t worry too much about that, though; your camera will still take fabulous pictures.
The Importance of Our Visible Spectrum
What we call visible light is a tiny fraction of the total electromagnetic spectrum that we and our cameras can see. I find it quite incredible that we can differentiate the different colors of the spectrum that occur in a range that’s only 320 nanometers wide. In other words, we can tell apart all seven colors that comprise white light plus all their combinations.

We are fortunate that most of the photons that hit the earth fall into the bandwidth from 380 to 700 nanometers. It is a happy accident resulting from our planet being in the Goldilocks zone, exactly the right distance from the right type of star. Plus our atmosphere has an ozone layer that filters out the ultraviolet light that would cause us sunburn and worse. If we were bathed in more energetic particles, such as UV or gamma radiation, we would not last long before we were cooked. At the other extreme, if the wavelengths reaching us were a bit longer, we would need much bigger eyes and would have difficulties threading a needle.
How Bending Light Affects Our Images

As the earth spins and dawn arrives, we see the sun appear before it’s physically above the horizon. That’s because, like passing through a prism or raindrops, the light bends when it hits the atmosphere. Consequently, that bending of light, called refraction, means we can see below the horizon. It’s the same effect as when you put a spoon into a glass of water and see it bend.
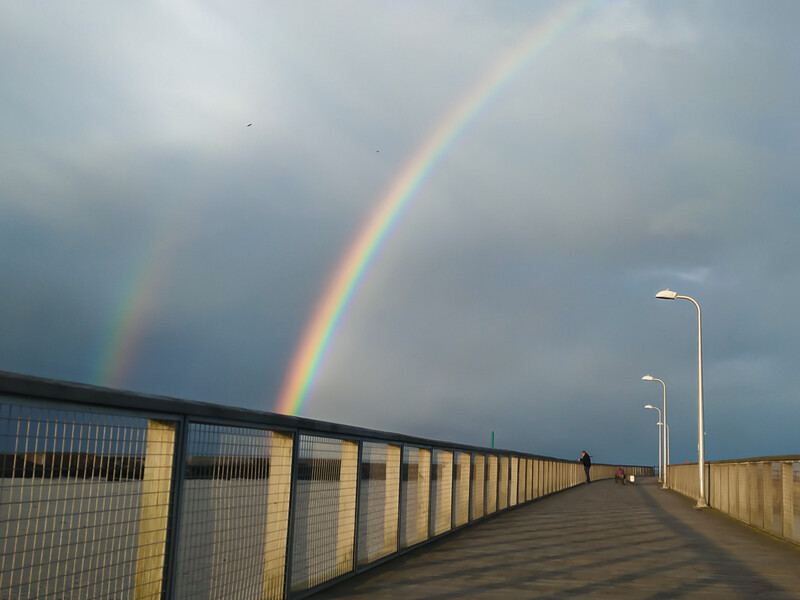
White light is made up of seven different colors: red, orange, yellow, green, blue, indigo, and violet. We see these in a rainbow and on the cover of The Dark Side of the Moon album by Pink Floyd.
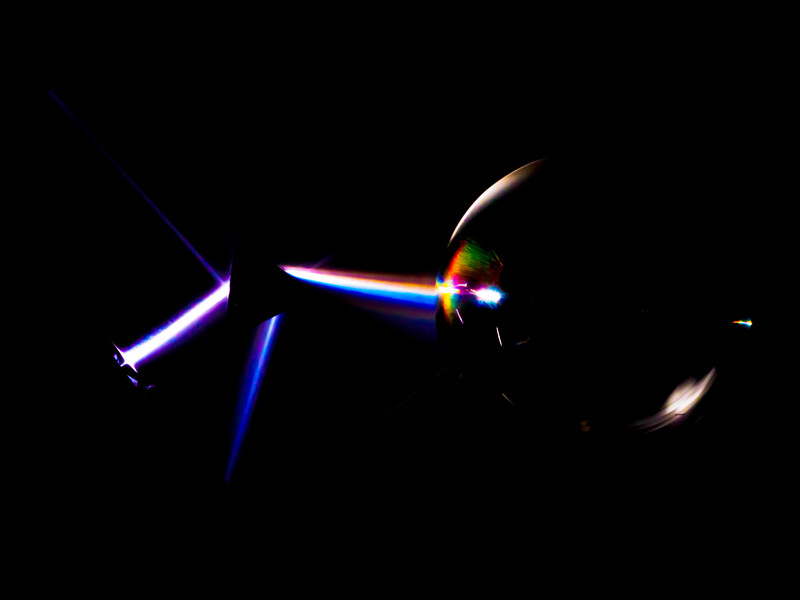
Each color has a different wavelength and therefore travels at a different speed. As a result, the colors bend at different angles, which is what makes the white light split into its component parts. Red light slows the least and is therefore diffracted less. At the other end of the spectrum, violet light is slowed down the most and is refracted more. This process of splitting the light is called dispersion. The more refraction there is, the greater the dispersion. Unsurprisingly, diamonds have the highest refractive index, which is why they sparkle with colors.

That splitting of light is usually unwanted in photography. The last thing we need from a lens is it making rainbows. When it happens, we see it as color fringing or chromatic aberration around high-contrast edges. Cheap lenses are prone to this fault. A perfect lens would have no aberrations and all the different wavelengths would converge on a single point on the sensor. To get close to this, lens manufacturers have multiple glass elements within the lens that help bring the different wavelengths together. Modern lens technology is getting constantly better and contemporary professional lenses exhibit no visible aberrations.
Diffraction also occurs as light hits an edge. Imagine ripples on water hitting an obstruction, they will bend around it. The same applies to light.

Why We Usually Avoid Very Small Apertures
Stand outside on a bright day and look at your shadow. You will see that the outer edges of it are not quite as dark as the middle. That lighter edge is caused by the light bending around you. Incidentally, that dark part of the shadow is called the umbra, and the lighter edge is the penumbra. The farther from the light source you are, the larger the umbra is in proportion to the penumbra, and the sharper your shadow becomes. That's something to consider when using flash and studio lights.
With photography, this light-bending effect happens when the photons bounce off and bend around the edges of the aperture blades. The smaller the aperture, the more pronounced that bouncing and bending becomes. That’s because the proportion of diffracted light to un-diffracted light is high at small apertures.
This is why photographers usually avoid the smallest apertures because the increased proportion of diffracted light causes images to be less sharp.
The Reason the Sky Is Blue
Not only does this bouncing – properly called scattering – occur when light hits boundaries, but also when light encounters other particles. Because blue has shorter wavelengths, it is scattered more easily than red, which is why we see the sky during the day as blue.
As we look toward the horizon, the sky can appear whiter. That is because there is more atmosphere for the blue light to be scattered repeatedly, which removes the blueness. Furthermore, looking obliquely through the atmosphere the extra particles scatter other colors too, plus there’s also the light reflected from the planet’s surface affecting it.

All these factors result in the different wavelengths being mixed again and producing white light. The exception can be over the sea, where the blue of the water is reflected up into the atmosphere turning the low sky blue again.
Using a CPL Filter
The scattered light in the sky is polarised. That means that the blue light waves travel in a single direction, as opposed to randomly in all directions. This polarized movement is perpendicular to the light source. Therefore, if you fit a circular polarizing (CPL) filter to your lens, you can cut out much of the light in the sky at 90 degrees to the Sun, making the sky appear darker.
Polarizing filters are great for taking away reflections off the water’s surface, allowing you to see more clearly what lies beneath because the reflection is polarized. You can also remove glare from, say, damp, autumnal leaves, allowing their colors to become richer.
The Physics Behind Those Glorious Sunsets
As the sun gets low in the sky, the sunlight must pass through a lot more atmosphere before it reaches you. At low levels, it is filled with dust and water vapor. This scatters the blue light even more and only the reds and oranges get through to our eyes, hence glorious sunsets with warm colors.

Warm Colors Are Not Warm At All
When I say warm colors, I mean psychologically warm. We think of reds, oranges, and yellows being warm colors and blues being cold. However, in physics, it's the other way around. Think of a blacksmith heating a piece of metal. At first, it glows red, then yellow. As it gets hotter it turns a blueish white. A welder's gas torch is exceptionally hot and can melt steel. It burns blue.
There's a Reason Why Your Camera Used Red, Green, and Blue
There is a question that I am often asked. Why do photographic sensors and computer screens use red, green, and blue to reproduce colors instead of red, orange, yellow, green, blue, indigo, and violet? That is the big difference between science and engineering. It is possible to achieve white by combining just those three colors, which, from an engineering perspective, is the simplest way to achieve the desired result. Finding a means of combining all seven colors of the spectrum on a camera sensor or computer monitor would be complex, and expensive.
However, like everything in photography, there is a compromise. The camera and your computer screen using the three primary colors of red, green, and blue cannot reproduce anything like the range of colors available to our eyes in the real world.
Even that isn’t as simple as it first seems. The range of colors differs depending on the device. Firstly, there is the virtual image, which is the most precise version. It’s what your camera records when shooting raw and what your editing software understands your image to be. Then there is the rather more limited version of colors that appear on your computer monitor, or your camera if you are shooting jpegs. Different again is the version that you are able to print.

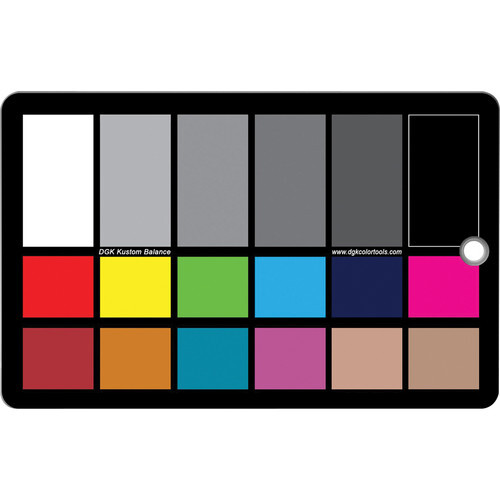
What we really want is for these three different ranges to be the same. To do that, we use color management. With color management, we are defining maximum and minimum values for red, green, and blue. Whole books have been written about this, and there’s far too much information to include in this article. However, it is important to know that you should keep your printer, screen, and camera (if you are not shooting raw), set to the same color space.
The most commonly used of these color spaces is sRGB. However, Adobe RGB is another common profile that has more colors available to it and it was the standard for high-end digital printing. ProPhoto RGB has an even wider profile and provides almost all the colors possible for most printers. However, things have changed and the printers I use produce color profiles for each type of print and paper. Those give the highest possible color accuracy.
For most photographers, it is enough to remember to use a color space that is no bigger than the gamut available to your devices.
The Difference Between Additive and Subtractive Light
When we mix projected light, red, green, and blue are primary colours. Combined they produce secondary colors: magenta, cyan, and yellow. This is additive light, so mixing red and green produces yellow. Mixing different proportions of these colored lights will give us the range of colors that the printer can produce.
In comparison, when we use printer inks, they remove or subtract colors from white light. The inks absorb some light and reflect others. When mixing the ink colors of magenta, cyan, and yellow in different proportions with black, we can get another, different range of colors. In color management, that range is known as a gamut.
Using a single color space, we ensure we are only using those colors where the two gamuts overlap. If we tried to view or print colors that were outside the capabilities of your screens or printers, we would get some odd results.

Color Is Not Entirely Under Your Control
On a related subject, the screen in front of you will have control buttons to change, at the bare minimum, the contrast and brightness. So will everyone else’s. Calibrating your screen is an important step to ensuring your prints’ colors and tones match what you print. Of course, when you share an image online, most other people won’t have calibrated screens. Consequently, your images may appear brighter or darker, with more or less saturation, and different contrast than it should. There is nothing you can do about that. If you are printing photos and want accurate results, or if you are sharing them with other photographers who are likely to have calibrated their screens, then calibrating your screen is essential.
Please, Go and Read More
This article is, of course, just scratching the surface of these topics and there is plenty to be learned under each topic I’ve covered. Search the other articles here at Fstoppers, there's a wealth of knowledge in the 33,000+ articles, some of which look more deeply at the topics I have briefly covered here.


Join the Fstoppers community for free
-
Post comments and join in the discussions
-
Browse the site ad-free
-
Share your work and get featured in the community
-
Compete in the photo contests for fun and prizes
4 Comments
A good general overview for the non-scientist photographer.
However, there are a few errors in it, such as, "Each color has a different wavelength and therefore travels at a different speed." No. The speed of light is a constant (for a given medium). If the wavelength changes, then it's the frequency that also changes, not the velocity. And, I am not sure photons "bounce" off aperture blades. Otherwise, a good read - Thanks
The speed of light is a constant only in vacuum. In a transparent medium like air or glas, light travels slower than in a vacuum AND the speed depends on the wavelength.
Well, the speed of light in a medium depends on the wavelength, that exactly causes the spreading of colours via refraction (sunset, sunrise, prism, rainbows, ...). Only in a vacuum the speed of light is the same for all colours.
As photons enter a medium the frequency usually stays the same unless they are absorbed and reemitted. By entering the speed of light changes, and therefor the wavelength has to change too. Btw the speed of light changes due to the interaction with the medium, it's quite complicated.
Photons do bounce off aperture blades, as they have energy and momentum. Diffraction at the aperture blades is indeed not bouncing off but an effect caused by interference of the waves made up by those photons (not exactly that, but I try to avoid quantum descriptions).
Thanks for the comments. The changing speeds and bouncing info I got from NASA. I'll take it up with them.