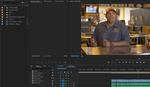
Once you master global color corrections in Premiere Pro, the logical next step is moving on to correcting specific areas of the frame. This is complicated by the fact that the camera and/or subjects are rarely still, but this great tutorial will show you both how to correct an isolated area and to track it across the frame.
Often, even after you apply global color corrections, there will still be part of a frame that you want to adjust further. This could be because you cooled off the white balance and want to add some warmth back to a person's skin tones, or it could be because of mixed lighting, or any multitude of reasons. Much like a still photo, you'll want to mask the area of interest from the rest of the content, work on it separately, and feather it to make a smooth transition, but unlike a single image, there's the added issue of movement across the frame. This is when tracking saves the day. And while Premiere Pro's automation generally works pretty well for this purpose, be sure to keep a close on it so you can manually adjust it if needed. Be sure to check out Cinecom.net's YouTube channel for more helpful tutorials.


Does the lumetri effect not have a mask built in? I recently started using this color effect with our gh5 footage but if it has the mask built into the effect you won't have to double up your footage like they did in the tutorial.
I'm on CS6, so I don't have the Lumetri panel, but my thought is that panel operates like a global correction much like the analogous panel in Lightroom, thus the doubled layer workaround.
Premiere CC does have the masks built into the Lumetri Color effect. I just tried it the other day. You do not have to double your footage like this tutorial states; you can just add the effect to your footage, mask in where you want it, and be done.
Sounds like it's time for to upgrade then! Thanks for the tip!