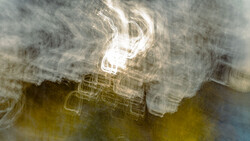
Atmospheric effects can enhance your photos, be it with in-camera techniques or postproduction effects. Light flares are one of the most popular effects that many photographers add to their work, and is one that can easily be overdone. Just like many things within Photoshop, there are several ways of doing it. It can be a fairly simple process using adjustment layers to add light flares and even haze to your photo.
Not sure how to add these effects in your work? Unmesh Dinda from PiXimperfect demonstrates how easily these effects are added with a few adjustment layers. When adding these effects in post, keep in mind where the light is coming from in the photo. It will help tremendously to sell the illusion of the flare you are adding in post. As seen in the second example photo Unmesh uses in the video, these techniques work great in enhancing what’s already captured in the photo. You do have complete creative control with your work, so you don’t have to go through the entire process that is shown. At any point you can also use masks to control the spill of these effects. What process do you use to add light flares or haze to your photos?

Join the Fstoppers community for free
-
Post comments and join in the discussions
-
Browse the site ad-free
-
Share your work and get featured in the community
-
Compete in the photo contests for fun and prizes
2 Comments
Why did you not start with a mask instead of directly editing the photo? My opinion, you need to start with a mask before any kind of editing directly to the photo
Fully agree with you!