
You can do a lot with photographs in Adobe Premiere Pro: create and customize a time-lapse with the automate to sequence feature, import a layered Photoshop file as a complex layered video sequence, or animate your images in 2D or 3D space. These are just a few of the things you can accomplish. I'm going to show you seven tips I utilize when working with still images in Adobe Premiere Pro.
1. Scale to Frame Size
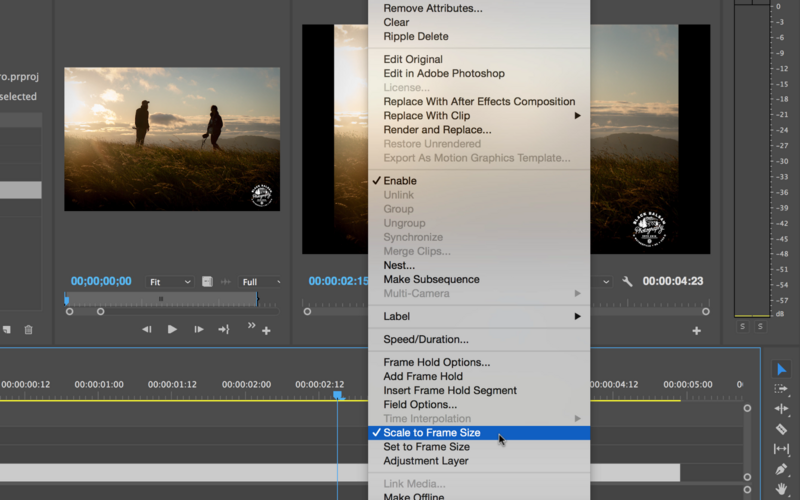
This is probably the number one tip when working with photos in Premiere Pro. Be aware that when you bring a photo into your timeline, Premiere will automatically scale your still image to fit the frame size of your sequence. In my case, it’s scaling a high-resolution photo down to 1920x1080 pixels, the frame size of my video sequence. To set my photo back to full resolution, I can right click and uncheck Scale to Frame Size. If you ever have any issues with a photograph not cooperating, try to check and uncheck this option.
2. Change the Still Default Duration
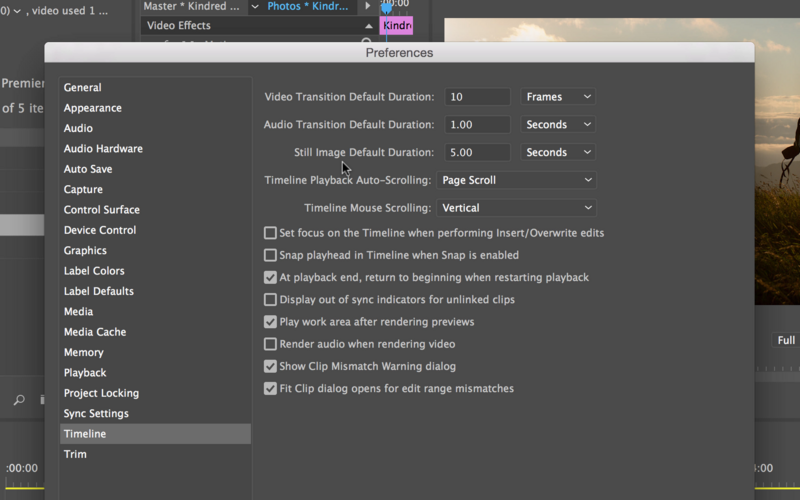
Another great tip that will save you time and give you more control over your still images is changing the default duration of your photos. The default duration of a photograph in Premiere Pro is five seconds. To change this, go to Preferences > Timeline. In the Preferences dialogue box you’ll see a place where you can change the Still Image Default Duration. You can specify a duration in seconds or frames.
3. Automate to Sequence
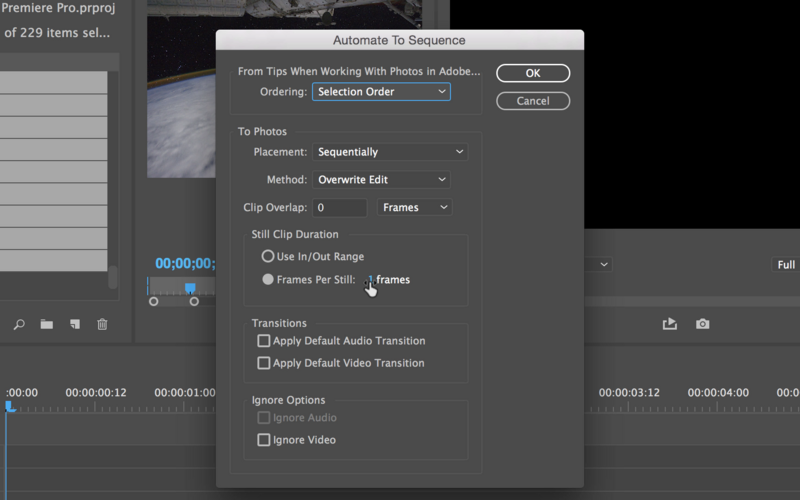
Let’s say I have a sequence of photographs in my Premiere project with which I want to create a time-lapse. I can create and customize a quick time-lapse by using the Automate to Sequence feature. To create the time-lapse, I can simply select all of my photos and press the Automate to Sequence button at the bottom of the project panel. This will bring up a dialogue box where I can customize a time-lapse sequence, including the photo ordering, placement, and still clip duration.
4. Import Image Sequence
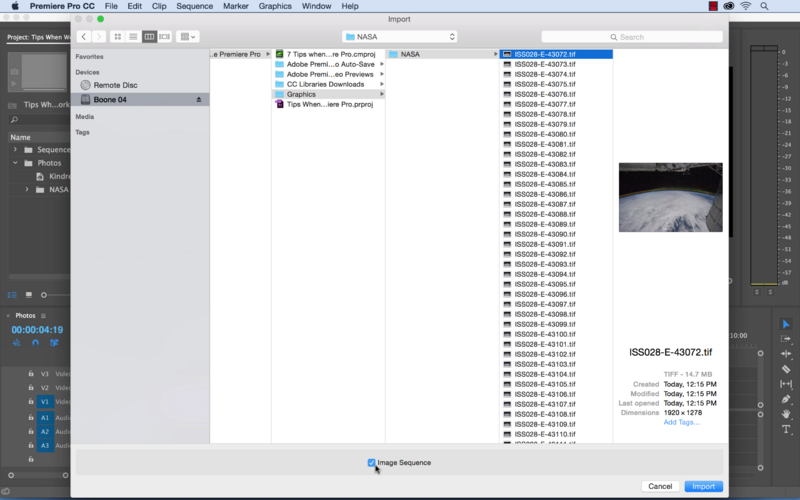
Another simple way to create a time-lapse is to import my group of images as an image sequence. To do this, all I need to do is select the first image in my sequence on the local drive. Once selected, an Image Sequence check box will become active at the bottom of the Finder window. I can check this box and then when I import the image it will come in as a video clip. Then I can bring the video clip into my timeline and change the speed of the time-lapse with the Rate Stretch (R) tool.
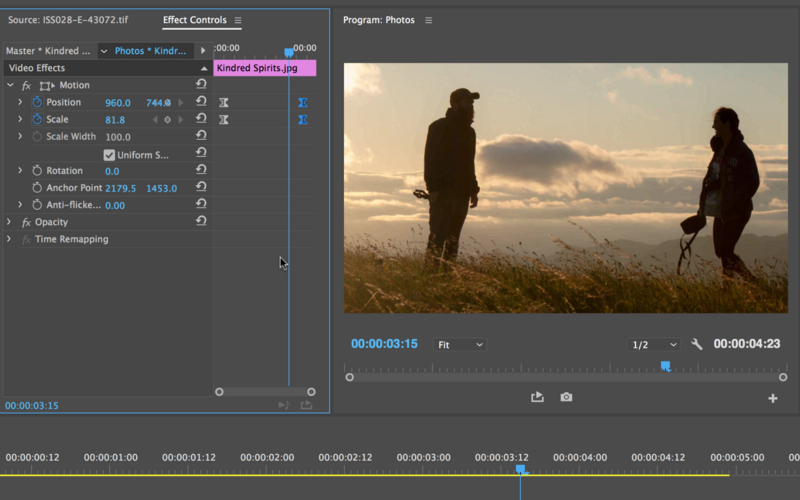
5. Animate the Photo
To bring a photo to life in Premiere, simply use keyframes. To add keyframes to a still image, select your image in the Timeline and then bring up your Effect Controls panel. Click the Toggle Animation button next to the property you want to animate. Add start and end keyframes to add movement to the photograph. I typically add Position, Scale, and Rotation keyframes to bring the animation to life.
6. Create Basic 3D Movements
In the Effects panel of Premiere Pro, you will find the Basic 3D effect. Drag and drop this effect straight onto a photograph in your timeline to adjust your photo in 3D space. Once applied to a still image, you will be able to change Tilt, Swivel, Distance to Image, and Specular Highlights attributes of your photograph. Each of these properties has the Toggle Animation button next to it, meaning you can add keyframes and animate accordingly.

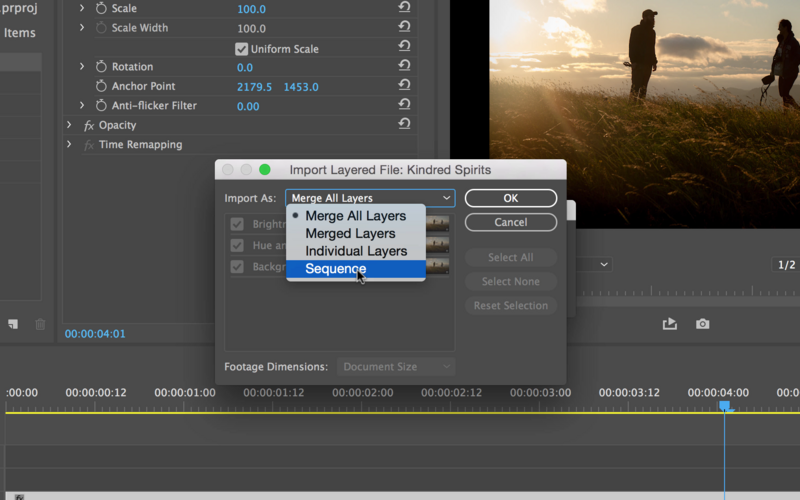
7. Import a PSD
Photoshop and Premiere work well together. When you import a Photoshop file into Premiere, you have four different import methods from which to choose. These include Merge All Layers, Merged Layers, Individual Layers, and Sequence. You can select which layers you want to include or leave out, and you can specify if you want the import to maintain the Photoshop Document Size or utilize the Layer Size. Working with Photoshop files in Premiere truly deserves a tutorial of its own.
If you'd like to learn how to make your own videos and don't know where to start, check out our filming and editing tutorial, Introduction to Video. If you purchase it now, you can save a 15% by using "ARTICLE" at checkout. Save even more with the purchase of any other tutorial in our store.


Join the Fstoppers community for free
-
Post comments and join in the discussions
-
Browse the site ad-free
-
Share your work and get featured in the community
-
Compete in the photo contests for fun and prizes
5 Comments
Nice article and video
Thanks, Pieter. Glad you enjoyed it.
Nice tips. For animating the stills, after doing the Ease in/out, select the two Position keyframes and select Spatial Interpretation->Linear and it will get rid of the 'curved' motion you sometimes get when changing position. More Premiere articles, please!
Excellent tip! That's insanely frustrating if you don't know what's causing that curve. Thanks again Anthony. More Premiere articles coming...
Usually i dont post comments due to the process of registering taking to long, however Jason, your clear searchable explanation saved me a lot of time.
Well done, keep the tips coming.