Strong gear and clever lighting still fall flat when composition is weak. Real estate work lives or dies on how well you guide attention, manage geometry, and shape the way a space feels.
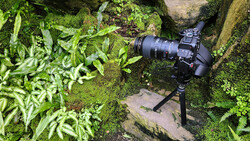
Coming to you from Nathan Cool Photo, this practical video breaks composition into steps you can apply on the next job. It starts with geometry because your brain expects verticals to be vertical and a camera to be level. Use the virtual horizon, then fine-tune with a geared tripod head instead of a ball head to nail alignment. With geometry set, the clip moves to visual flow, showing how structural flow uses lines to point toward features like a range hood or a window view. Tonal flow then takes over, where contrast and brightness pull the eye to key elements without shouting.
The video uses a kitchen to show how leading lines act like arrows and how brighter areas become magnets for attention. You’re reminded that the rule of thirds helps but is secondary to clear flow paths in the room. These basics matter when you’re asked to make a modest condo feel intentional rather than crowded. You learn to read the room for lines and tone, not just objects. That mindset translates to faster decisions on site and cleaner edits later.
Angular perspective comes next, with the fast, reliable angle that usually shows two walls and sells overall space. It’s easier to control than a single point setup and pairs well with a wider view, but watch extension distortion. Get too close at 18mm and cabinets swell while distant sinks shrink, so step back or switch to a a longer lens to calm the stretch. Full frame shooters will like keeping it at 20mm or longer when possible to keep furniture looking natural. Use the 18mm lens only when you need the coverage and your lines still support flow.
Single point perspective raises the bar. The camera sits perpendicular to a wall and points straight in, which adds symmetry and a calmer, higher value feel. You must hold vertical, level, and horizontal alignment at once, so the setup takes more care than the angled view. The payoff is real when you need polish for design clients or when a hallway or large living room benefits from the balanced look. If space is tight, a 14mm lens on full frame can still look clean if alignment is perfect and you avoid pushing edges near the frame.
Framing is the curveball that sparks curiosity. You shoot through doorways or architectural cutouts to hint at a feature before revealing the whole scene in the next image. Listing agents may not always love it because it hides square footage, but design clients and luxury listings often do. Start with a framed detail like pocket doors, then follow with a single point of the room, then a tighter feature shot so viewers feel led deeper into the property. That sequence increases perceived sophistication without adding exotic lighting or heavy editing.
To build a shoot that feels intentional, assemble a psychological flow. Begin with an angular perspective to show the full area when a room needs context. Introduce discovery with a framing shot to preview a feature before revealing it. Anchor the set with a single point view to communicate order and value, especially in high-end spaces. As time permits, add restrained details or vignettes so the gallery doesn’t read as a map but as a guided tour. Check out the video above for the full rundown from Cool.


Join the Fstoppers community for free
-
Post comments and join in the discussions
-
Browse the site ad-free
-
Share your work and get featured in the community
-
Compete in the photo contests for fun and prizes
No comments yet