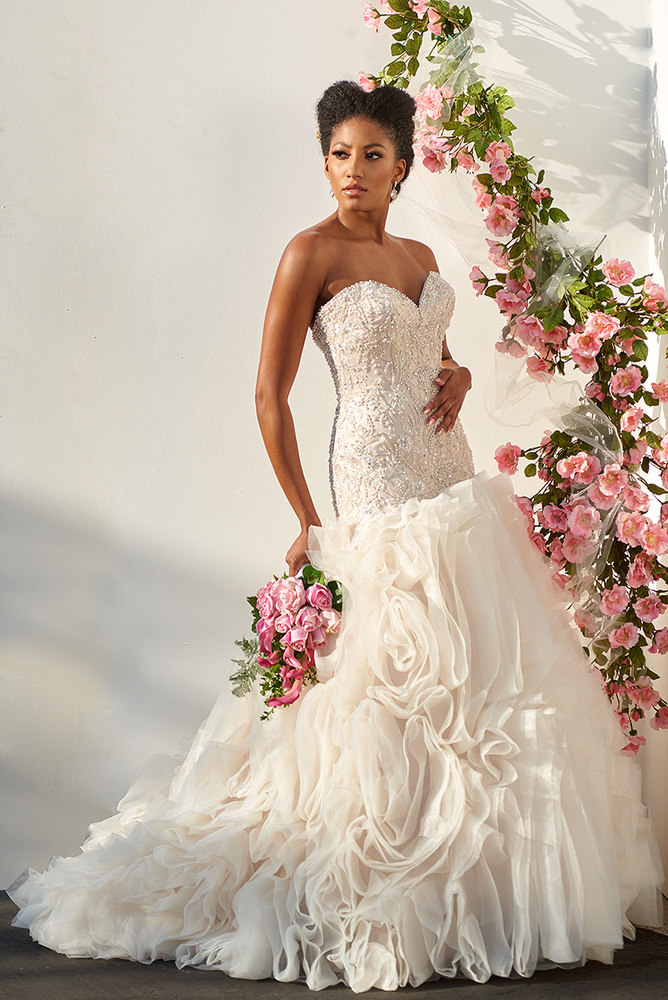
A spectacular shot of a bride in her gown can be one of the most enduring images in the spectrum of bridal photos. I’ll state up front that I am not a wedding photographer, but as a fashion photographer specializing in bridal fashion, I’ll wager that I’ve shot more bridal gowns than the average wedding photographer. Along the way I have picked up a few tricks that wedding photographers might find useful when taking a bride’s formal portrait in her gown.
Each season I am hired to photograph catalog and advertising images for a number of bridal designer lines. That can literally mean shooting more than 100 gowns for each of the Fall and Spring seasons. Most often I am shooting a studio setting with controlled lighting. Not every wedding photographer is going to have the time or resources during a wedding shoot or even a formal portrait sitting. Granted, I am photographing experienced fashion models wearing the gowns which is certainly a benefit to the photograph. My shots are staged to make the gown look its best. That is why we hire models. Real brides can be a more difficult subjects. Of course they are both the bride and the client, and you can’t exactly re-cast them, but maybe these tips can help.

1. Controlling Highlights to Prevent Blow-Outs on White Gowns
Highlight control is one of the greatest photographic challenges shooting bridal gowns. In a great many instances gowns are brighter in tone than the woman wearing it. Additionally having lighting closer to the subject is often desired to present a softer effect. Both factors can increase the chances of blowing out the tones in a white gown. I frequently use large softboxes to project a soft beam of light. To combat hot spots I use a black mesh scrim or even full black flag to darken areas of white gowns that are closest to my light source. I carry the Matthews RoadRags Kit with me on all bridal fashion shoots.

The scrim or flag creates a darker area in the beam of light. I frequently try to make that dark area correspond to the torso or chest of the model wearing the gown. That is the area which seems to blow out most often. From experience, my digital technician and I have concluded that keeping the hottest point on a gown at 240 or below on the tonal range scale will prevent most blowouts in the highlights while still keeping the gown looking white. Different materials have different degrees of reflectance. Silks and satins reflect more light than lace or tulle.

This becomes even more critical when I am called upon to shoot white gowns against a white background. In these cases, I use large black cards for negative-fill which gives dark separation edges to define the silhouette of the gown against the bright background. Another technique is to restrict the beam of a light with barn-doors or egg-crate grids that increase contrast even with soft lighting.
2. Improving the Fit or Silhouette of a Gown
A wedding photographer is not going to have the option of changing brides or changing gowns, but there are ways of improving the look of a gown on a bride. The most simple is to select an angle to minimize a bride’s waist. Avoid posing a bride with her shoulders and hips squared to the camera. This position shows the widest line of the waist on most brides. Also include poses that show a bride’s arms away from the line of the waist to keep from interrupting the silhouette. I tend to set my camera position eye level between the model's hips and shoulder so that I can keep my image plane parallel to the line of the model to avoid tipping the lens up or down and introduce more lens curvature. If you choose to shoot a gown from a rear angle, watch for direction that the zipper is hidden or revealed. Designers always prefer to shoot the angle that hides the zipper under the small flap covering it. It’s a small detail, but one that can weaken an image.

Since the photo will only show one angle of the gown at a time, we use small A-clamps to further tighten the line of the waist. In some cases we also use them to pull in at the knees to increase the mermaid effect of some gowns. A-clamps are one of the cheapest pieces of photographic equipment in my case, but they see frequent use. Occasionally we need to change the entire fit of a gown with several clamps up and down the back or front of the gown pulling in the width. Typically bridal gown samples are size 4-6, whereas a typical fashion model is size 0-2, so we keep a lot of A-clamps around to fit the gowns to the model. In the case of a real bride, most gowns are made to fit the individual bride, but sometimes a little pinch in can project a nicer line.

Gowns are generally designed to hit the floor without causing a fold or break like with men’s slacks. On my shoots for designers we keep a supply of shoes from ballet flats through stripper heels to make sure the front of the gown will hit the floor at the right height, but some designer samples have unusual variations, so I also keep wooden disks that a model can stand on to get to the right height. I learned over time that squared boxes can sometimes push out the line of a gown, so I had some 1” thick disks cut that we can stack to jack up the model.
3. Increasing the Volume of the Skirt and Train of a Gown
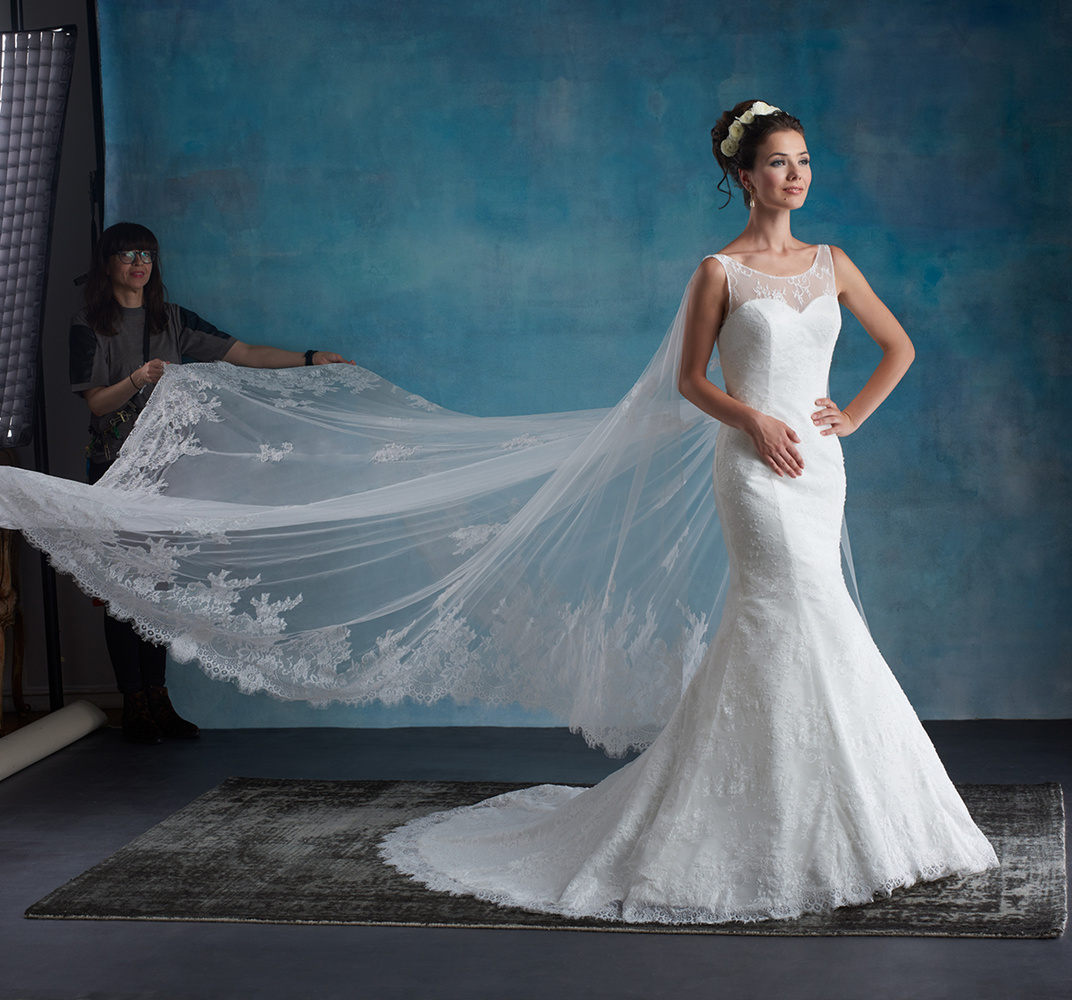
For some brides it all comes down to the train. Cathedral length trains can quickly eat up real estate on a photoshoot. Walking down the aisle a long train can project a beautiful and impressive aura, but standing for a formal photo trains usually need some help to fill out the volume of air that is filling it when in motion. Over time I have picked up a few approaches to bringing back the aura to a still photo of a gown with a long train or a voluminous skirt.
Probably the simplest approach is stuffing. Some gowns are made to wear with a petticoat. To get a more rounded and full look we sometimes have the model wear two petticoats under a gown for added puff. It would likely inhibit a bride at a real wedding, but it is an easy add-on for a formal photo. If you don’t have a spare petticoat, dry-cleaner plastic bags also make a good material to ball up and stuff under a gown. Garbage bags serve the same purpose, but they would likely have an adverse effect on the expression of a bride.

For tulle and multi-layer gowns it is important that each layer fall smoothly and not bunch up into each other. Fabric layers often stick to each other with static electricity. We go thru Static Guard by the case on bridal shoots spraying each layer starting with the bottom and adding layers one by one until the final. This will help ensure that the gown is photographed the way the designer intended.
When a train needs more help to overcome gravity we employ the fluff-and-run technique where an assistant will hold up the end of the and gather air under it before gently placing it down on the floor and diving out of the photograph. It is somewhat like playing with a parachute back in elementary school. The inflation of the train will only last for two or three images, so generally we will make several attempts with the fluff-and-run to get the right shot. This works best with light and airy trains and long tulle veils. Other times we sew or tie in lengths of lightweight fishing line to pull or lift the train which are invisible or easily retouched.
Other gowns have heavier satin or lace trains that fall flat no matter how much we toss them. For these we will basically stick the edge of the train to the floor putting tension on the fabric to create the nicest lines. I have different clients who employ different methods of adhering the gown to the floor. The most common is several pieces of rolled up Gaffer Tape that will stick the underside of a train to the floor and provide enough tension to pull out many wrinkles. Too much tension will cause the tape to let go. This technique doesn’t work with sheer trains because the camera will see each piece of tape. I have other clients who use more aggressive approaches to sticking the gown to the floor. Some will use straight pins or T-pins to pierce the end of the gown and stick it to the floor assuming that it is wood and not concrete. Some brides might worry about damaging the train, but done with care this approach should not harm the fabric.

I have one client that throws caution to the wind and just hauls off and staples the gown to the floor. I don’t want to come out and wholly endorse this approach, but I will say that we can really gain a lot of control over the fabric with this method. This has been especially useful when creating smooth, regular arches along the edge of the train. We can be a little rougher on the gowns we shoot because they are samples and won’t be worn by a bride, but we take care not to rip any gowns. Again, I am not advocating this approach for others.

To be sure, I have a lot of help on my sets by people who are greatly experienced in making gowns look good. Situations will dictate when or if any of these tips will apply to formal shots for brides, but I hope that some can help wedding photographers to think more like fashion photographers to please their brides and gain more clients.


I found "1. Controlling Highlights to Prevent Blow-Outs on White Gowns" to be very informative and interesting. Thank you for posting, Dan!
Excellent article. Good points thanks Dan
Great article. I would love to hear more lighting tips from you Dan. I like how your images in here look like a room/lighting situation you would be in with a bride. Gives it a more realistic feel. Thanks!
Great tips Dan, thank you.
Thank you for your insights.
excellent tips and ideas! love the black flag idea
Great post
Great post. Thank you for sharing your expertise!