
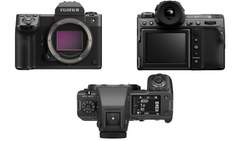
Having now had the Fujifilm GFX 100 camera for a couple months now, I thought I might share a couple of the ways I’ve found most efficient for me to use the system. Perhaps some of the following tips may help you with the GFX 100 or other Fujifilm systems as well.
Using Back Button Autofocus
There’s a good chance that when you first began in photography that you learned using the focus and recompose method. This is where you use a single autofocus point to get focus by pressing the shutter halfway down, then while keeping it halfway depressed, you recompose your shot and take a photograph.
There’s also a decent chance that despite all the new developments in autofocus technology that you may still shoot like that. It’s trained into your fingertips and it’s mostly effective. I know I still shoot like that quite a bit. And if you are shooting stationary subjects, there’s not really a reason you have to change.
But when shooting moving subjects, learning to use continuous autofocus instead of single shot autofocus will help to improve your hit rate. Modern autofocus systems are a massive upgrade over those systems we used when first learning to focus and recompose. And while the physics of the medium format GFX 100 mean that it’s never going to focus as quickly as its smaller siblings like the X-T3, the continuous autofocus is quite respectable (especially compared to other cameras in its weight class).
But, respectable or not, it will still take a moment to maneuver all that glass into position. And when you use the shutter button focus and recompose method, essentially you are asking the camera to refocus every time you take a shot. If you have time to move more methodically, this may be just fine. But if your subject is constantly changing and you want to shoot in rapid succession, you may find the constant refocusing maddening.
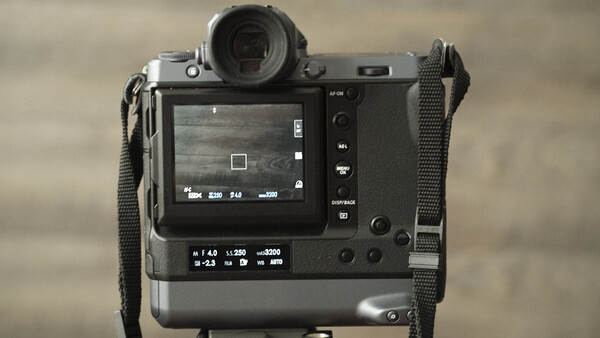
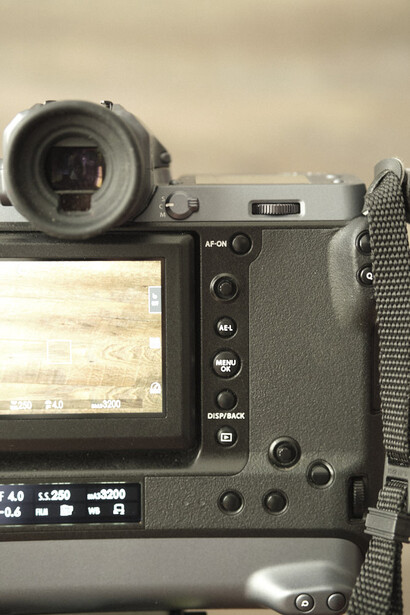
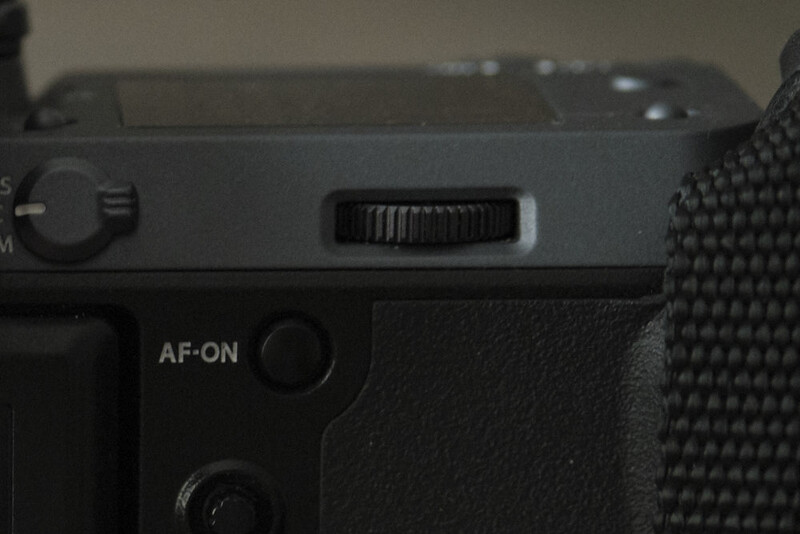
To get around this, I use back button autofocus when shooting moving subjects in continuous autofocus mode. The way back button autofocus works is that you press the AF ON button on the back of the camera to gain focus. The shutter button, now completely decoupled from the process of focusing, can be pressed at will.
Why is this a benefit? Take, for instance, the experience of shooting a model. He or she is going to be quickly moving through a series of poses. They aren’t so much going to change their distance from the camera, but they will go through 30 variations on a theme before you put the camera down again. And if the model is any good, it’s likely that they will be moving through these poses with a quickness. If you spend too much time dawdling with your focus, it’s likely you may miss a keeper or two.
In this scenario, with shutter release single shot autofocus, the camera would be trying to refocus 30 times. With backbutton autofocus, you can focus once, then just shoot 30 times without having to wait for the camera to refocus. As long as your subject falls within your depth of field, you should still be in focus and can shoot more quickly as a result. Take that same model and have them running across frame as opposed to standing still and the need to be able to release the shutter quickly at exactly the right moment only multiplies.
Pro Tip: Be sure to pay attention to your depth of field. Especially with medium format, it doesn’t take much for a subject to weave in and out of your focus range.
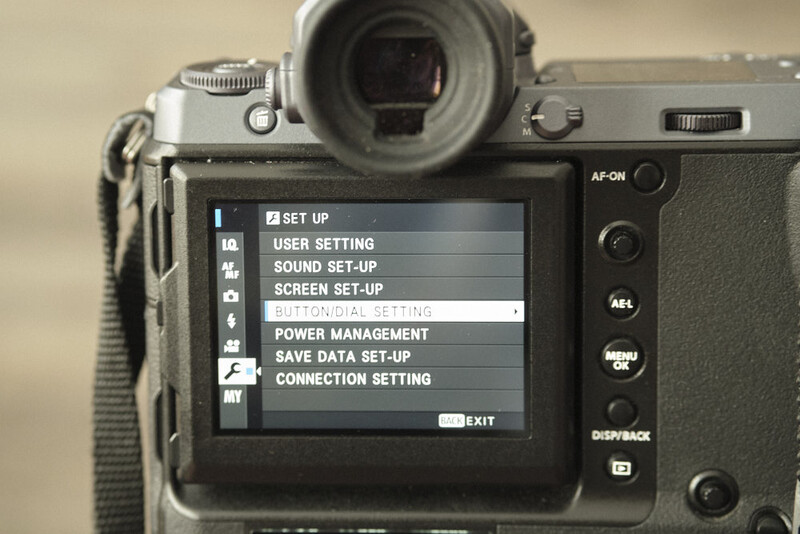
To set up back button autofocus, you need to:
-
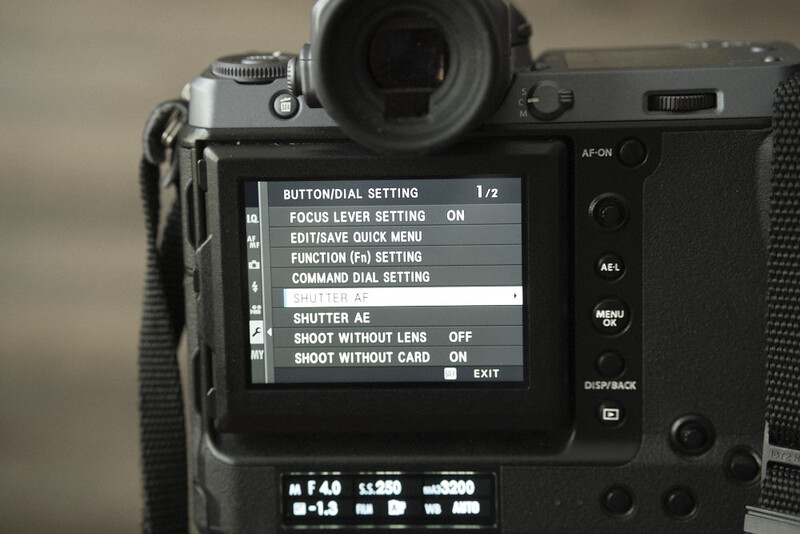
Go into the Setup Menu (the wrench)
-
Button/Dial Setting
-
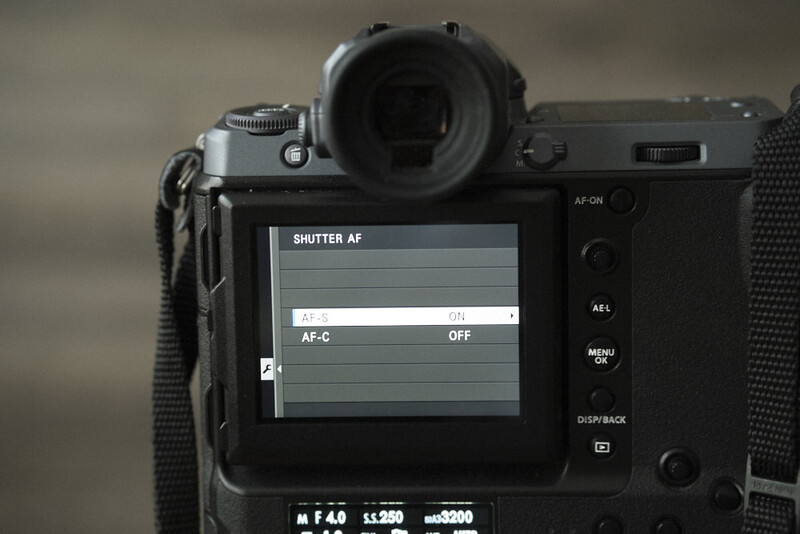
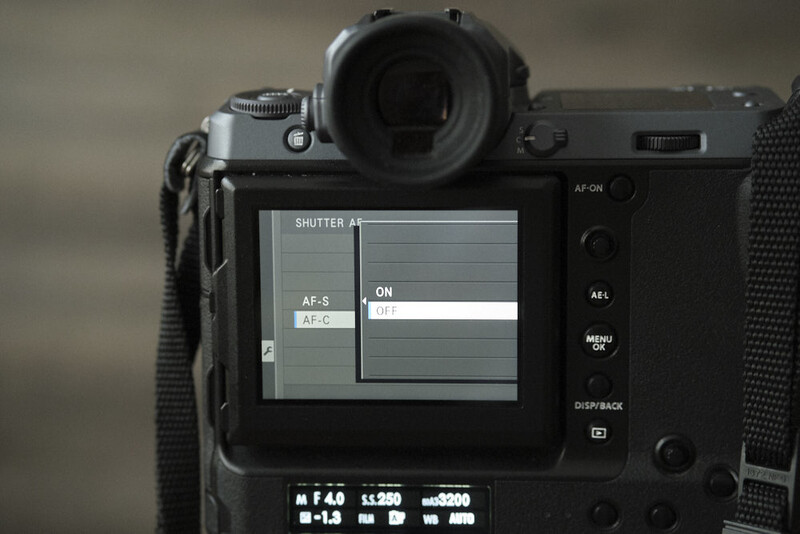
Shutter AF
-
Choose AF-S or AF-C. You can setup back button differently for continuous and shutter release for single shot autofocus. This is what I do. Since moving subjects are the ones where backbutton will benefit me the most, I set backbutton autofocus for AF-C. And then, I use shutter release autofocus for single shots with single focus points (AF-S). But you can set it up any way you’d like.
Create Custom Shooting Modes
Have you ever lent your friend or your spouse your car for the day, and next time you get into the driver’s seat, everything is out of place? For me, at over six feet tall, it usually starts with trying to sit in my car and finding my knees being unexpectedly driven back into my chest as a result of a seat being slid all the way forward. The rearview mirror is pointed for some odd reason towards the floor. And since my father and I have never been able to agree on the correct position for side mirrors (personally I like to see the edge of my car, he insists this is wrong), the side mirrors will be deliberately pushed to the widest possible vantage point. Thank goodness for whoever it was that designed the preset button into cars so that you can return most of your desired settings to your vehicle with the push of a button.
Well, cameras these days can do much the same thing. Have a favorite combination of settings for street shooting but a completely different set of preferences for concerts at night? The GFX 100 allows you to save those presets in the custom menus.
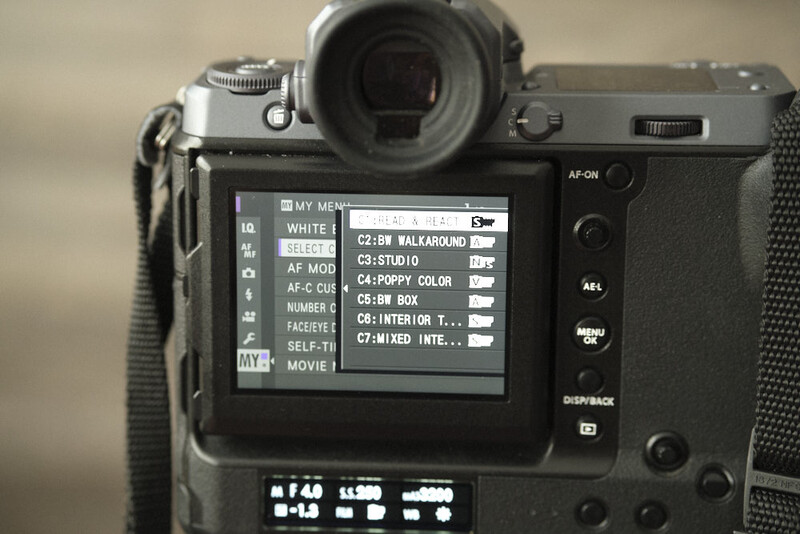
There are seven custom settings in total. I have one set for walkabout street shooting. One for black and white Acros designed for a specific look. Another with a punchy Velvia combination. What you want to set these to are up to you. But, having a handful of these programed into your camera can help you to quickly adjust to different shooting scenarios with the push of a button.
To set up your settings:
-
Arrange your camera settings manually in the way you frequently like to use them.
-
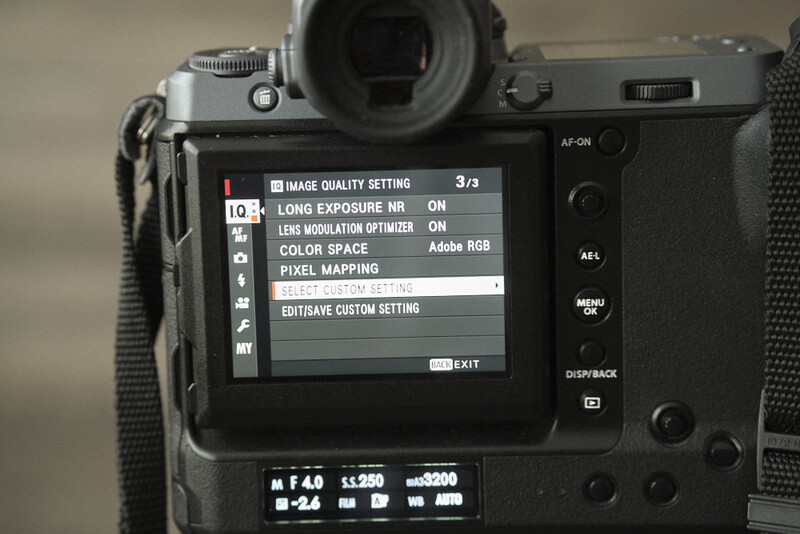
Go to IQ in the menu.
-
Go to the third page and push "Edit/Save Custom Setting."
-
Pick the slot you want to assign to this combination of settings.
-
Select "Save Current Settings."
-
Later, when you want to load those settings, simply go back to the same location in the menu and choose "Select Custom setting." Or assign that action as special button, as we will come to next.
Pay Attention to the Customizable Buttons
Speaking of buttons. The GFX 100 has a lot of them. And most are highly customizable. Want to push a button and have all your custom shooting modes pop up? You can do that. Want to push a button and flip-flop between focus modes? Done. You can literally alter the entire layout of the camera (aside from the shutter button, of course) to make the camera over in your own image.
Use as many customized buttons as you want. Or, in my case, use as little as you want. I realize this somewhat contradicts this particular section, and don’t get me wrong, I love being able to assign functions to each of the 19 customizable buttons and dials on the GFX 100. I just have a couple personal reasons for a less is more approach.
I should first admit that I get easily confused by too many buttons. I came of age in the time of Atari. You played video games with a joystick and one button. Eventually I graduated to the Nintendo controller with a directional pad and two buttons. When video game controllers got to the point they are now, where the controller itself has more knobs and buttons than a space shuttle launcher, I went ahead and tapped out. I can’t keep track of all those buttons, and by the time I remember what combination of buttons is necessary to jump over the one thing, I will likely have already been eaten by the big green monster thing.
Photography, for me, is somewhat similar. The fewer buttons I have to remember before pressing the shutter, the better. When I first purchased my GFX 100, I had every button preset to my liking, but trying to remember which functions I assigned to which buttons was just slowing me down as opposed to speeding me up. Most people would probably quickly be able to get used to this, but for me, it was a lot.
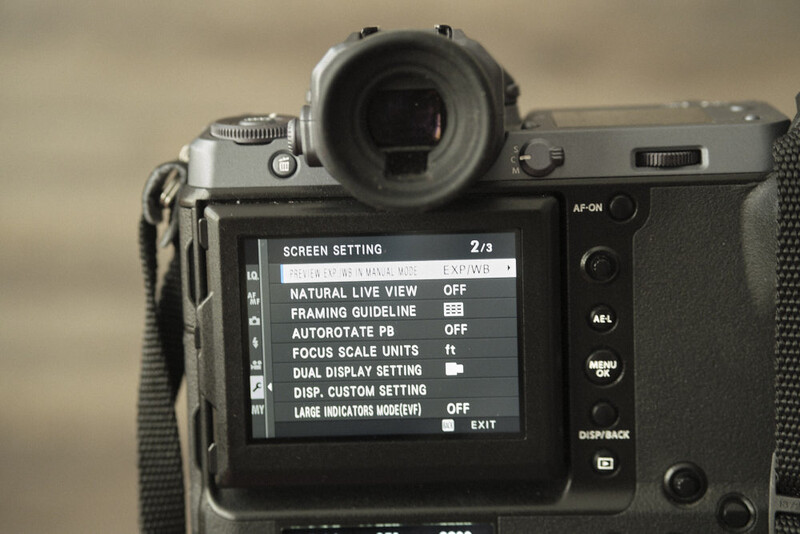
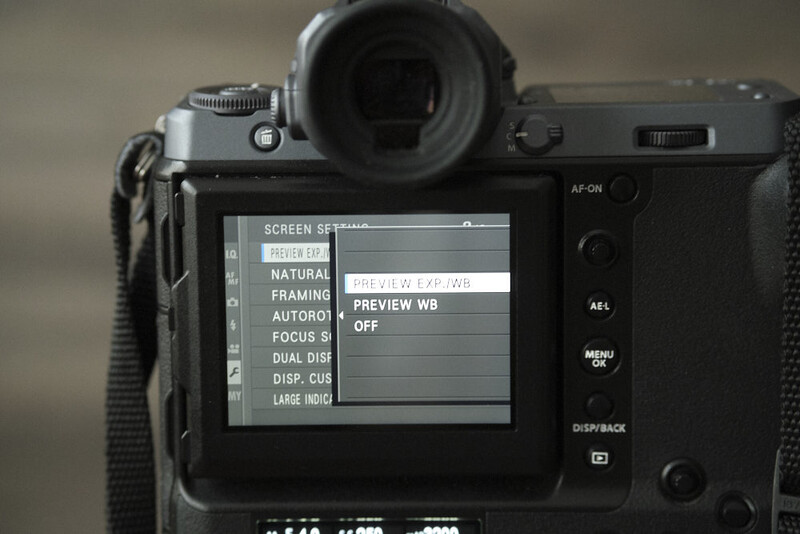
Personally, the only buttons I reassigned that I considered beneficial to speeding up my process were assigning the top function button (Fn 2) to toggle between previewing exposure and white balance and not previewing those. I shoot with strobes quite frequently, so the unlit preview is essentially meaningless, as it won’t take into account the final image. If you’re shooting in a dark studio where the preview will essentially just show you a black screen, well, that’s not very productive at all. So, I set my button up to be able to toggle the preview on or off depending on if I’m shooting with strobes or without.
The other button I have preset is Fn 4, just above the Q button, for toggling between manual mode and auto mode. I’m rarely in full auto mode, but if I wanted to just grab my camera and run out to catch an unplanned spectacle, then I could just hit that one button and enter PhD (Push Here, Dummy) mode and be ready to go.
The rest of the custom buttons (aside from AF On for back button autofocus), I have set to off. Why off versus just choosing not to use them? Well, that brings up practical point number two. I can be a bit clumsy with my fingers. And when in the middle of a shoot, where you’re constantly picking up and putting down the camera, changing between the horizontal and vertical grip and basically just manhandling the equipment over and over, I’ve found its very easy to accidentally press any of the custom buttons. My first couple shoots with the camera, I kept finding my settings unexpectedly changing randomly for no apparent reason. At first, I thought it was some bug in the camera, but eventually realized it was me accidentally pressing different preset buttons. So, I would be flipping between shooting modes, display modes, and everything else without wanting to, just because I picked the camera up in a certain way. Add to this that the touchscreen allows you to change the focus point and other functions with a tap (even when shooting with the EVF only), and I was convinced the camera had a mind of its own.
So, for me, in addition to only assigning functions to the harder-to-reach buttons, I also turn off the touchscreen function, except in specific circumstances. One might say I’m not getting the full value of the customization. But, given that I can’t remember all those buttons anyway, for me, it’s easier to just idiot-proof the buttons so that I don’t accidentally adjust anything.
This is 100% my own preference due to my own shooting style and inability to remember key strokes. You, on the other hand, may be the complete opposite. You may want to manipulate the touchscreen from shot to shot and have a specific need for each of the custom buttons that you will use frequently. That’s the wonderful thing about having a camera with all those options. You can set it up exactly the way you like.
To assign actions to your function buttons, touchscreen, and dials:
-
Go to Setup.
-
Select Button/Dial Setting.
-
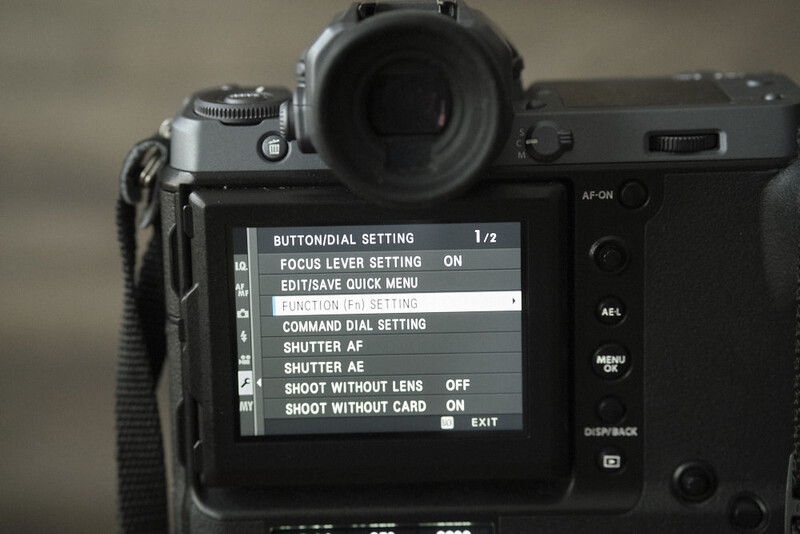
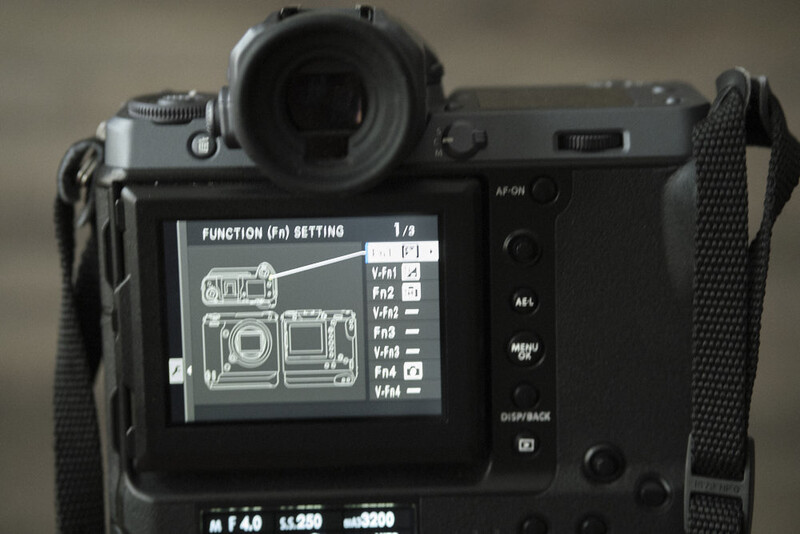
Select Function (Fn) Setting.
-
Choose which button you want to assign.
-
Scroll through the options and pick what you want.
Shortcut to Quickly Format Your Card
The reason why I fell in love with Fuji cameras is for their design. They really take into account the user experience and build machines that put the fun back into the art of photography.
Which is why I was never able to understand why they made it so hard to reformat your memory card. “Hard” is perhaps the wrong word. It’s not difficult. You just have to go to the Save Data Setup menu, keep pressing down until your reach page three within that section, then select Format to select which card you want to affect.
But, since this is a function I do after almost every photoshoot, it is one of the main things that I would want to add to the My Menu. But, for some reason, Fuji doesn’t let me do this. So, I keep having to go through that multi step process at the end of each shoot.
That is, I did have to do that until recently discovering a shortcut. I mentioned my inability to remember buttons in the previous section, but this is one cheat code that even I can keep track of.
To reformat your card on a Fuji camera quickly, just:
-
Press and hold the trash can button for around four seconds.
-
While still holding the trash can button, push the rear command dial in.
-
This will bring up the format card dialog screen where you can make your selection.

Use Auto ISO
I don’t know why I didn’t start using this technique sooner. I am a big proponent of setting your camera manually. Not because doing so makes you a superior talent necessarily, but because as an artist, I feel like the more decisions you make about your image, the more personal and unique an image you can make.
But that doesn’t mean there isn’t a perfectly good reason to leave your camera in one of the many automatic modes from time to time. Historically, for me, this would always be aperture mode. Like many, I would obsess over depth of field and didn’t much care about the other settings. And aperture priority does this well. I can move quickly and efficiently, usually when doing an improvised shoot with a model outdoors, and know that my exposure will be at least what the camera thinks of as right.
But doing so leaves a very effective tool in your kit out of the party. Your shutter speed is there to control how motion is handled when taking a photograph. In the most basic sense, the faster your shutter speed, the more you can freeze action. The slower your shutter speed, the more motion blur you are introducing into an image.
Both can be used for different reasons. Say you want to take a picture of an athlete in midair and you want his brand new Air Jordans to be sharp. You’d want to use a faster shutter speed to freeze the motion. Alternatively, say you were shooting a race car. If you have too fast a shutter speed, it may completely freeze the car on the track. While this could be a good way to see every sponsored decal on the car’s hood, the resulting photograph would essentially make that fast-moving car look like it was parked. In this case, you may want a longer shutter speed to introduce a hint of motion into the car’s tires or surroundings so that you can get a sense of movement.
Even portraits can benefit from considering shutter speed. In bright sunlight, aperture mode will likely do a great job of figuring out the right shutter speed to keep your images sharp. But occasionally, if you are in a particularly dark or shady area, using aperture priority will drop your shutter speed to too slow a level for you to safely handhold without introducing motion blur, which a viewer may confuse for a shot being out of focus. The GFX 100 does have in body image stabilization, but why rely on that if you don’t have to?
Using auto iSO instead of aperture priority allows you to control that depth of field while at the same time controlling the depiction of motion in your photographs. The only variant controlled by the camera is the ISO.
ISO essentially controls how much grain or noise is introduced into an image. The darker the scene, the higher the ISO you will need and likely the higher the level of noise. As a general rule of thumb, you want to always shoot at the lowest ISO possible (unless you are intentionally introducing noise). So, with that in mind, I feel less guilt about letting the camera automatically determine the ISO level since all I really want from that variable is for it to always be as low as possible.
On the Fuji GFX 100, to enable Auto ISO:
-
Make sure you are in manual mode.
-
Turn your aperture dial on your lens to the desired f-stop.
-
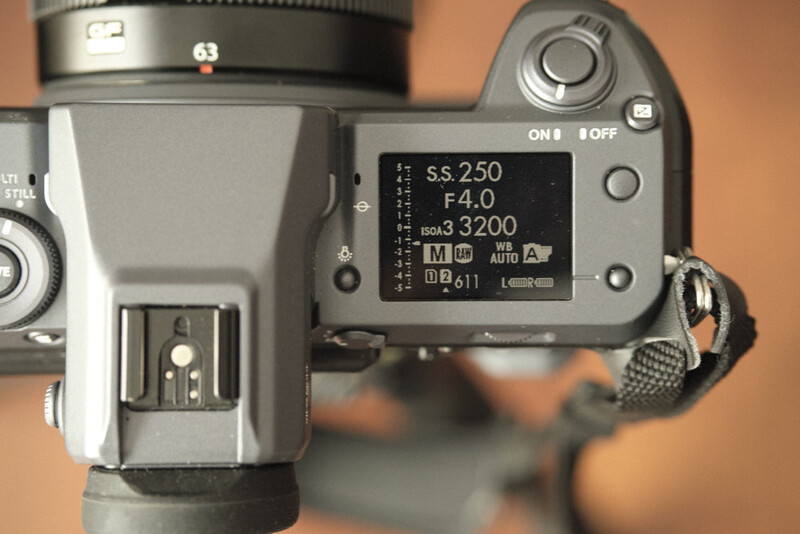
Set your shutter speed manually to the shutter speed that will best convey your action.
-
Use the front dial or quick menu to change your ISO setting until it reads "Auto ISO."
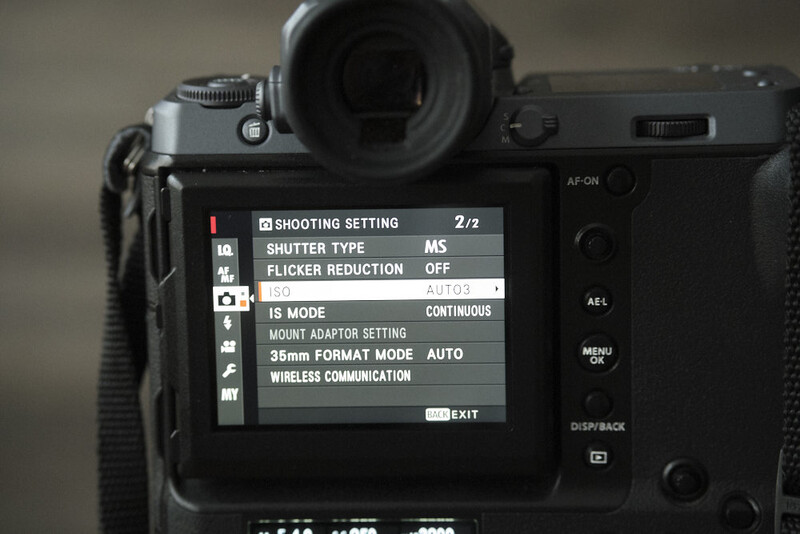
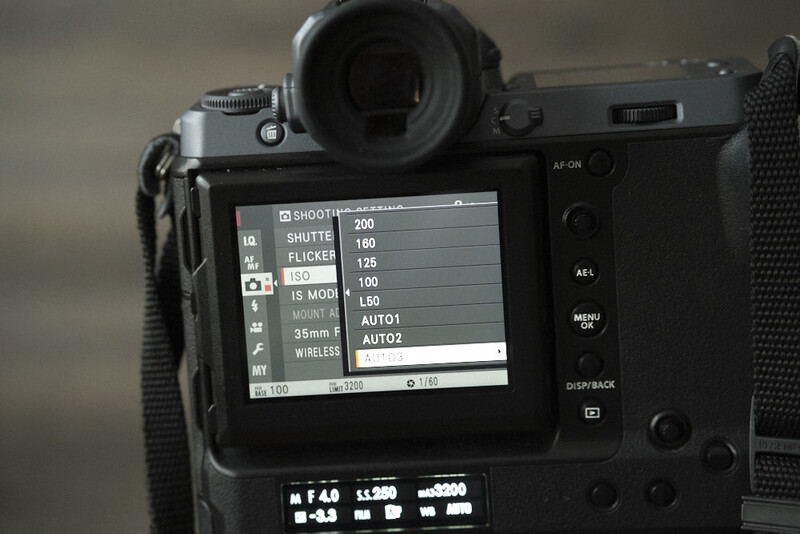
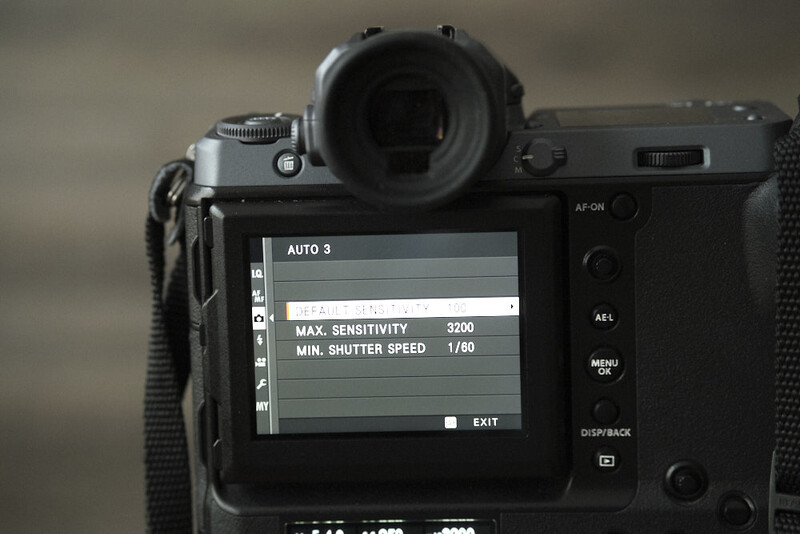
The camera has three available presets. Each preset allows you to set a minimum and maximum ISO range. So, for instance, if you never want your ISO to go over 3,200, you can set that as the maximum setting while maintaining your lowest ISO setting at 100. So, the camera would take into account your chosen aperture and shutter speed combination. Then, it would see auto-select the lowest ISO possible starting at 100 then topping out at 3,200. I use this as my base. But you can also use either of the other preset slots to set your range higher or lower depending on your tastes.
Side note for those of you with the X system cameras: setting Auto ISO on the smaller cameras is similar. In that case, your would turn your aperture and shutter speed dials to your desired settings. Then, you would turn the ISO dial to “A.” Then, you would go into the menu system and decide on your presets in the same manner as you would on the larger system.
Use Custom White Balance Instead Of Auto When Using Flash
Coming from a Nikon system where there is a flash setting for white balance, it took me a moment to figure out how to set white balance when using Fuji systems. Not sure why they don’t have a standard flash option in the white balance menu, but the manual suggests that you use Auto WB when connecting to flash for the best results. Here is one where I feel I need to overrule the manual.
If you’re only taking one picture of one object, then the auto white balance setting will do just fine. The camera is making a multitude of readings and will develop a reasonable facsimile of what the colors in your scene should look like. But if you try using auto white balance on a living, breathing subject with strobes and constantly changing angles, you will quickly end up returning home to do your edit only to realize that you have provided yourself a major headache.
The camera will have tried to optimize each frame, leading to little micro adjustments in your white balance from shot to shot. So if, for example, you are tasked with shooting a fashion lookbook and producing hundreds of shots of your subjects, you will get a series of shots where the white balance shifts slightly with each photograph, so even the same red dress will look slightly different in each successive frame. Sure, you can try to fix this in post, but in my experience, it’s never quite right.
Instead, your best bet at holding onto your sanity is to preset the white balance either by using the custom white balance (and balancing off of a white surface) or dialing in a desired numerical value. This will keep your white balance consistent from shot to shot regardless of small adjustments made by the model or wardrobe changes. Heck, even if you use the wrong white balance initially, as long as you shoot the entire session with that same white balance, batch adjusting your white balance in Capture One after the fact will be a breeze. But it’s only easy if the original white balance of every raw file had the same numerical value to begin with.
Capturing consistent white balance will make it far easier to deliver a consistent product to your client in the end and ensure that their products are correctly represented.
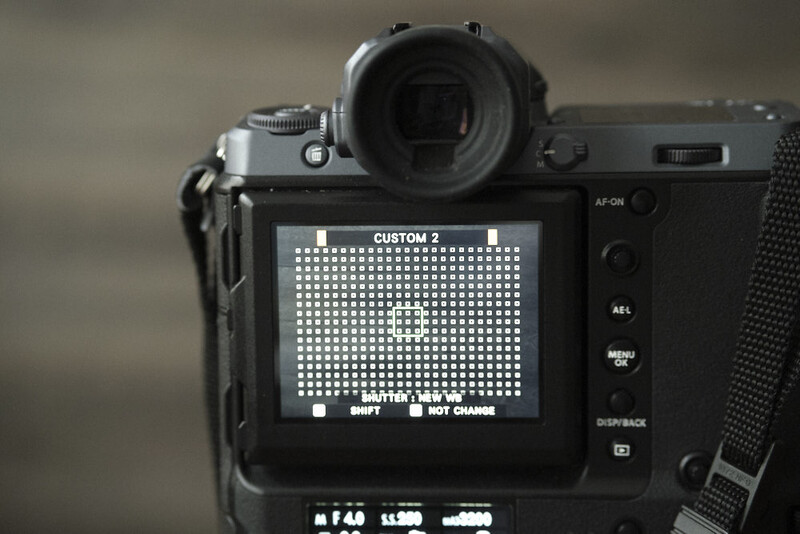
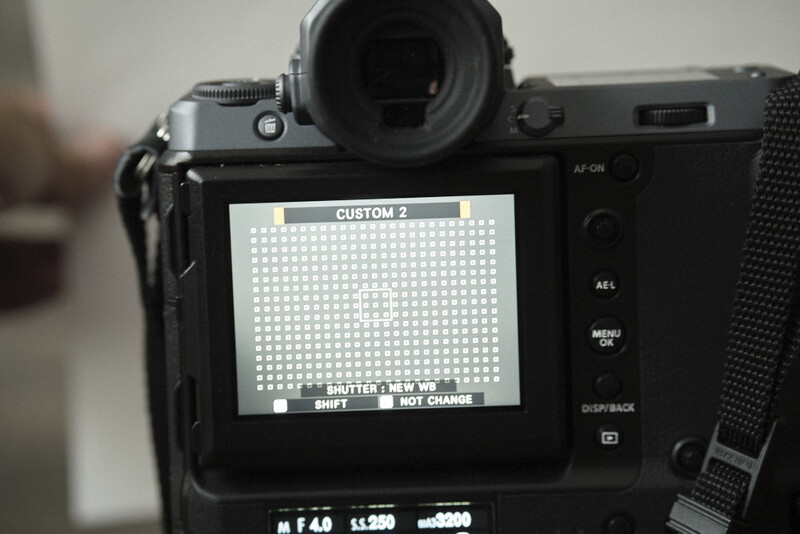
To do custom white balance on the Fujifilm GFX 100:
-
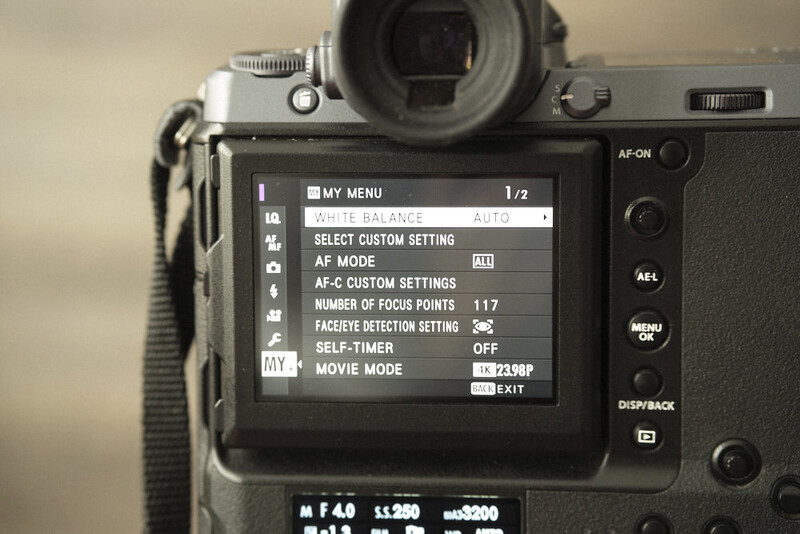
Go to the IQ menu.
-
Select "White Balance" of the second page.
-
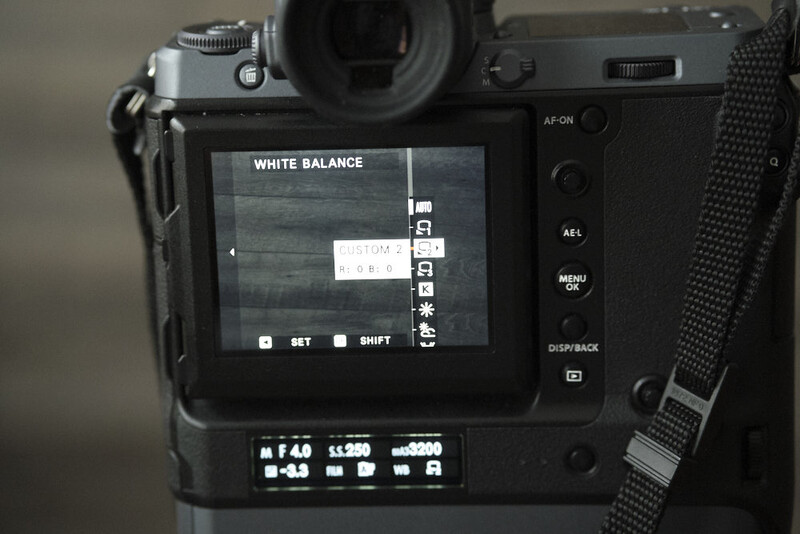
Choose one of the custom white balance icons.
-
This will give you a small box on screen.
-
Hold up something white (a regular piece of paper will do the trick) in front of the lens so that it fills the box in the same light as will hit your subject.
-
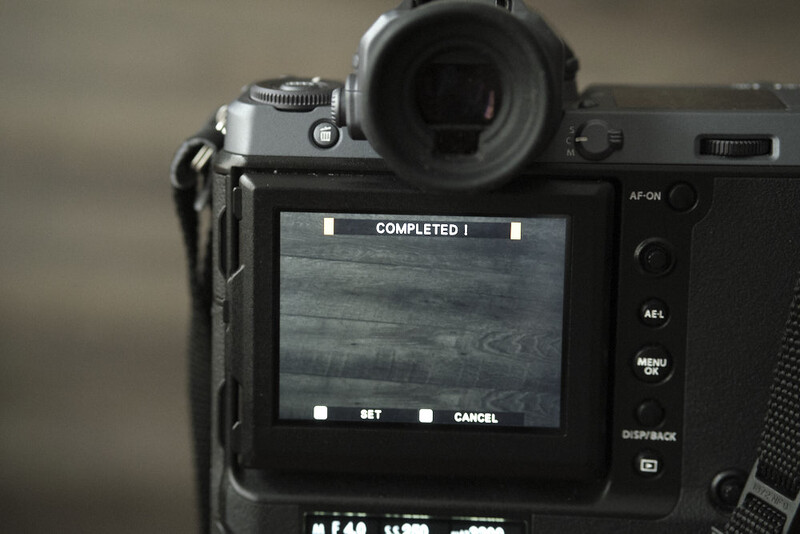
Press down on the shutter.
-
Once confirmed, press OK.

Keep Firmware up to Date on Both Your Camera and Your Lenses
It may be a pain to constantly be connecting your camera and/or lenses to your computer and downloading random files off the internet to load onto them, but in the world of digital, keeping your devices updated with the latest firmware can make a difference to your system’s performance. Especially with the improvements in autofocus between the GFX 100 over its older brothers, the GFX 50S and GFX 50R, be sure to download the latest firmware for all your lenses to ensure optimal performance.
Okay, that’s it for now. Hopefully, you will find some of these tips helpful for shooting with the GFX 100 or any of its smaller siblings. If you have any more helpful tips, be sure to leave them in the comment section to help other users.


Join the Fstoppers community for free
-
Post comments and join in the discussions
-
Browse the site ad-free
-
Share your work and get featured in the community
-
Compete in the photo contests for fun and prizes
9 Comments
Holy crap that is one hell of an in depth article! Ones of people on this forum will find it relevant. LOL.
This is incredibly long article. I will bookmark this so that I will have some tutorials when I buy my gfx-100s (same time next year)
Step one: Check your credit limit.
Crikey, how helpful this is, this camera's been sending me a bit nuts and this is great. Thanks. By the way if you're in the mood to write about focus stacking or depth of field previewing, I need it because I like to set a camera at a set distance on manual focus and hope the subject walks into my focussed zone, and the quality difference between these massive raw files and using smaller files, I won't object. Thanks again.
After years of being staunch Nikon user, I'm switching to Fuji. This article gave me a great insight into the menu system and i can't wait to get started with my new gfx 100. Thank you for a great article...kudos
Congratulations on the new system :-)
Hi Malcolm, Thank you for your kind reply. I just read your article "wandering tn the desert with a gfx 100". I know there have been several firmware update sense you penned the article and Im wondering is you're still having those wonky issue? Id be greatful to hear. Thank you so much Charlie
Hey Charlie. In my experience, yes, I do still have wonky issues with the GFX 100. Don't get me wrong, the image quality is AMAZING. And its not like the camera doesn't do it's job. But I don't think it's a stretch to say that I do find myself having more issues with the GFX than my other cameras. Some of those issues are due to me being clumsy and the GFX buttons being both small and highly customizable :-). Others are kind of just weird, like my battery level indicators never quite being accurate. Or certain random settings seeming to change for no reason when I've left the camera off for an extended time. Then I pick it up to shoot and find, for example, that I'm in JPG only mode instead of Raw for some reason. Others I've spoken to have not had these problems at all. So, it's possible it's just me. I primarily use the camera now for personal work. As I said, the IQ is second to none. So when I have time to double check before I shoot and really just want to get the highest possible quality, that's the camera I go for. When I need to move super fast and just know my camera is going to stay exactly how I set it without fail, I usually shoot with one of my other cameras. It's just a matter of preference though as I'm sure other shooters will have found the camera perfectly dependable without any issues.
I bought my 100s the same month it hit the market, and have been using it ever since, but with some long breaks in-between. Over the years, I have read numerous articles about how to use the thousand possible combinations of settings. Undoubtedly, this article is the best and most helpful that I have seen. Thank you!