

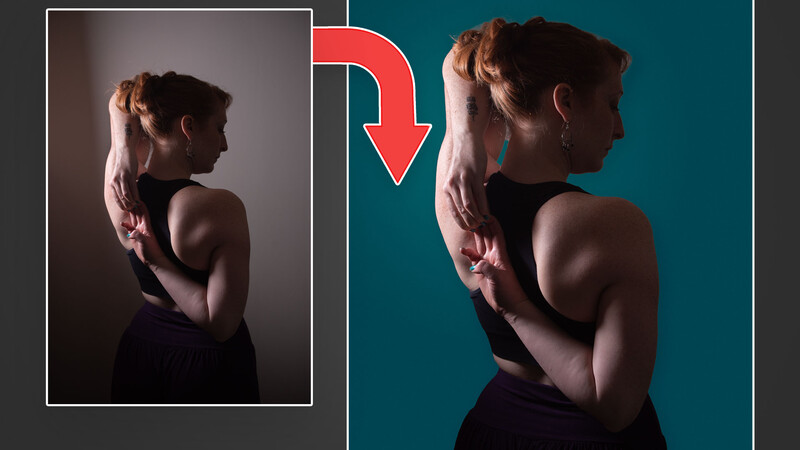
Using the latest version of Photoshop CC, there's a new method you can use to cut out a portrait and place in a new background. And the great thing is, it only takes a matter of seconds.
I remember a time when Photoshop was in its infancy, and my image editing skills were too. I'd spend countless hours attempting to cut out a portrait with the pen tool or even the brush and place a new background behind, but now, I can do this all with just a few clicks and a little adjustment.
Using a new tool and a bit of luck, you barely have to lift a finger, Photoshop CC is now so powerful and intelligent that it can do a lot of the heavy lifting for you. So, let's take a look at that new method and see if you can cut out a background from a portrait in just a few seconds.
1. Open the Image
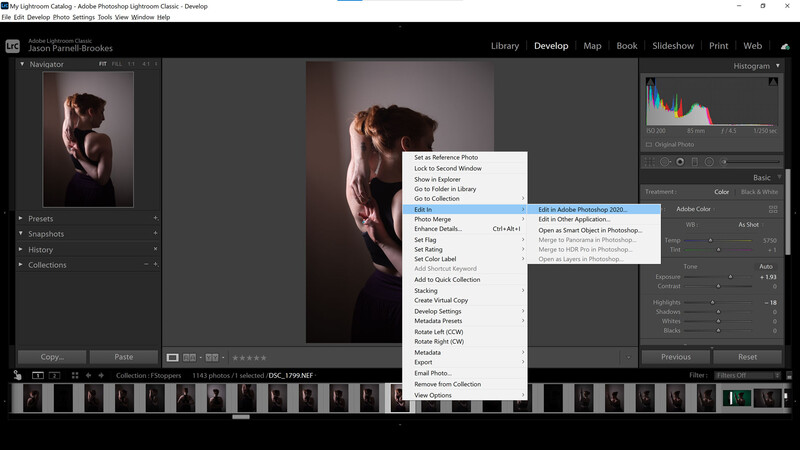
The best images to cut out are ones with clean, clear backgrounds. That's because it makes it easier to distinguish between the portrait subject and the backdrop. However, even photographs with busy backgrounds are relatively easy to cut out nowadays. I've chosen one with a clean backdrop but harsh light shadow falloff just to keep Photoshop on its toes.
2. Choose a Selection Tool
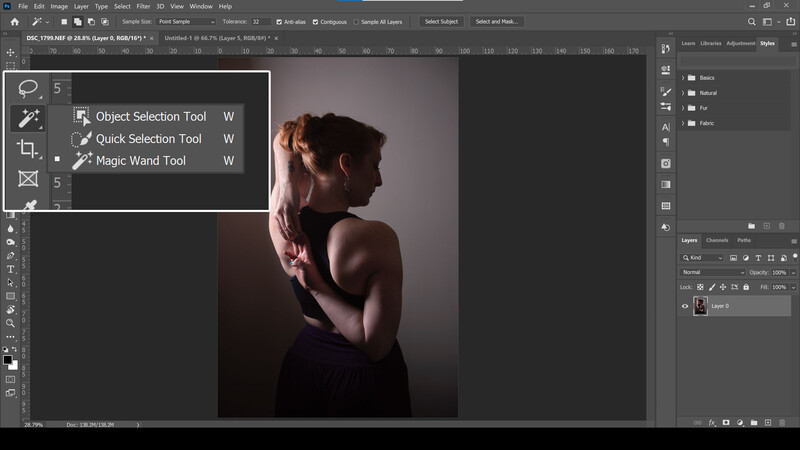
This could be the Magic Wand tool, Quick Select, or Object Selection tool. It doesn't really matter at this point, because it's the extra, new feature within them that we want to utilize. Far from the days of making selections and adjusting the tolerance and sensitivity of the selection tools, we'll be using Adobe Sensei technology to cut out this portrait for us.
3. Use Select Subject
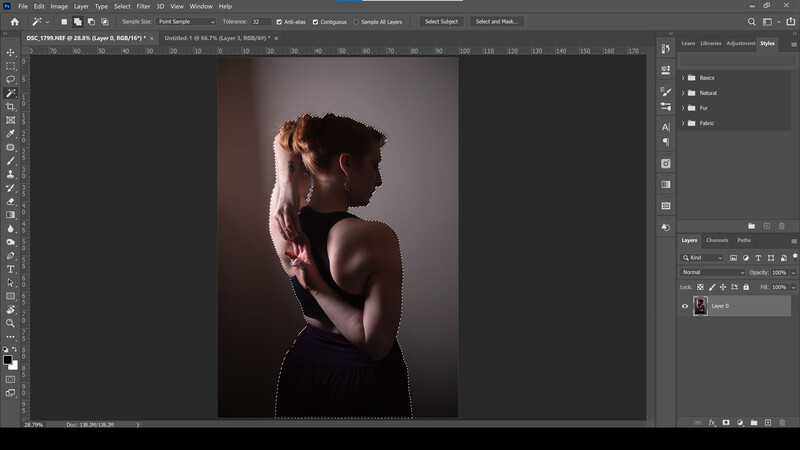
Here's the clever bit. Photoshop's new Select Subject option is available under every selection tool right at the top of the window. It sits next to Select and Mask, which is used to refine the selection. Select Subject is demonstrated by Adobe and many others to work well even with complex backgrounds and under a variety of different lighting conditions.
However, as always, it works best with clear backgrounds. Unlike a standard selection tool, it intelligently detects gaps between arms and legs in the selection process, saving you time.
4. Add a Mask
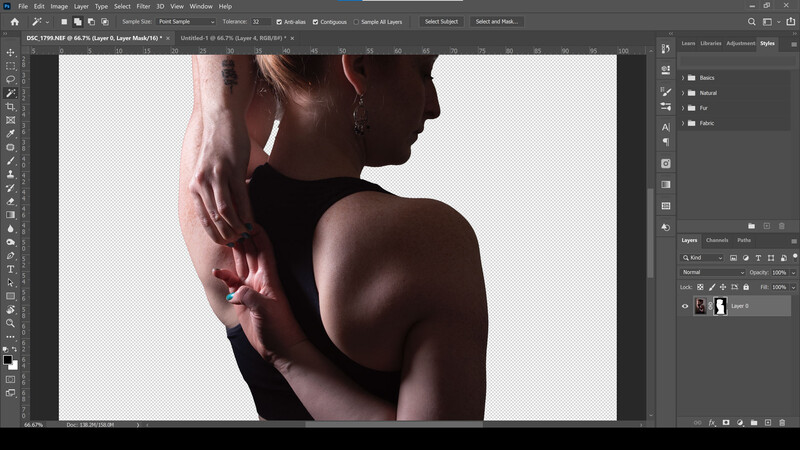
At the bottom of the Layers palette, you'll now need to click on the Add layer mask button to place the selection on the layer. Don't forget that if your layer is locked, you'll need to double-click it and press enter to unlock it. The mask will then drop into place and should cut out the portrait subject with relative ease, as it has done here.
5. Drop in the Background
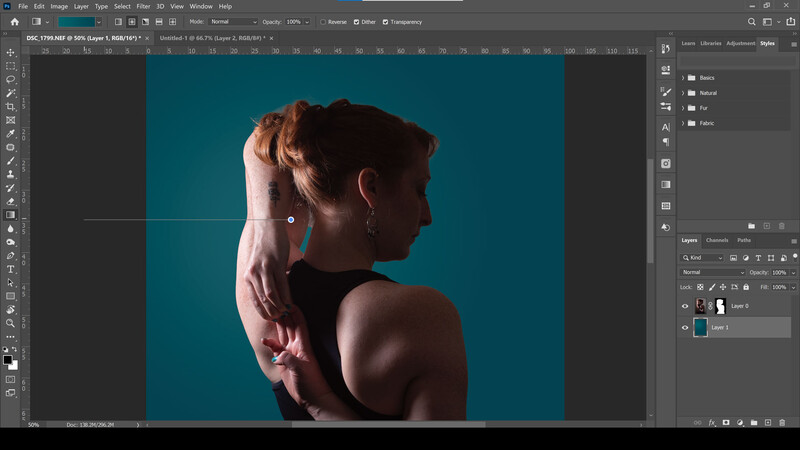
Make a new layer (keyboard shortcut Ctrl+Shift+N or Command+Shift+N on a Mac) and place it underneath your portrait layer. Now, you may want to make your own background, like the gradient I've made here, or opt for placing a ready-shot backdrop. The key here is to make it blend together well so it looks seamless.
The best way to do this is by matching the tone of the portrait subject. My portrait is dark, with a single light-source camera left, so I've dropped a slight radial gradient behind the brightest part of the subject.
6. Add a Layer Style
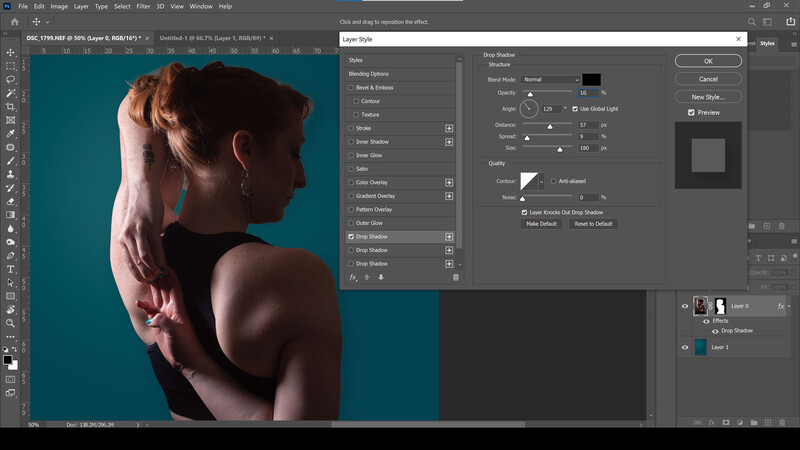
The last tweak I'll be making to this background replacement is to add a layer style from the bottom of the layers palette. By adding a simple drop shadow, I'm feathering the dark side of the subject with the backdrop. I'm also adjusting the angle of the light for the drop shadow such that it casts a shadow in the direction a shadow would naturally occur, camera-right, due to the light source placed camera-left.
7. Refine Your Selection
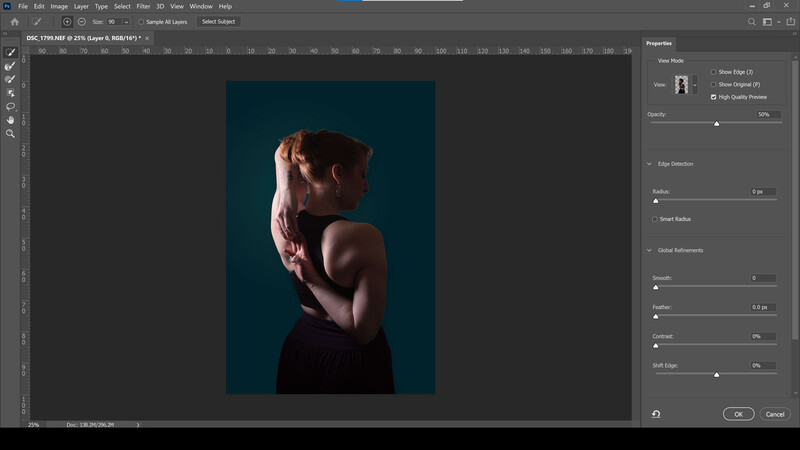
If you've noticed that the Select Subject feature hasn't produced the best cutout for you or if you want to get it absolutely perfect, then you'll need to refine the selection. With the mask thumbnail selected, head to any selection tool (Quick Select, Magic Wand, or Object Selection), and head to the Select and Mask button at the top of the window.
From here, a new window will appear to refine your selection. You can paint over the existing selection and make other global adjustments such as smoothing, feathering, contrast, and you're also able to shift the edge inward or outward if you need a little leeway.
Summary
I'm fully aware that the Select Subject tool isn't perfect. It's relatively new to the Adobe software and can still be improved upon. But for something that once took me hours of painstaking work to be completed within just a few seconds by Photoshop itself, I've saved a lot of editing time. In fact, I timed myself just now doing the whole process above, and it took less than 60 seconds. Of course, it's not 100% accurate, but for those that don't need perfection or perhaps have a high volume turnover of work, it's a time-saver for sure.
Main image arrow icon by Michael, used under Creative Commons.
If you'd like to take your photo editing to a new level, make sure to check out the variety of Photoshop tutorials and plugins that will speed up your workflow and help you create stunning, professional work. Save 15% by using "ARTICLE" at checkout.


5 Comments
Displaced my arm
With Photoshop updating, so should our techniques as well. For years, for example, I used the 50% gray fill technique for my dodging and burning, then moved to using a transparent layer instead, and finally by trying and trying I came up with my own way to do it (2 layers). Which, incidentally, I made a video about: https://www.youtube.com/watch?v=fbU0W_7-CsQ
Thanks for sharing it Jason.
This is helpful. I'm bookmarking it for later!
It's a mystery that the topic of this article is "Use this New, Easier Method to Replace Backgrounds in Photoshop".
How can it be a new method when it is one of the most common and one of the most used methods which people having been using for years.
Maybe he means it is new ... to him. LOL.
i believe he means the new subject select, which actually does a halfway decent job, instead of the older one that was worthless. so its a new technique because the tool works now.