
Dodge and burn are one of my favorite go-to techniques. It can be used in so many different ways by using numerous techniques. You can use dodge and burn to retouch, to globally guide a viewers eye around an image. It is great for adding contrast to specific areas for detail, as well as stylizing your images it gives it that painterly feel. The list goes on and on. But if you then start throwing the various techniques how you can create dodge and burn, it gets even longer. Some people use the soft light method, some the fifty percent gray method. I sometimes use both of these. But the best way, in my opinion, is a curves adjustment dodge and burn. Why is it the best? Because like all the best things in Photoshop, it is non-destructive and adjustable. I will show you how to create the curves adjustment dodge and burn group and then I will go into a little more depth and how you dodge and burn to stylize.
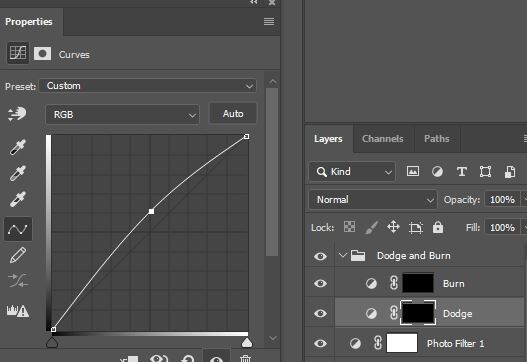
First, let us learn how to create the amazing curves adjustment dodge and burn. Go up to the adjustment panel in Photoshop and click to create a curves adjustment. When the curves box appears click it in the center and pull the little square up around one and a half squares. The image should turn brighter overall. Then with that adjustment selected to create a layer mask. Make sure the layer mask is selected and then hold control and press "I". This will invert the mask and hide the adjustment you have made by pulling the curve up. Rename this layer "Dodge".
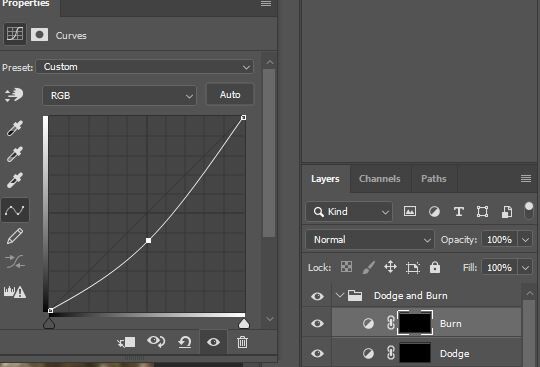
Next, we do something similar to create the burn curves layer. Once again create a new curves adjustment. Instead of pulling up, this time click on the center and pull the curves layer down around one and a half squares. The image should turn darker. Now add a layer mask, and like before hold control and press "I" to invert the layer mask and hide the adjustment. We need to rename this layer "Burn".
So now we have our curves adjustment dodge and burn set up we are nearly ready to rock and roll. But let me explain how you use the layers to dodge and burn. Because we are working non-destructive, and I urge you to too, we use our brush to paint directly on to the layer mask. We are un-hiding the adjustment but only where we paint with the brush. This stops us from destroying any pixels and also means we can work in an adjustable way. Gone to hard a specific area, well all we need to do is switch the color of our brush and then erase (Paint the layer mask back on). This gives us a huge amount of control.
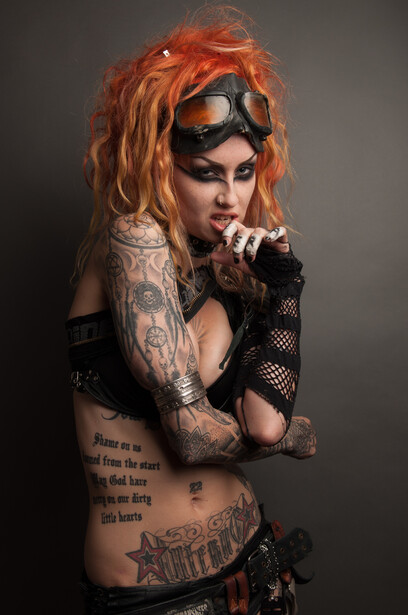
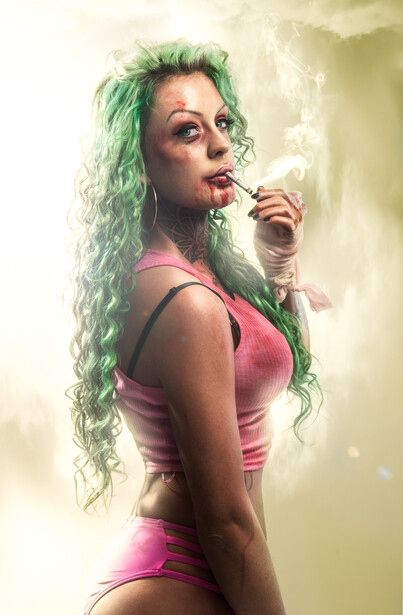
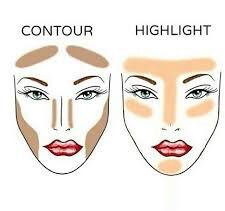
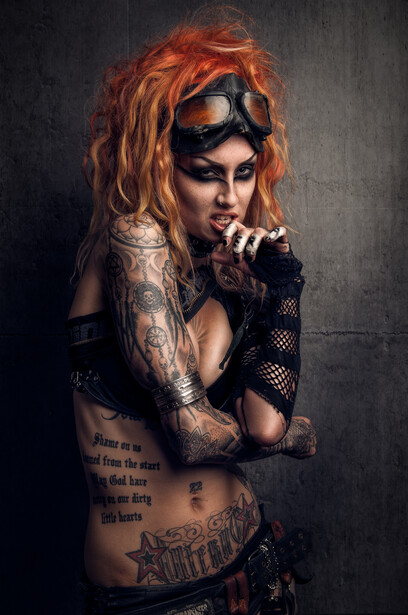
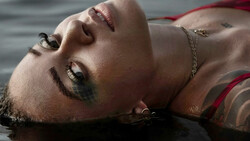
Now you know the rules, let us get started. I am going to dodge and burn the image above I always start from the face and work in areas. For example, I will dodge and burn the face, and nothing else until I finish that area. I will then start on the left arm, dodge and burn that completely and then move on to the right arm. If you work in sections it is easier to keep up with where you are and what is already done. What you want to do in each area is dodge the highlights and burn the shadows, it is a little like tracing. You are adding more contrast to those areas. A good guide of where to dodge and burn the face can be found on makeup guides on Google. I used to use these as references when I first started. After a while, it will become second nature.
How far you take the dodge and burn will ultimately affect the style of your final image. A little dodge and burn can be very subtle and go unnoticed. If that is your aim, then this should not be a long task. If you are like me though and prefer a stylized look it is always better to spend a long time on it, dodge and burning all the fine details. This is how you get the painterly feel that a lot of commercial advertising images have. Ultimately it is up to you and your preference. Just remember dodge and burn can be used in multiple ways and it is good to have it in your bag of tricks.
Join the Fstoppers community for free
-
Post comments and join in the discussions
-
Browse the site ad-free
-
Share your work and get featured in the community
-
Compete in the photo contests for fun and prizes
6 Comments
Agree
Wait for it. Hater comments will go, “Dodging and burning changes the background?”
Excellent!
And the easiest way to look like an over painting amateur if not done properly. This is not used to fix bad lighting but to enhance features or for artistic reasons. But mostly what I see is people shooting models with their back to the sun for rim light and then dodging the front a ton to look like there was a light there. Pretty lazy and catch lights give it away.
Different article. But, yes, you do see that. That's why God invented off camera lighting. But how this demonstration shows, it's very useful to create and enhance texture and depth.
As professionals, we never stop learning. I find this article of much value. It's too bad that some people find it necessary to leave negative comments here. We don't have to agree with someone else's techniques but at least show respect and gratitude for their time and effort to teach us another way.