Flat-looking images usually are not about the camera or lens at all. They come from choices about light, contrast, and viewpoint that quietly cancel any sense of depth.
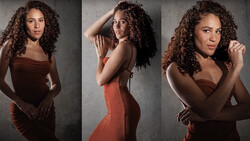
Coming to you from Martin Castein, this practical video breaks down why some images feel lifeless while others pull you right into the scene. Castein starts with the idea of lighting hierarchy, where you decide what receives the most attention from the light instead of letting everything sit at the same level. Sometimes that means the subject is not the brightest point, as in his portrait where the glow in the hair leads your eye before the face. Other times, as in his image of the Shard, the foreground steps get more emphasis so the light guides you down into the frame before you notice the building. You see how shifting the brightest area from “main subject” to “part of the story” changes the way someone reads the image.
Castein then talks about contrast as another way to create depth when light alone is not enough. In another shot, he boosts contrast along the path and in the distant light so the story of moving through the landscape becomes stronger than the little house itself. In a portrait from a rainy day, he pushes his subject close to dark wooden boards so they act as negative fill, stealing light from one side of the face and building a natural shadow. That small move gives you a clear light and dark side, which instantly feels more dimensional even in flat conditions. He extends the idea with sharpness hierarchy, making eyes and key facial features crisper than the rest of the frame so attention locks onto specific points. He even uses scale and position so a small tree in Wales looks dominant just by getting low and close rather than relying on a dramatic sky.
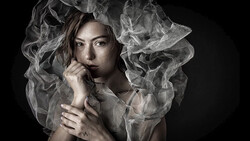
The video also spends time on the type and direction of light you look for before you even raise the camera. Castein shows how side light, even on a cloudy day, shapes textures and forms by giving one side of your subject light and the other side shadow. In studio examples, he turns a model so ruffles and folds catch that side light, which builds depth into clothing and skin without complicated setups. He contrasts this with backlighting, where the actual light source sits inside the frame and becomes a compositional element you have to place carefully instead of something you ignore. Urban “pockets of light” come in later, where strong, colorful sources scattered around a city street can create dramatic backlit scenes if you frame them as part of the design rather than random clutter. Castein also walks through changing camera height, from ground level to eye height, to show how foreground, middle ground, and background trade places in importance as you move. Check out the video above for the full rundown from Castein.
If you would like to continue learning about how to light a portrait, be sure to check out "Illuminating The Face: Lighting for Headshots and Portraits With Peter Hurley!"


Join the Fstoppers community for free
-
Post comments and join in the discussions
-
Browse the site ad-free
-
Share your work and get featured in the community
-
Compete in the photo contests for fun and prizes
No comments yet