Window pulls are one of the most technically demanding parts of real estate photography post-processing, and getting them wrong is more obvious than most people expect. A bad blend doesn't just look overprocessed; it can make an entire interior shot read as fake, which undermines the entire purpose of the image.
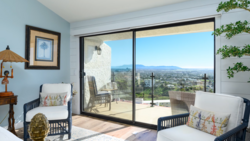
Coming to you from Nathan Cool Photo, this detailed walkthrough covers the specific techniques Cool uses to get natural-looking window pulls every time he shoots real estate. The foundation of his approach is visual hierarchy: not every window deserves equal treatment, and knowing which views are selling features versus background elements changes how aggressively you expose and blend them. A lake view outside a living room gets center stage; a small bathroom window does not. Cool walks through real examples of each, showing how exposure decisions start in camera and carry through into the blend.
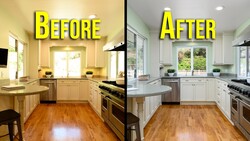
Cool is emphatic that you should never cut out a window. Cutting produces that telltale fake look. With darken mode, you can paint in the window view without precise masking, which means mullions, mini blinds, wood frames, curtains, and even partial obstructions aren't a problem. He demonstrates this live in Photoshop, painting a window pull at 100% brush opacity and showing how clean the edge transitions are without any selection work. One detail that trips people up is over-flashing the window during capture. Cool shows a comparison where a too-bright flash pop creates haze on the glass and odd reflections that darken mode can't fully fix, which is why getting the flash exposure right in the first place saves significant cleanup time later.
Cool also covers a repair layer technique for situations where reflections persist even with a properly exposed flash pop. The repair layer uses a no-flash ambient shot, and he shows exactly how to apply it with a boundary edit so you're only replacing pixels inside the window frame, not disrupting the surrounding wall or trim. Each window in a frame should be treated as its own layer. If one window has a screen and the other doesn't, the exposure difference will show, and you need separate pulls at different camera exposures to match them. He also briefly mentions using a curves layer to add punch to window pulls, with a separate video on that technique linked in his description. White balance is the last major variable he covers, and it's where a lot of blends fall apart quietly. Your flash shots for the interior are often around 4,500 K, but window pulls need to be closer to 5,000 to 6,000 K to match the daylight outside. Shooting at the wrong color temperature produces a pull that looks overly cool and immediately reads as composited.
Check out the video above for the full breakdown from Cool, including his live Photoshop walkthrough and the specific layer structure he uses across different window types.


Join the Fstoppers community for free
-
Post comments and join in the discussions
-
Browse the site ad-free
-
Share your work and get featured in the community
-
Compete in the photo contests for fun and prizes
1 Comment
Great information but never heard of Window Pulls! I got into HDR years ago due to seeing the out door view was clear as well as the indoor and mostly yes the out door view was most times very bright. But not using a flash but just the HDR combined HDR did the job. I am just a hobbyist not one who works at it. Some play time is in the future.
Never used PS but sometimes you see and want to capture. Another use of the HDR is getting the indoor capture from the outside.
There is one device most do not know about is the LensSkirt say up high in a hotel or building or on a bus/train/car and want to capture the outside but windows. It has suction cups to hold to a window blocking reflections (I know new in Lrc or PS) just use a longer MM lens.
Not knowing much but a challenge is seen, but before knowing a 16-35mm is gold my mistake going wider like 12mm or even 10mm. A hint for a sharp moon is to have your HDR top setting at ISO/SS 125 but center at .5 sec getting the last at 30s. for moving things like clouds just keep ISO/SS equal in value and just increase SS you get the same spread but a faster end SS., just some help!!
First A7SM1 and Voigtlander HELIAR-HYPER WIDE 10mm F5.6 HDR
Second A7SM1 and Voigtlander 12mm 5.6
Third A7s and SEL24240 @ 24 mm f/3.5 5 images +/- 3 ev center .4 sec ISO 80. PP in Oloneo PhotoEngine, LR and Nik Color Efex Pro.
The last image done with a canon T2i using a promote control, just some play time and learning.