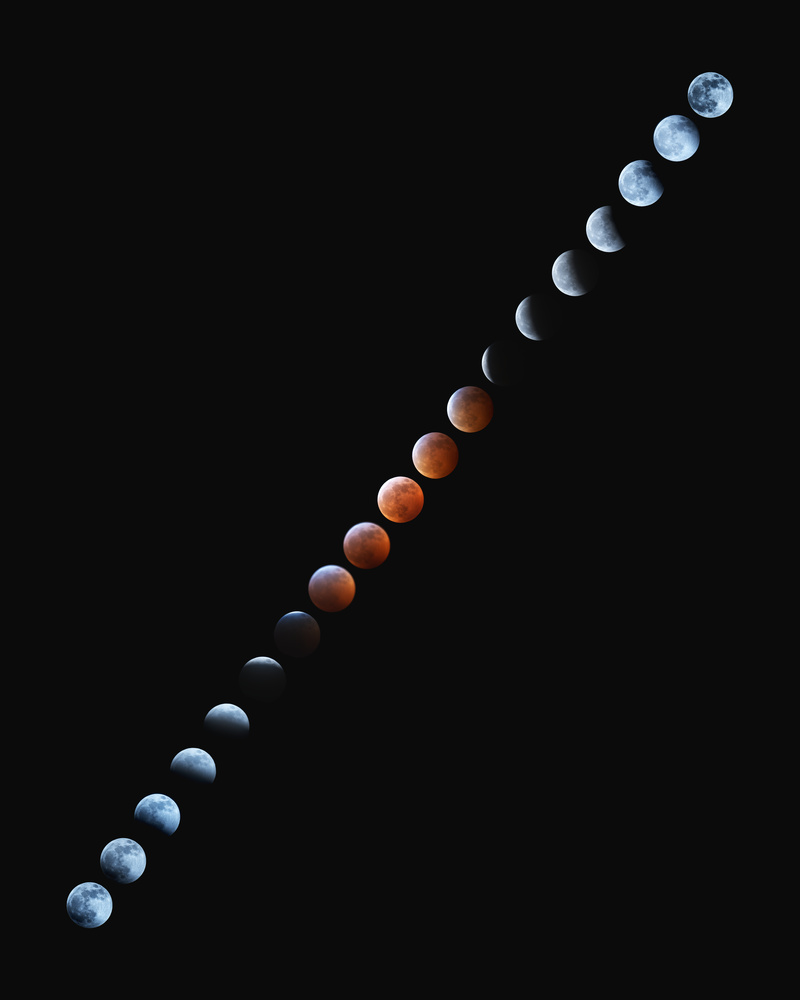
Lunar Eclipse on 1/20/2019
Contest Submissions
Click on the thumbnails below to comment and rate each image.
Click here to learn about the Fstoppers rating system and what each star value means.
Click on the thumbnails below to comment and rate each image.
Click here to learn about the Fstoppers rating system and what each star value means.


6 Comments
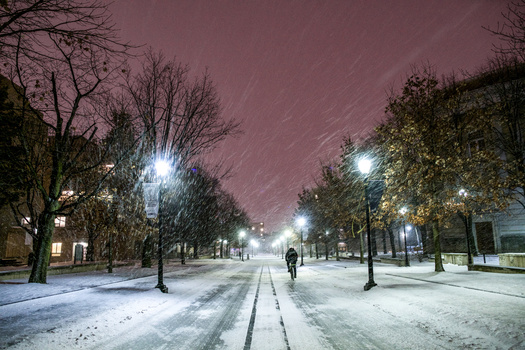
Great photo, but is that really a winter photo?
My feeling was that given it was shot yesterday while standing in the snow in sub zero temperatures, I will always associate it with winter. I had other compositional goals in mind that would have been more obviously “winter” but the weather didn’t cooperate.
I mean the photos of the moon are great. A winter themed picture includes though something that is about winter.
And you're entitled to your opinion, just as I am entitled to mine. And to me, this is a winter photo of which I am quite proud, and that is why I submitted it.
I took this same series of shots but mine didn't turn out this clear due to light cloud cover.
Thanks very much, I definitely lucked out with the weather. The other technique I used to pretty great effect involves using some (free) specialized planetary imaging software. Basically each moon in the composite is created out of a stack of 99 frames, and 15 dark frame exposures. The process I used is as follows. I used a program called Planetary Imaging PreProcessor (https://sites.google.com/site/astropipp/) to automatically crop the raw frames around the moon, do dark frame averaging and subtraction, and compute a quality score for each frame. I then used a program called AutoStakkert! (https://www.autostakkert.com/) to stack numerous exposures into a single frame. Depending on the quality of the individual frames the stacks were comprised of the best 10-30 frames, a lot of trial and error here, and I'm sure if I actually had any idea what I was doing I could get better results. Then I used Registax (https://www.astronomie.be/registax/) to perform some basic histogram stretching and wavelet based sharpening. Also a lot of unguided tinkering here that could almost certainly be improved with actual knowledge of the program. I then loaded the sharpened frames into LR for a traditional LR & PS editing workflow. Lots I would improve next time since I was kind of winging it, but I'm pretty stoked on the result. Currently have a magnification test printing at a local photo lab here to see how large I can print it...fingers crossed for a 48" x 60"!