
There are a couple of ways for models to get into an agency, including hiring a photographer to take photos of them and using those to show an agency their range. This requires the photographer to work quickly and efficiently to get as many different looks as possible in a compressed amount of time to save them money.
Model tests are an integral style of photography for any aspiring professional to learn, this is because it teaches you to shoot fast, prepare your setups so that you can rotate through them quickly, and gets you connections with agencies and allows you to experiment with new techniques while having a "client".
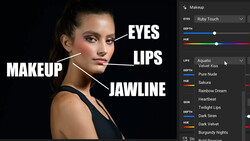
For this model, Romance, she contacted me to have some shots done so she could pitch herself to local agencies here in Toronto and I was happy to help! We brought in a makeup artist and once makeup was done we had under an hour to photograph at least three looks with vastly different outfits and styles to show some range.
One key thing to remember in model tests is that they should be bright and cc try to keep the cool editorial moody shots for cool and editorial shoots. Sometimes I'll throw one in if I have time, but not always.
The First Look
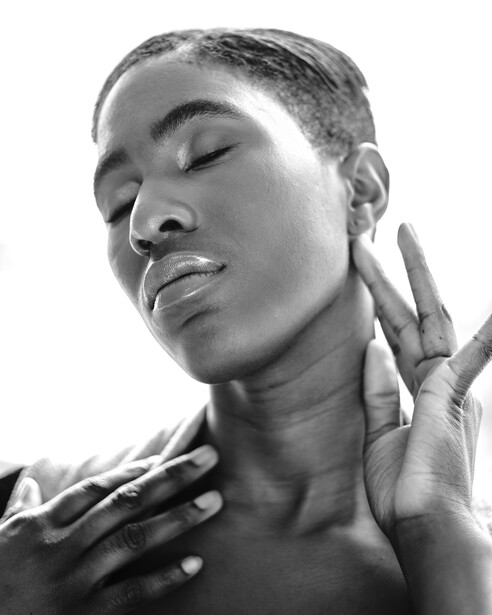
The first look was in studio, as I find it easiest to start there since I always begin with a naturally lit shot, and I can set up the second look while makeup gets done I can get two vastly different photos without changing my setup in-between since they are set up at the same time. In the photo above I used a very simple lighting technique I got from one of my favorite photographers, Nick Fancher, in which you take a cheap reflector and cut a hole in the middle of it, and then all you have to do is stick your camera through the hole, backlight your subject, and shoot! The woven fabric of the reflector will ensure that the hole doesn't spread so no need to worry. about needing to throw out your reflector in six months because it is torn to shreds — these things are rugged!
If your subject is backlit by, say, a window, the light will bounce off of the reflector and hit your subject, causing proper exposure on their face and a white backdrop with gorgeous light wrapping around them. I used my 56mm F/1.2 at f/2.8 on my Fuji X-T3 to give me a nice soft look while still being tack sharp. I wanted the photo to be almost like a beauty shot and show off her beautiful hands and some of the softer side of things. What is great about this natural light setup is that I can easily do it with a second style of lighting already prepped and jump straight to my next photo.
The Second Setup
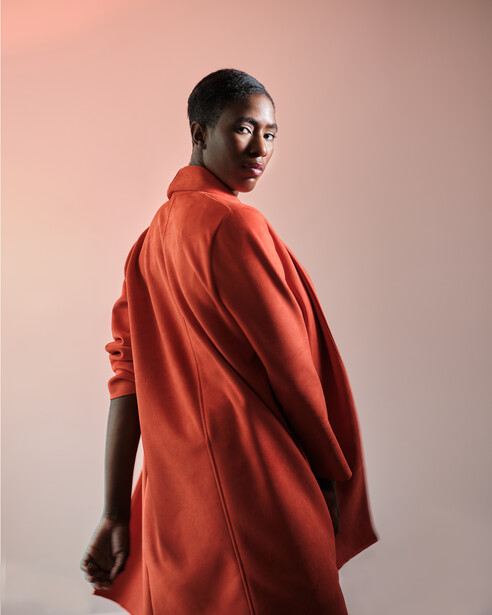
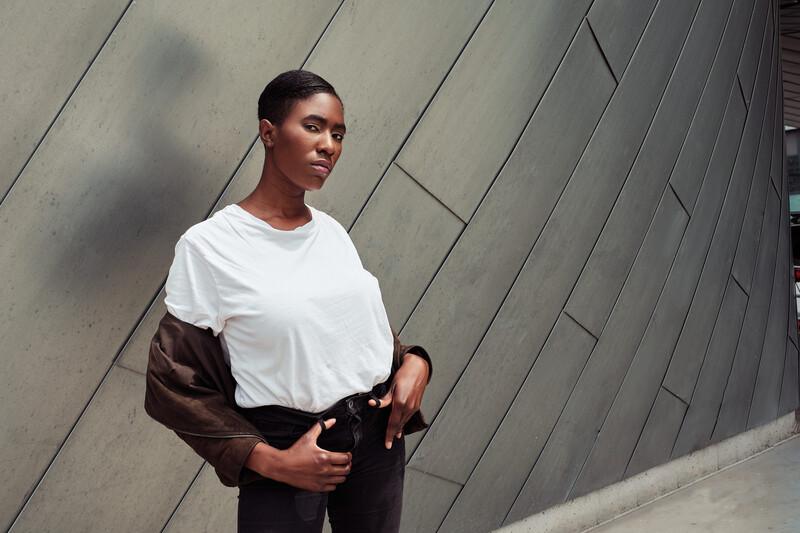
The second setup we used was a simple two light setup. Romance was wearing a gorgeous orange jacket and, as a fan of analogous colors, I wanted the background to look similar, so I threw a salmon-colored gel onto my RF60x and pointed it at the wall and ceiling with a flashbender to create a nice soft color.
For my key light I used another Cactus speed light and a 24" gridded softbox fired straight at Romance with just the inner diffusion to give a beauty dish-like soft/hard light. I then had Romance simply do a few turns and fired off a few frames and then it was time to move on. Similar to the previous shot, I shot this on my 56mm at f/1.8. In this photo I was sure to let the shutter drag just a little so I could have just the tiniest bit of motion blur on her hands and really show off her movement.
Since I was at f/1.8 the large window camera left, the same one I shot against for the first image, acted as a small fill light without being too intense.
The Third Setup
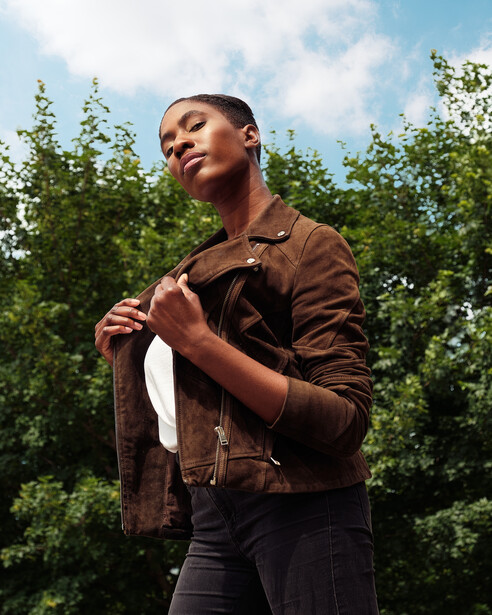
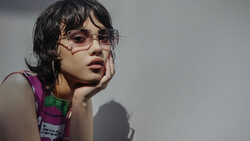
This shot was super simple, I used natural light and zoomed in with my Fuji 16-55 f/2.8 all the way to 55mm and stepped back in order to make Romance seem closer to the background than she was and give me a little bit of background blur without being too distracting. I wanted Romance to look like that line between badass and friendly and I think she rocked that direction. One thing I with I had done is adjusted that zipper but I didn't have time on the day and I simply forgot, to err is human.
Out of all the shots this is the one with the most post production because of the sky. In the photo we have this bright beautiful blue sky and clouds. On the day we, well, didn't.
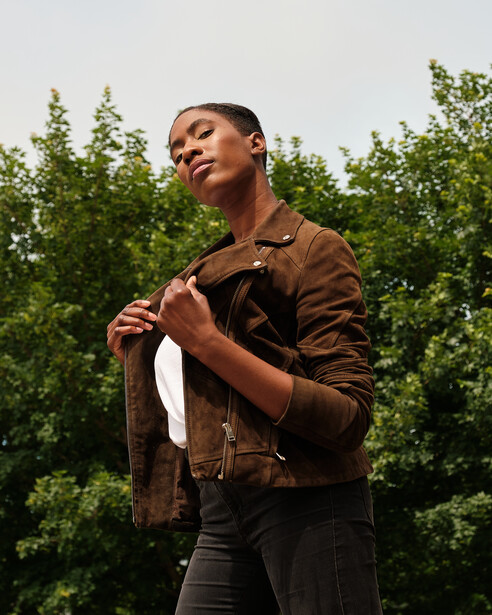
To replace the sky I used Mike Kelley's Sky Library and his tips in the tutorial, like not simply using 100% opacity, were incredibly useful in the replacement not jumping out too much and looking natural.
The Last Setup
Conclusion
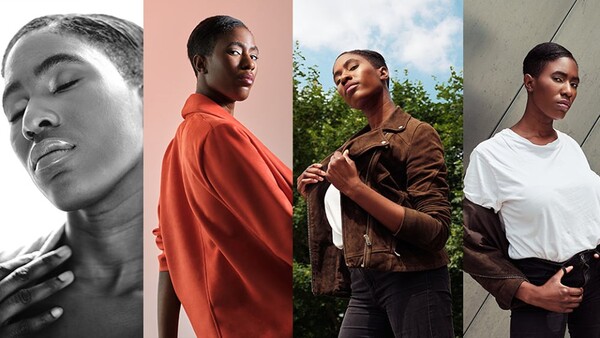
As you can see, with some smart planning, you can crank out four very different looks quickly and easily — images that are clean and simple and can show a model's range are integral to getting them representation and now, thanks to the work we did together, she is represented by a Toronto Agency!
Have you ever done a model test? What did you do to get the amount of looks done? I'd love to see your model tests below!


4 Comments
I have a few clients that I would like to see associated with a legit agency (not one that wants them to spend $2k on photos), blah blah. Several live in small towns and do not have good exposure. I like to see them get a top-notch company and more professional in quality than me. Any suggestions?
Every state's largest cities will have legitimate agencies....and schools just trying to overcharge and not really get you work. A true agency will likely not have classes at all....and the main thing...they will be affiliated with major agencies in NY-LA-Atlanta-Chicago, ect. What you want to do is call all the agencies listed in the biggest city in your state...and find the one that has a direct relationship with a big agency like Ford-Wilhelmina-Elite-Next. I started shooting models in Seattle many years ago. The legitimate agencies there all had connections to large agencies in NY-LA-Paris-Milan and Tokyo. So even though a girl might have been starting in Seattle...if she was good enough...she might end up having representation in half a dozen agencies in 3 countries before she even left the state. They will likely have her shoot with a photographer or two if she goes to visit...but real agency tests are several hundred dollars...NOT thousands.
The key between a legit and sketchy agency is up front costs. Up-front costs are an instant red-flag. Even if it costs 3000 dollars to join an agency, they will take it out of paycheques they get you, not cash
Next time try to add the sky with a blend mode so you don't have that choppy tree look. Or just blur the hell out of it to hide the work.