
There are many different surfaces that you can shoot your food photography on. You can use a table in your kitchen, a table in a restaurant, the floor, or any other flat surface that you can find. When selecting a surface, the colors, patterns, and textures of the surface will have a great effect on the look and feel of your final image. With the background playing such an important role in your image, there should be some thought put into what you shoot on. The best way to control this is to make your own backgrounds! Let me show you why wooden planks are my favorite surface to shoot on.
You can can go dumpster diving and find wooden planks for free, or spend a few dollars at your local hardware store. You can get as few or as many as your want. It all depends on how big you want your set to be. When buying my planks, I like to buy enough planks that when lined up side-by-side, they are about the width of a kitchen table. This can be anywhere from 3-6 planks depending on their width. The grain and the type of wood that you choose will play a role in the final look of the planks, so try and experiment with different varieties. Take however many planks are needed to create your set and keep them together.
 The key to transforming the planks into a beautiful custom shooting surface is paint and wood stain. Sometimes I just stain the wood, other times, I will paint the wood with a light color and then add a dark stain once the paint has dried. To create a natural wood look, stick with browns, whites, and greys for your paint colors. For the stain color, a dark brown works well. You can apply the stain with a paper towel. If you want a deep stain, let it sit and dry onto the board. For a light stain look, add the stain and then quickly wipe it off with a paper towel. I like to paint one side of a set one color and the other side a different color. This allows for you to have two different backgrounds per set of planks! Don't worry if you mess up or grow tired of a color. You can easily paint over it and start over!
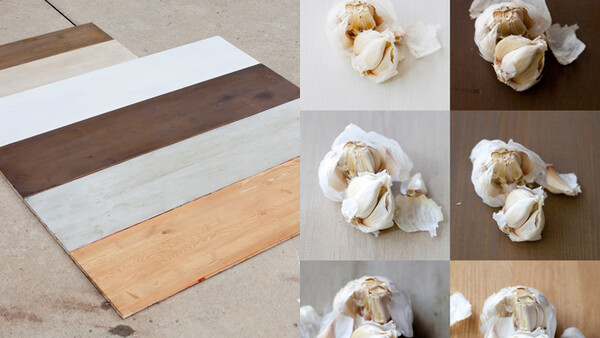
Here are 6 painting combinations that I recently created.

Here are what those backgrounds look like with a subject on them.
 These board sets are compact to store, don't wrinkle, and transport easily.
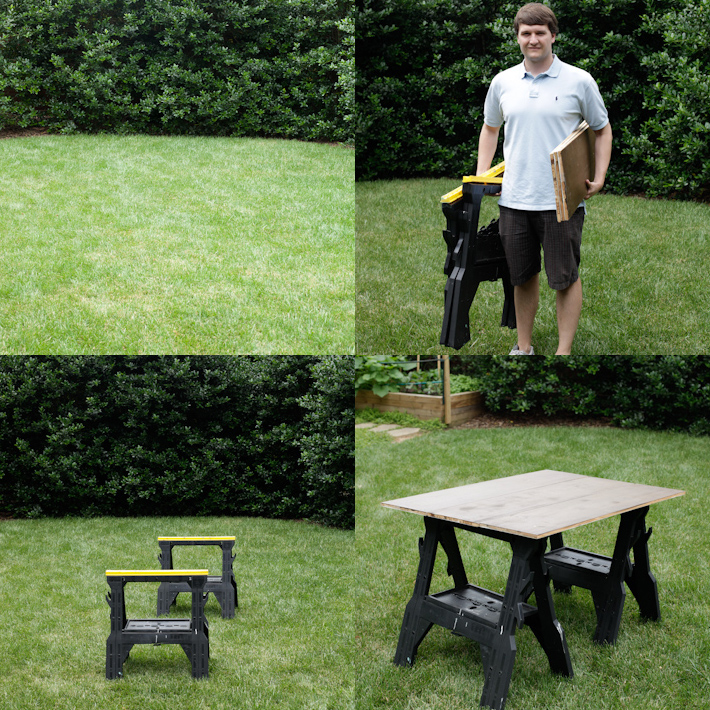 If you are shooting on location, you can place the planks across two sawhorses and create an instant shooting surface! Here are two examples of the backgrounds in use.
 Painted wooden backgrounds may be a little heavier than fabric backgrounds, but they do not wrinkle like fabric will. This means that there is no ironing or steaming required before shooting! If you are looking for a background solution that is durable, you can customize any way that you want, and will transport easily, then give a set of wooden planks a try!
For more food photography tips, tricks, and tutorials check out Issues 1-5 of photographing FOOD!
Join the Fstoppers community for free
-
Post comments and join in the discussions
-
Browse the site ad-free
-
Share your work and get featured in the community
-
Compete in the photo contests for fun and prizes
9 Comments
Lowes / Home Depot is like a toy store for photographers if you have a little imagination. Word to the wise tho - don't try to make picture frames on the cheapest of the table saws. Apparently $199 entry level table saws only go to a sloppy 88 degrees or so on blade tilt.
Love it Taylor! I am a huge fan of doing the best with what you have. I like to snag the sheets of wood flooring per square foot as a back drop. Linoleum is great too as it can be rolled up and washed easily.
I purchased a selection of linoleum pieces recently (less than $20.00 in total as they just cut-offs from the floor and timber shop) they work perfectly and can be rolled up and stored in a cylinder-container similar to those art-student use for their sketches looks something similar to this:
Any examples w/ the linoleum? I can't see how it'll look as good as real wood planks that have texture..
Also, wouldn't you get a bit of unwanted reflection off the linoleum? (Especially if you used studio lighting?)
I assume you could use a polariser to get rid of that reflection. But in saying that I would definitely use the real thing if weight isn't an issue
i have to go to bauhaus deifinitivamente
Taylor you are sick good at these things.
This is really useful thanks. I've also found some printed paper backdrops that look as good as the real thing for only £15 each - www.blackvelvetstyling.com