
I've always been a fan of seascape and waterfall photography. I love these dynamic environments and don't shy away from getting myself wet while closing in on the subject matter. The only thing that could hold me back was the intense spray I had to face while getting close to a stormy sea or a thundering waterfall. But no longer. I found a solution against the limitations it imposed on my photography, and I share it with you in this article.
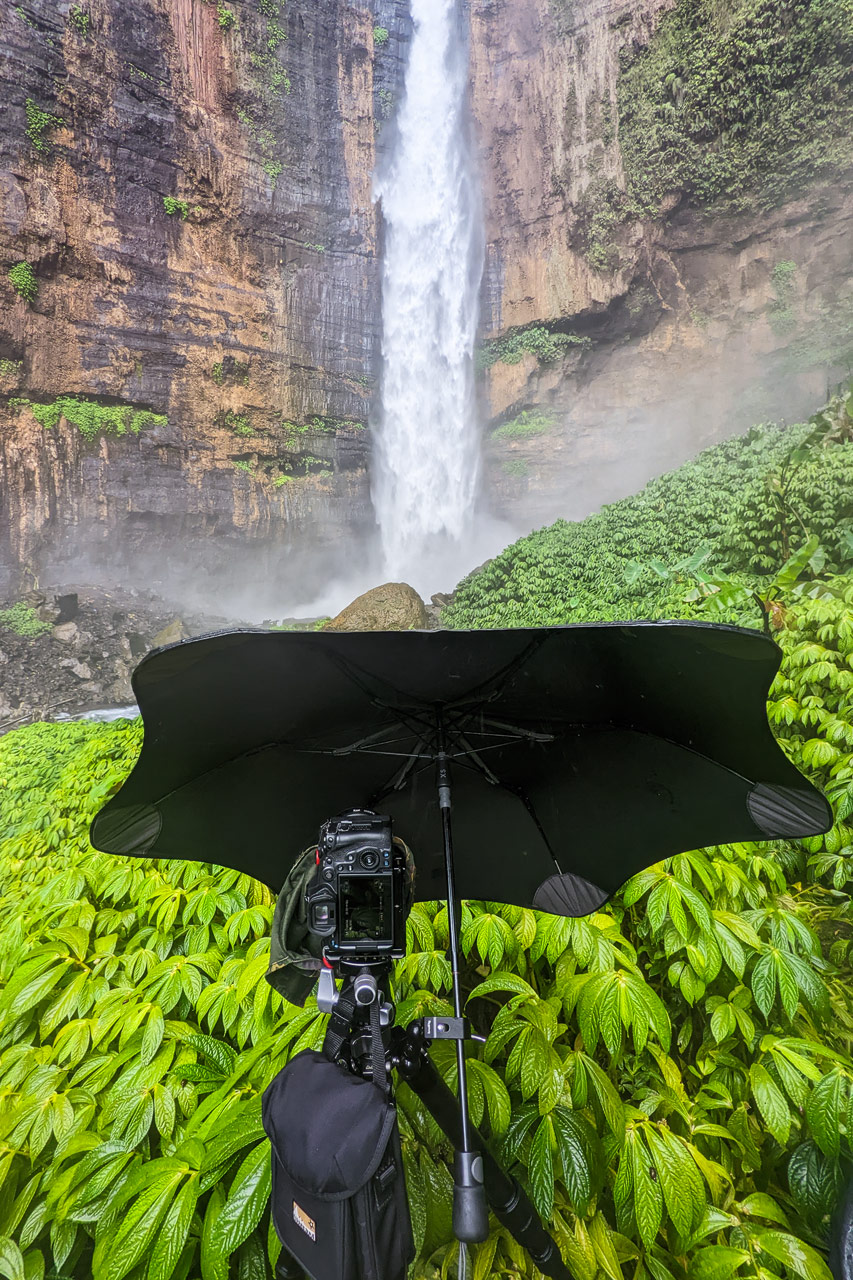
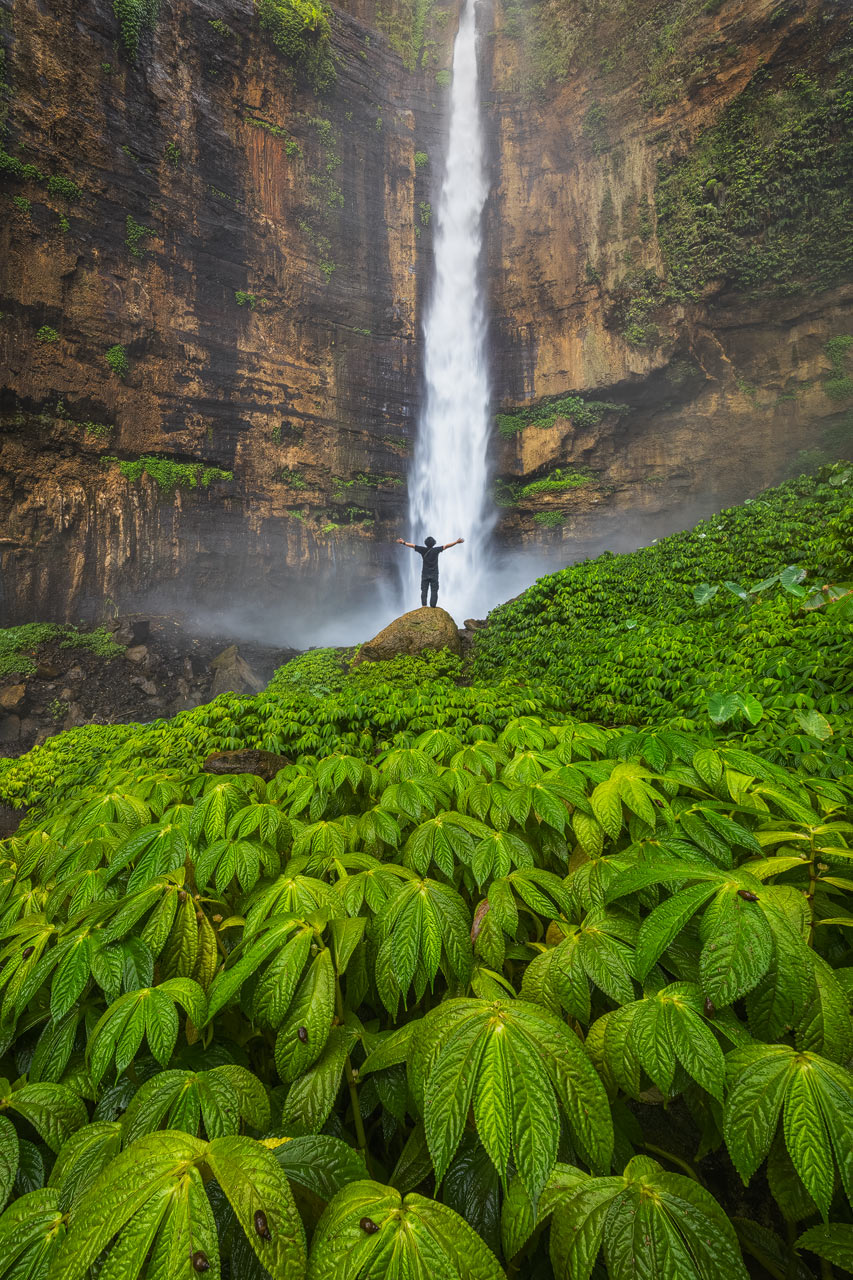
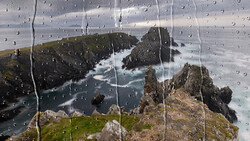
The following photo might look stupid to you. Why would I photograph my umbrella that way? Well, that's not what's happening here. The picture shows my setup before taking photos close to a powerful waterfall. In the feature video, I share a clip I recorded at Kapas Biru waterfall in Indonesia. It took just a few seconds until my GoPro was completely wet from the spray. Taking a clean photo in such an environment would have been unthinkable without this setup. Let me explain.
Equipment for Photography in Wet Conditions
The photo shows how I attached an umbrella to my tripod while facing Kapas Biru waterfall. With my camera behind the umbrella, it wasn't affected by the spray produced by it. What you need for this setup are three pieces:
-
A sturdy tripod that can withstand wind while holding an umbrella is necessary. If your tripod is too light, this setup gets blown over much too easily, even with the tripod legs spread wide.
-
Get a storm-proof umbrella. I use the Metro umbrella from Blunt. It's kept my camera gear dry for six years while being compact enough for travel.
-
The glue between the tripod and the umbrella is a clamp. I use an inexpensive crab clamp from Smallrig. It can be mounted to a tripod in multiple ways, as shown in the feature video.
Technique for Photography in Wet Conditions
You might still wonder how this setup helps take photos in wet conditions. Here's how to use it:
-
Use your waterproof cellphone to scout for compositions. If your cellphone is not waterproof, get a cover for it or your camera. You must know where to set up your camera later. Only scouting can tell you that.
-
Assemble everything before getting close to a waterfall like Kapas Biru. Then head to the scouted location. Keep the umbrella between your camera and the waterfall by turning the Smallrig clamp.
-
Now it's time to get your camera wet: Loosen the clamp and move your umbrella out of the way so you can fine-tune the composition. A rain cover for your camera might be beneficial here.
-
Put the umbrella back in place and use a lens cloth with a rocket blower to free your lens from water blotches.
-
You are now ready to take the photo. Loosen the umbrella and hold it in your hand while maintaining its position in front of the camera.
-
Use a 2-second release timer together with bracketing to take the photo. Before the shutter releases, move the umbrella out of the camera's field of view.
-
Continue with step 4 and repeat as often as necessary to capture all the photos you need to create a clean result.
Even with this technique, you'll get water onto the lens while taking the photos. But it'll only be a few drops in each image. Repeat this process a couple of times to capture enough source material. Load several images into layers in Photoshop and mask out the water blotches.
Conclusion
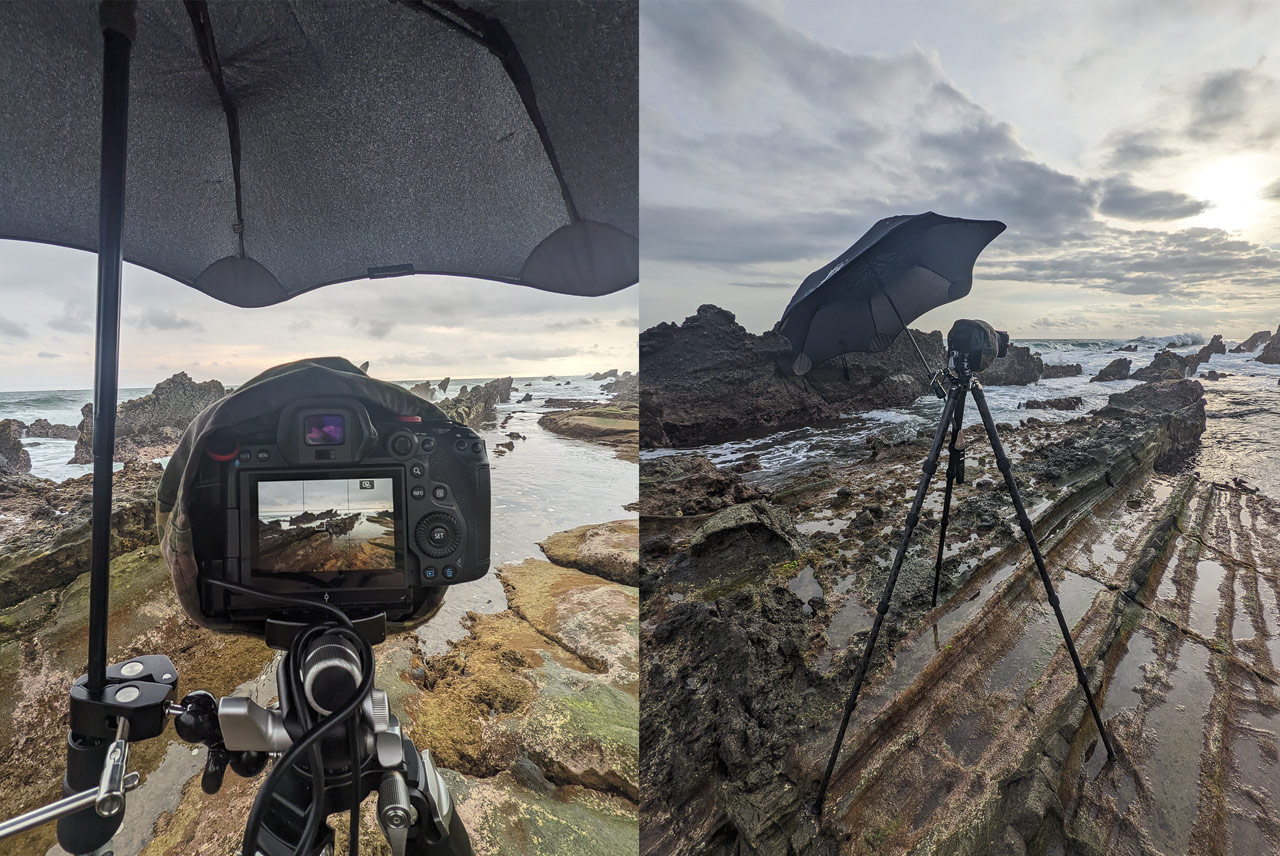
Taking photos this way is more work than a photo shoot in dry conditions. But if you want great results, don't shy away from putting in the effort. The necessary equipment is not expensive, yet versatile in how you can use it. In the image above, I show a setup with the umbrella facing up to protect my camera from rain. A second setup shows the umbrella facing sideways. It helped against the occasional freak wave crashing on the rocks, splashing water on me and my gear.
Because showing this process is much easier than writing about it, I encourage you to take a few minutes and watch the feature video. It should answer most of the questions you might still have. And if you have another or better setup, please tell us in the comments.


Join the Fstoppers community for free
-
Post comments and join in the discussions
-
Browse the site ad-free
-
Share your work and get featured in the community
-
Compete in the photo contests for fun and prizes
5 Comments
Lint free paper wicks water far better than any cloth. Google Kimwipes.
I like a more sustainable solution, but I might add a few of those for emergencies. Thanks
🤣😅 that literally makes me laugh out loud that you think you are so eco conscious that you need to essentially chastise somebody else about using a small amount of paper now and again. I have purchased 1 small box years ago, a box maybe 1/4 of a tissue box. I don't think I'm destroying the planet with that compared to anybody travelling anywhere without just walking for any photo.
I didnt say any of what you imply. I even thanked you for the tip. But I would need much too many of those during a typical shoot / travel, which is why I would rather get them only as emergency option. It is not sustainable for my Photography as at some point my Backpack would be stuffed with those ;-)
I can't see in your photos how you configured the crab clamps. I chose to combine the major parts of two crab clamps into a single unit that allows me to put one crab clamp on the center column of the tripod, and the other to grab the umbrella shaft (or any other appliance). I took the ball-ended screw with the long shank from the #2 crab clamp and used it to replace the ball-ended screw with the short shank in the ball-clamping mechanism of the #1 crab clamp, thus having a double-ended clamping arrangement. I'd also recommend that one use a lock washer on each of the long-shank screws when assembling the modified setup, and apply LocTite 242 or 248 on the screw threads to avoid unwanted self-disassembly at inopportune times.