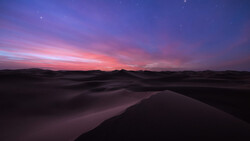
Exposing for the highlights is age-old advice in landscape photography. However, that technique can cause other areas of the photograph to be underexposed. You can always use the exposure slider in Lightroom to increase the exposure, but is that really the best way to fix the exposure in the image?
Preserving the highlights in a photograph can often lead to other areas of the image being underexposed and needing some correction in post-processing. It is easy to think that using the exposure slider in Lightroom is the right way to fix that. Just boost the exposure, and you are on your way.
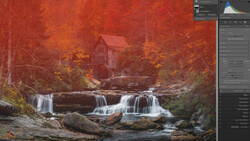
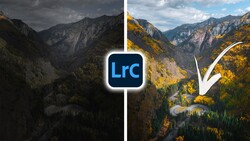
In this video, Mark Denney advises why that might not be the best way. Simply increasing the exposure slider in Lightroom can lead to flat light, muddy contrast, and dull colors. Denney demonstrates a more precise way to make exposure adjustments, never using the exposure slider.
Denney works his way through the example photography using other elements of Lightroom to be more precise in the exposure work. Using measured adjustments of the highlights, shadows, blacks, and whites sliders, paired with some masks, he increases the exposure of the image while maintaining a vivid look.
I always enjoy seeing different approaches to everyday tasks in Lightroom. I found his method of affecting just the midtone exposure of the image quite interesting, and I can see myself using that tool more in my own work.
Join the Fstoppers community for free
-
Post comments and join in the discussions
-
Browse the site ad-free
-
Share your work and get featured in the community
-
Compete in the photo contests for fun and prizes
3 Comments
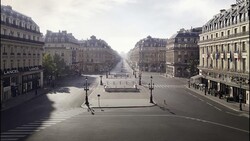
Whilst I generally like Mark Denney's videos, he's not exactly comparing like for like on this one. On the first shot, he's simply applied the exposure slider. In the second, he's used various selective masks and vignetting. Apply those to the first, and it wouldn't look quite so anemic.
Yes this is a better way vs increasing Exposure! I have been doing this like a long time. Example when doing fall foliage the colors are best under cloudy days and the clouds are generally grey with little detail but this is due to over blown highlights so on my camera I have EV dial and will lower the EV sometimes the full 3EV to reduce the zebras by a max setting. This will give a very dark image but highlight blowout is minimum and cloud detail is way better. Now to brighten the image increase shadows but razing clarity also brightens the image and down on the curve I have the sliders so there also shadows to the right. This also is used for white birds for the detail for feathers the zebras have to disappear and with a camera that gives you +/- 5EV going down to -5Ev yes again a very dark image but still reducing highlights and some whites to keep but just enough to not get highlights dull but shadows right also down in the curves with sliders shadows also and some highlights and whites to get some brightness and clarity brightens but detail of feathers comes out.
Also for those night shots where again zebras are on again while setting up and a reduction even a little will give detail inside of windows with lights.
4. yes a bracketed image but the center image doing adjustments to zebras help over all images to get the a inside detail and colors of all indoor as well as blown out lights having detail.
Yes having a camera that is ISO Invariance and just increasing exposure can get a brighter image but other sliders in different areas can better help. All these images are before Lr masking, so imagine using masking also or maybe just over kill.
The first shot looks very over processed, lacking contrast and shadow depth.