Using different white balance settings within a single image can dramatically enhance your photos. Here's how to do it in Lightroom.
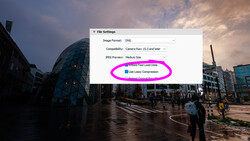
Coming to you from Christian Möhrle - The Phlog Photography, this practical video walks through a sophisticated editing approach in Lightroom, showcasing how you can merge multiple exposures into an HDR image. Möhrle carefully balances exposure to retain details in both highlights and shadows without losing quality. He then demonstrates a nuanced adjustment strategy, shifting from Adobe Color to Adobe Standard, reducing contrast and creating a more versatile base image. What stands out is how clearly Möhrle explains the rationale behind each basic adjustment, including raising shadows gently, controlling exposure, and maintaining an eye on the histogram.
Moving beyond basic edits, Möhrle applies masking techniques to selectively alter white balance. He skillfully demonstrates how cooling down a focal element—in this case, an ice block—can effectively highlight it by creating a subtle contrast against the warmer tones of the surrounding scene. This method of isolating and individually enhancing areas based on color temperature is a technique that is not always intuitive, yet it significantly impacts the visual interest of your photographs. Möhrle also addresses common pitfalls, including avoiding overly intense blue tones by balancing adjustments with slight reductions in saturation. His practical approach provides clarity, particularly regarding how small, intentional edits can yield significant visual improvement.
The video extends beyond these initial white balance adjustments into further edits like color grading and detailed retouching. Möhrle carefully crafts gradients and localized masks to warm up the sky, enhancing the sunrise ambiance while preserving a gentle softness. He even demonstrates subtle methods of emphasizing details and texture to improve the foreground. His selective approach to boosting vibrance and clarity while avoiding excessive harshness is particularly instructive for nuanced editing.
Additionally, the video illustrates precise split toning and color calibration techniques. Möhrle's adjustments demonstrate how intentional color shifts—making highlights warmer and shadows cooler—produce richer contrasts and more depth. This targeted use of colors emphasizes his theme of controlled editing rather than random, overly vibrant adjustments. Lastly, Möhrle takes viewers briefly into Photoshop to address cleanup tasks like removing distracting elements and sensor spots, further refining the image quality and demonstrating efficient editing practices. Check out the video above for the full rundown from Möhrle.
And if you really want to dive into landscape photography, check out our latest tutorial, "Photographing the World: Japan II - Discovering Hidden Gems with Elia Locardi!”


Join the Fstoppers community for free
-
Post comments and join in the discussions
-
Browse the site ad-free
-
Share your work and get featured in the community
-
Compete in the photo contests for fun and prizes
No comments yet