Flash photography can be tricky when you're just starting out, and it’s easy to make a few common mistakes without even realizing it. If you're new to using a flash, there are a few things you need to get right from the beginning to improve your results.
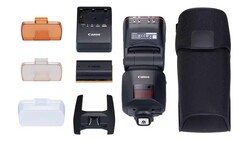
Coming to you from Ed Verosky, this informative video highlights several mistakes beginners make with flash photography and how to correct them. One of the most common errors is selecting the wrong flash. It’s tempting to grab a flash that fits your budget, but it’s important to ensure the flash is compatible with your camera. The video advises against choosing a cheap flash with limited power and features, as you’ll quickly outgrow it. Instead, opt for a flash with enough power and an adjustable head, so you can experiment with bouncing light for more natural effects. Third-party brands like Godox and Yongnuo offer budget-friendly options that perform well, making them a good starting point.
Another mistake highlighted in the video is relying solely on direct flash, which can create harsh lighting and unflattering shadows. While direct flash might seem straightforward, it’s not ideal for most situations unless you're going for a specific look, such as a photo booth effect. Verosky explains how bouncing your flash or using a modifier can help produce softer, more flattering light. Using the tilt and rotate function on your flash to direct light at walls or ceilings is a simple way to enhance your images and avoid that overly harsh look.
The video also covers the over-reliance on TTL (Through-The-Lens) mode, a setting that automatically adjusts flash power based on your scene. While TTL is great for fast-paced environments, like wedding receptions or events, Verosky cautions against depending on it for every situation. TTL doesn’t always produce perfect exposures, and you might find your shots underexposed or overexposed at times. To gain more control, it’s essential to learn manual flash settings. By manually adjusting flash power, especially when your subject’s distance remains constant, you can achieve consistent, accurate results that TTL can't always provide.
One of the more technical mistakes that often trips up beginners is not understanding high-speed sync. Without high-speed sync, using a shutter speed faster than your camera’s sync speed can cause part of your image to be blacked out. This happens because the shutter isn’t fully open when the flash fires. High-speed sync solves this by allowing you to shoot at faster shutter speeds, which is particularly useful when shooting in bright outdoor conditions. However, it’s important to remember that high-speed sync reduces flash power, so you’ll need to compensate accordingly. Check out the video above for the full rundown from Verosky.
If you would like to continue learning about how to light a portrait, be sure to check out "Illuminating The Face: Lighting for Headshots and Portraits With Peter Hurley!"


Join the Fstoppers community for free
-
Post comments and join in the discussions
-
Browse the site ad-free
-
Share your work and get featured in the community
-
Compete in the photo contests for fun and prizes
No comments yet