
In this day and age, more and more people are setting up recording spaces. Whether for simple work meetings, live streaming, or recording content, the need for a good-looking space is in high demand. This is a walkthrough of how I have my space set up and lit.
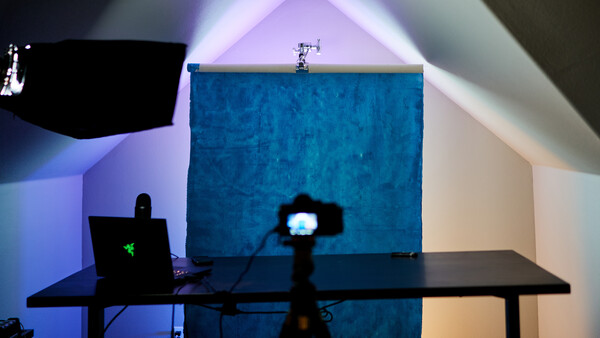
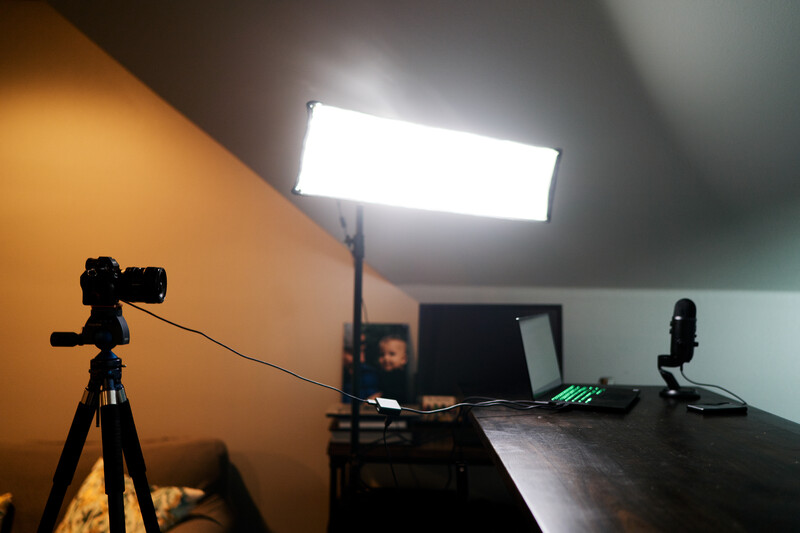
To start, I want to explain where my space is and why I chose it. The location is my home office, and while there are prettier spaces in our house, I needed somewhere I could set up long-term without the kids messing with everything. Inside of my office, I have some big blank walls, some cabinets, tables, a TV, and a whole lot of recurring gear clutter. So, I decided to stick my space off on one end so that it would be out of the way but also less prone to the chaos of my weekly gear-prep tornado. The good thing about this area is that it is the part of the room that shows the pitch of the roof. I felt this could give my setup some compositional interest and was key in deciding where I would place my camera. The downside was that it was facing the one and only window in the room.
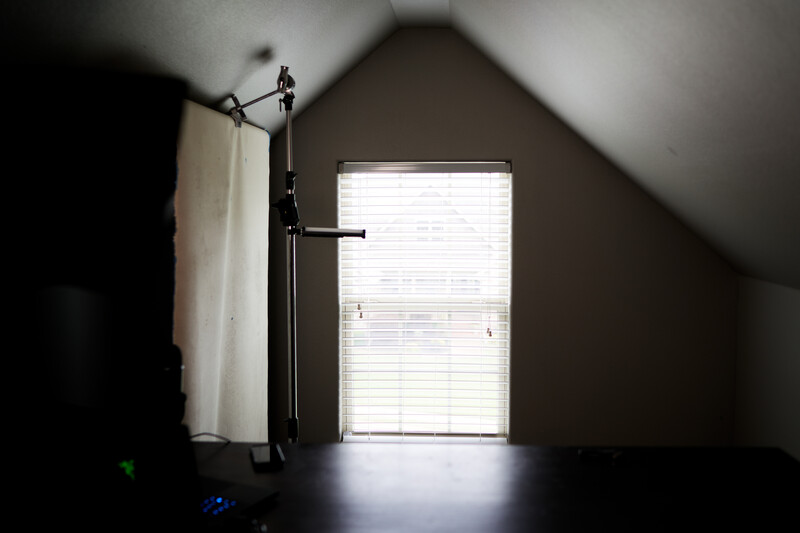
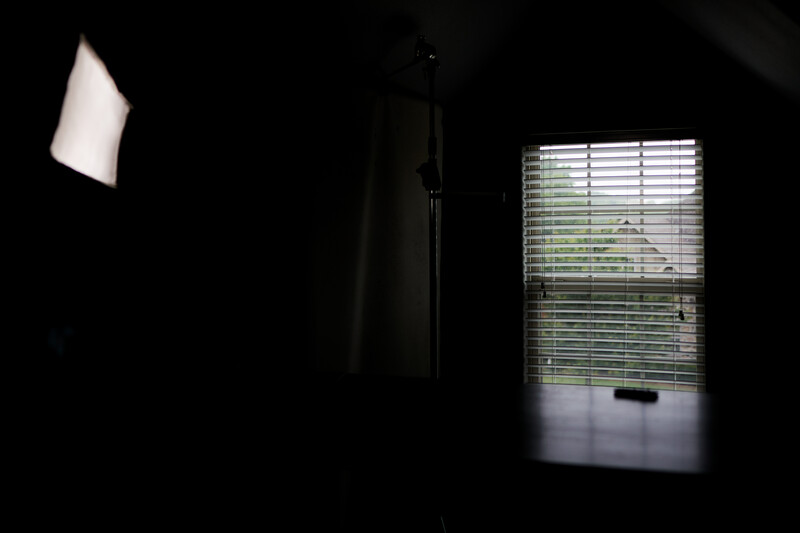
With the window there, I had some decisions to make about the lighting. If I used something similar to the exposure above, I’d have a constant haze of blown highlights around me. If I exposed so there were no blown highlights, I would need a good amount of power coming off my lights in order to compete. The image below shows my Stella Clx10 set to 4000 lumens, and as you can probably tell, I would need a good amount more light in order to light myself (and this example is on a cloudy day). Not only that, but exposing to the outside also leaves me with some distractions. Not only can you see the houses and trees, but you would also see the constant change in lighting as the day progressed or as clouds covered and uncovered the sun.
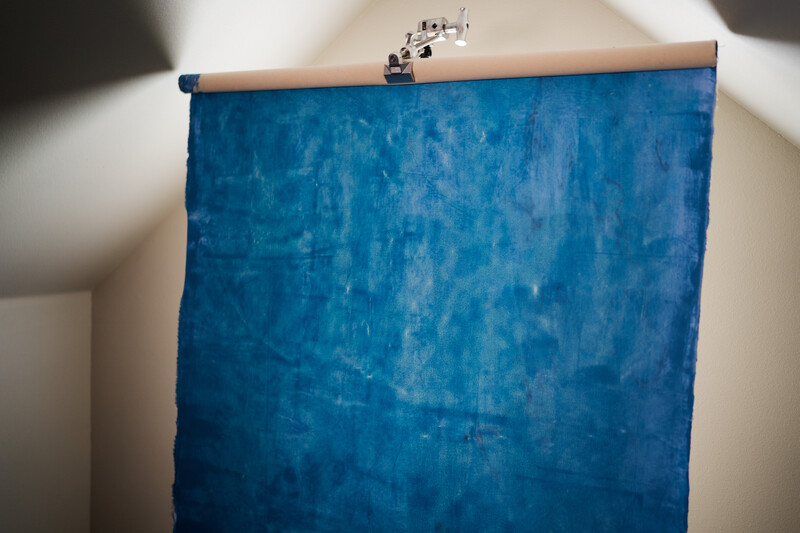
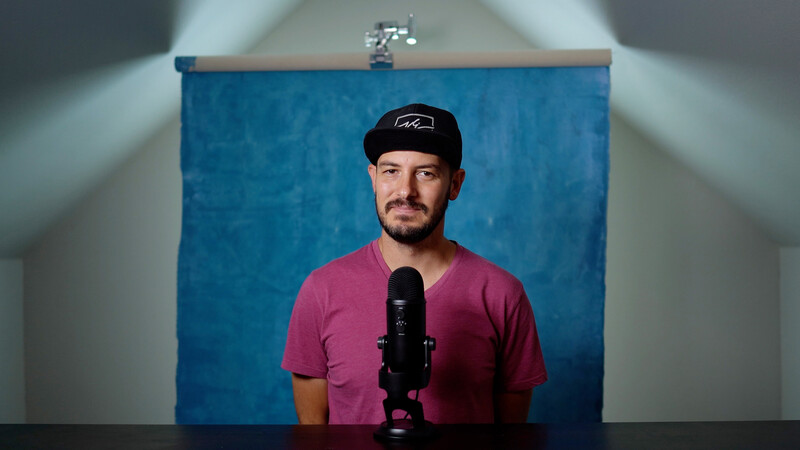
So, what I ended up deciding to do was get a backdrop to simply cover the window. But not only did I not want to deal with wrinkled and folded paper backdrops as things inevitably got moved around, but I also wanted something that looked amazing and had some character. So, I decided to get a drop from Hand Painted Backdrops UK. The durability of canvas meant I didn't have to constantly replace my backdrop. The hand-painted texture and color also look amazing and doubles as a backdrop I can use for portraits and product images.
Now that I had the general setup, the next step was lighting. When I first got everything put together, I was using my Stella Pro lights Clx10 inside a large 39-inch Elinchrom Rotalux Softbox. While this light was big and beautiful, it was just a bit too much for space. For one, it was hard to maneuver around my desk and the angle of the sloping ceiling. It also made me feel very boxed in, which was fine when I was recording, but outside of that, it just felt claustrophobic to have always set up. Lastly, it simply spread a bit too much light, which ended up fading my background lights (more on that in a few). So, what I ended up moving to was the same Stalla Clx10 inside of a Paul C Buff 36-inch Strip Box. This modifier gave me a nice wrap of light for my face while not spreading as much to the background. It was also much easier to maneuver and not as intrusive for an everyday setup.
Now, for the background. Here, I have two go-to setups. One is simply with the strip box and not the other added light. But what I will do is make sure the window behind the drop is open. This allows a bit of light to fill and bounce around in the space between the wall and drop to add some interest. The backdrop also has some areas where the paint is thinner in areas (part of the texturing process), so having the light behind it really accentuates that texture and gives it a super cool look.
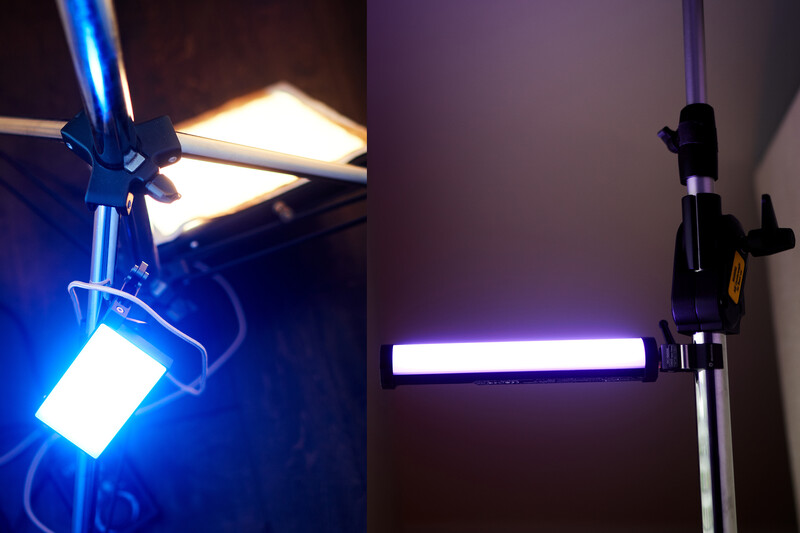
The second setup I'll use is with three different lights set up behind the backdrop. These lights are just a combination of lights I had laying around, so that is why there is no real consistency to what I’m using here. I have one Flashpoint M1 (same as the Godox M1) set to blue on one side. On the other side, I have a Westcott 1x1 Bicolor Flex Light set to its warmest temp to give me an orange color. However, the orange wasn’t warm enough, so I also added a sheet of CTO gel on top of that. The third and last light I have is a Nanlite Pavotube 6C set to a pink/magenta color attached to the backdrop stand with a Manfrotto Nano Clamp and pointed up towards the ceiling. The result is an interesting gradient of color from one end to other.
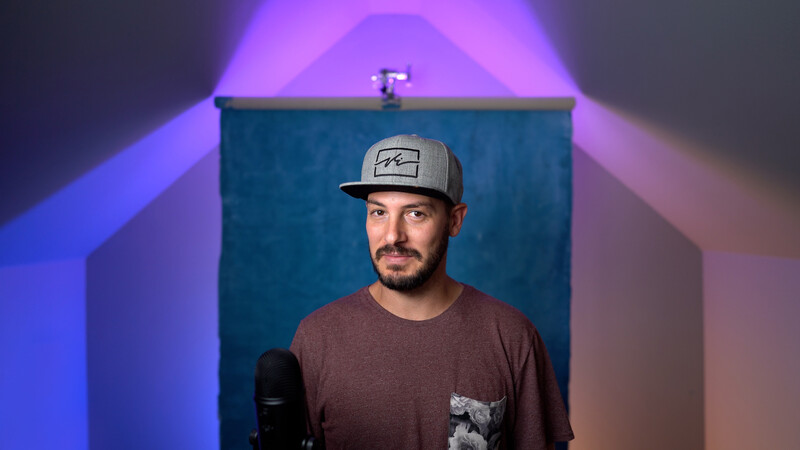
The last thing worth mentioning is the camera setup light power. Thankfully, since the pandemic, most camera manufacturers have released software to allow you to use your camera as a webcam without the need for any fancy adapters or converters. So, I’m using my Sony a7 III with my Sony 24mm f/1.4 GM lens. The settings are 1/50 s, f/2, and ISO 100. My Stella Clx10 in the strip box is set to 4,000 lumens. The Westcott Flex is set to about 20%, and the other two colored lights are at about 75%.
Overall, I’m pretty happy with where I ended up. The only other thing I plan to add is a better microphone solution. I’m currently using my Blue Yeti just sitting on my desk. This works fine, but I would like something I can boom overhead and not have it clutter the frame. But what would you do differently given the same circumstances? Which setup do you like best?


Join the Fstoppers community for free
-
Post comments and join in the discussions
-
Browse the site ad-free
-
Share your work and get featured in the community
-
Compete in the photo contests for fun and prizes
No comments yet