

There are 10 Lightroom features I use more than any other, and many of you reading might not even be aware of them, as they're often hidden away or require sneaky keyboard shortcuts, so read on to find out what they are.
If you ever wanted to speed up your workflow, then getting to know your image-editing software intimately can help. After using Adobe Lightroom Classic for years, I've accumulated a set of commonly used tools and features that I find supremely helpful and help me make changes quickly and easily. So, I've collected 10 of my favorite Lightroom features for you here, all in one place, so you can take advantage of them too.
1. Library Filter
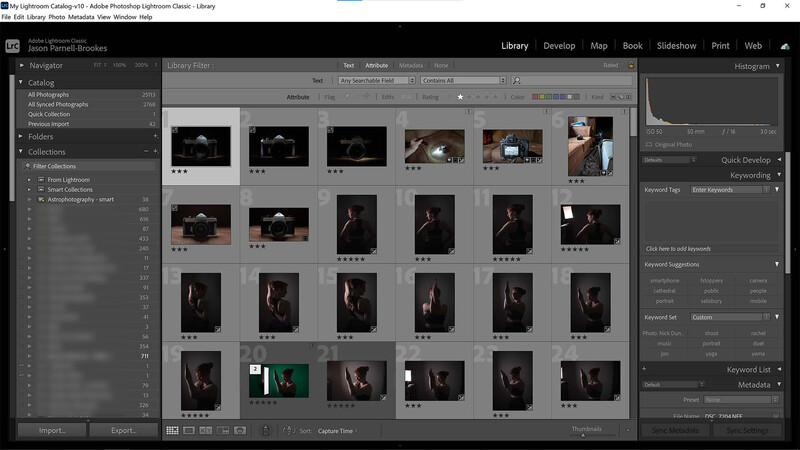
One of the best things about Lightroom Classic is the ability to search through all the photos in your catalog and find exactly what you're looking for. In the Library module, there's a Library Filter at the top of the window. From here, it's possible to search for images in any collection, Smart Collection, folder, or even from the entire catalog. There are options for filtering by text, attributes, metadata, and more. Say you have a portrait you want to search for and you know that the keywording is already in place with a five-star rating. Simply search for a portrait in the keyword filter option and include the option for returning results with a rating of five stars. All the photos will pop up, and you can scroll through to find the one you're looking for.
Perhaps you're looking for an image taken on a 14-24mm f/2.8 lens. You can search for that specific lens in the metadata of the file, and it'll return all results with that lens. Be sure to select the right collection or folder from the panel on the left side of the screen to narrow searches down further.
2. Batch Synchronization Window
Lightroom Classic is fantastic image editing software because it's so easy to batch-process photos. Let's say you have 500 photos from a shoot and you want to apply a certain look to the images. Instead of doing this one by one, you can use the Sync button. In the Develop module, make all your settings and style changes to one image, then Ctrl + click to select one or two or Shift + click to select the rest of the images, and then, click the Sync button.
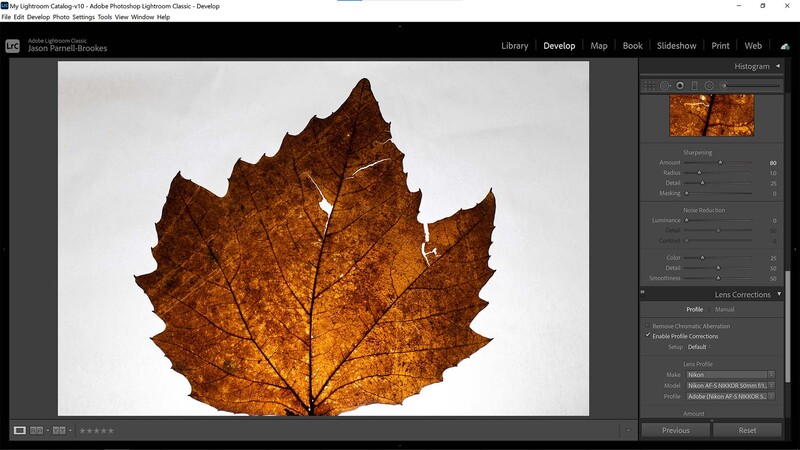
A new window will appear. which opens up the possibility of synchronizing just one, a few, or all settings changes you've made across the selection. If you want to make sure every photo has lens corrections applied and the same white balance, you can do that. However, if there are specific localized edits or a certain crop ratio you want to apply, those can be added as well.
3. Adjustment Brush
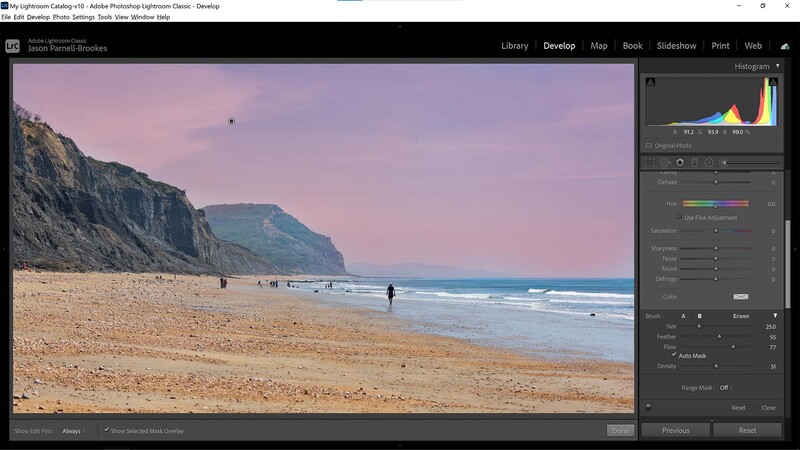
After the major, sweeping edits comes a more refined edit. The Adjustment Brush (K) allows users the ability to make these localized changes by resizing, adjusting feather and flow, and the density of the brush. There's even an option to Auto Mask, which will allow the brush to cling to whichever source point you've defined on the initial click and apply the edit to similar areas as you move the brush between complex scenery, such as the sky above some craggy cliffs as above. All kinds of settings can be changed, with levels, color, and details all editable. One thing I'd like to see here though is the addition of a vibrance slider.
4. Smart Collections
Absolutely the best way of organizing your images in Lightroom Classic, if you haven't used it before, is the option to create Smart Collections. A Smart Collection works the same as a regular collection in that it collates all your images for given shoots but will do it automatically. For example, if you want Lightroom Classic to group all your landscape images, Smart Collections will do that for you without you needing to lift a finger after import.
This works by adding rules to the Smart Collections that tell them what to include. If you want all vertically oriented landscapes with a rating greater than 3, but not include those taken on wide-angle lenses, then you can make that set of rules for your Smart Collection and Lightroom Classic will group them for you, including arranging any previous images that also fit that criteria.
5. Painter Tools
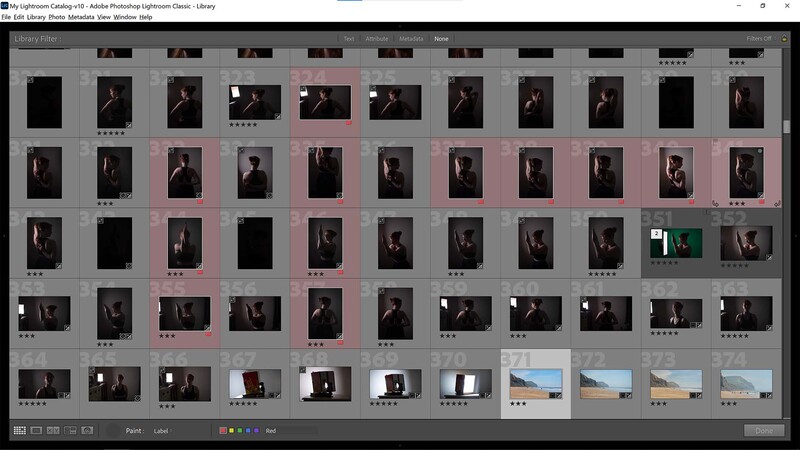
I haven't seen that many photographers or editors using this one, but it's really good if you're dealing with hundreds of images at a time and need to make changes or selections to loads of them at once. In the Library module hit Shift and Tab to make the side windows disappear and then press G to get the group view as above. Click the Painter tool in the lower toolbar and then make any label selections you want (I've chosen red here, but you could choose a star rating or keyword to input). Now, start clicking and dragging across your images to place the paint label on the images. This is helpful for rating or coloring every fourth or fifth image, say if you've taken a bunch of portraits where the flash regularly doesn't recycle or for astro if you want to create a time-lapse but the interval was too quick.
6. Image Profile
Before rushing into your edit, get into the Develop module and breathe for a moment. In the Basic tab, there's a little option to change Profiles. Edit this first to make one of the most powerful changes to your image you can do before tweaking levels, color, and other options. Get the right Image Profile to start with (or choose from the myriad presets) to lay down a solid foundation before making edits elsewhere.
7. Dehaze Slider
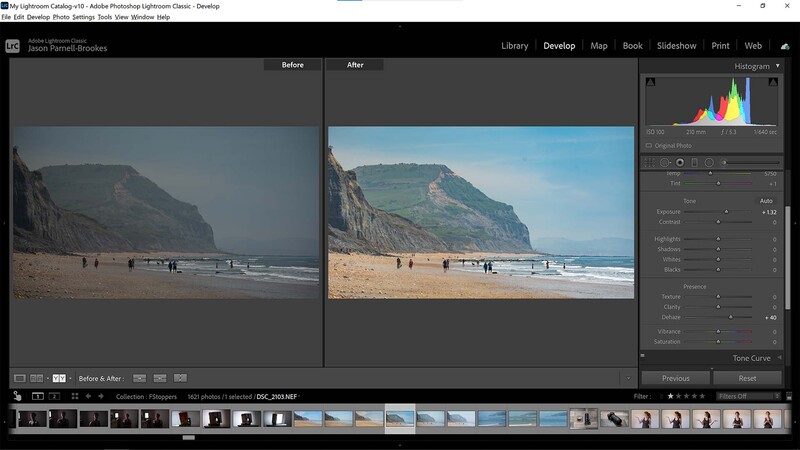
For those lazy, hazy days of summer or even if there's a bit of autumnal mist rolling in, the Dehaze slider in the Develop module does wonders to revive washed-out shots and provide everything with a sense of contrast. It's easy to overuse this slider, so apply it sparingly. You can get some excellent results, even if you forgot your polarizing filter on the day of the shot. This is particularly handy for astrophotography, where light pollution or thin bands of Stratus clouds obscure an otherwise magnificent star display.
8. Navigator Zoom
The old, faithful Navigator sits in the top left of the Lightroom Classic window and provides editors with an updated preview of where they're viewing in the image. This makes sense if you're zoomed right in because you can see where you are in the frame. You can even click and drag within the Navigator thumbnail to move about the image in the middle of the window. However, my favorite feature within this is the zoom options beside it. I regularly use the 100% zoom to check for focus and sharpness and then flick between 200-400% zoom for fine work on details. Want to change the extra zoom option to something completely different? Click the double-arrow drop-down next to it and select anywhere from 6-1,600%.
9. Alt and Click on the Tools to Hide/Show
This is one of those features that, unless you've been told it's there, you're very unlikely to find for yourself. Head to the Develop module and hold down the Alt key while clicking on the drop-down arrow of one of the panes, for example, the Lens Corrections pane. This will toggle the view to either hide or reveal one pane at a time or all of them. So, if you find yourself having to keep collapsing each pane because you're sick of scrolling up and down, Alt and click on one of the arrows in the pane, which will have Lightroom Classic automatically collapse all others but the one you're working on. It'll keep doing this throughout any of the panels you're working on until you tell it otherwise.
10. Texture Slider
Sometimes, you just need a little extra gritty detail. Sharpening would be too fine and produce halos or that glassy look you can get with over-sharpening, but Clarity is too wide, fat, and obtrusive. That's when I turn to the Texture slider. It's relatively new compared to many of the other sliders in Lightroom Classic, but I've found it valuable. I use it for landscapes and astro-photographs when I need that extra pinch of detail revealed without introducing artifacts.


Join the Fstoppers community for free
-
Post comments and join in the discussions
-
Browse the site ad-free
-
Share your work and get featured in the community
-
Compete in the photo contests for fun and prizes
3 Comments
Jason, you wrote,
"One thing I'd like to see here though is the addition of a vibrance slider" in the adjustment brush.
Not sure if you are aware of this, but in the adjustment brush, the Saturation slider is actually Vibrance on the positive side, and Saturation (or, more correctly, desaturation) on the negative side. Not quite the same as individual Saturation and Vibrance, but it is still pretty effective. I don't think I ever use negative Vibrance, so it seems like a nice combination of the two functions into one slider. Not sure why they chose to do it that way instead of two sliders. Nonetheless, it is there. Kind of like an easter egg that Adobe put in for users to discover. In fact, it is in all the local adjustment tools.
I had no idea this existed until I saw this Matt Kloskowski video recently.
https://www.youtube.com/watch?v=pobscR_goHo
Re #9: Alt-clicking appears to do two things at once: 1) hide/reveal the panel; and 2) toggle Solo Mode. I find it more straightforward to explicitly set Solo Mode from the right-click menu.
Reading this it seemed a bit out of step with the big release... but...
For the much vaunted big release, I doubt that the new selection processes are going to find much favour with Lightroom users.
I was whatever the entire opposite was of blown away by the speed of sky selection - and noted that the AI failed to realise sky shows through trees. I'm sure that most Lightroom users will stick with graduated filters and range selection and get results quicker.
I thought LR had crashed when I tried subject selection on what to be seemed an obvious couple sitting on a bench, especially as the quick and dirty subject selection on the phone app didn't seem to struggle. Minutes, not seconds.
Running on a high spec SSD only Windows 11 box.
That being said, the tidying up of manual filters is a decent upgrade, just don't think I will be passing the AI buttons again anytime soon.
Edited to add: hmm, went back again to poke around more and it has speeded up massively. Not sure what is going on here, but that's a nasty first time through experience.