Adobe Lightroom has continued to become more powerful over the years. If it has been a while since you have used Lightroom, you might be surprised at how far it has come. Masking is an area where the software has greatly improved, including a tool that could have been called the Mask Anything tool.
The masking features in Adobe Lightroom continue to advance, allowing a photographer to accomplish many more editing tasks solely in Lightroom than also needing to leverage Adobe Photoshop for more complex tasks. In this video, Mark Denney looks at one masking option, the Object Selection tool, which he says Adobe should have called the Mask Anything tool.
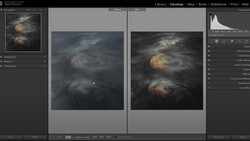
Using several example images during the video, Denney demonstrates how using either the rectangle select or brush option can allow you to target very specific areas of an image with a mask to apply edits only to the selection. While the initial selection might need some refinement, the color subtraction option he shows allows you to quickly refine the mask to affect just the area you want.
As a landscape photographer who has already been doing more editing in Lightroom instead of Photoshop, I think I’ve been overlooking the power of the Object Select tool in Lightroom. The techniques Denney showed in this video helped me realize how applicable the tool could be to my own work.


Join the Fstoppers community for free
-
Post comments and join in the discussions
-
Browse the site ad-free
-
Share your work and get featured in the community
-
Compete in the photo contests for fun and prizes
4 Comments
Kinda the hard way around . . . Mask the object, then intersect with new mask(s), instead of subtracting what you don't want.
I think his key point was starting with the object select to focus the general selection right where he wanted it, the boat, then from there multiple ways to approach refining the selection.
I totally agree with you, Bart. I thought he was going to show that way too. It would have been much simpler.
For what he needed it for, his way is the better way by one step.
His way:
Step 1: Mask
Step 2: Click Subtract
Step 3: Click Color Range
Step 4: Pick colors to subtract
Intersect way:
Step 1: Mask
Step 2: Click Intersect Mask With
Step 3: Click Color Range
Step 4: Uncheck Color Range Invert (see below image)
Step 5: Pick colors to exclude