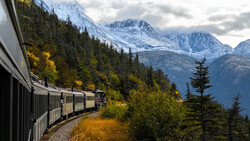
Editing landscapes in Lightroom involves multiple techniques, but understanding how to combine these steps effectively is where the real improvement happens. Seeing a complete edit, start to finish, helps clarify how these individual tools actually work together.
Coming to you from Mickey with Eastern Shore Photo Instruction, this practical video walks through processing a single landscape photo, step by step, to demonstrate how to pull all these tools into a coherent workflow. Mickey begins by cropping the image to shift focus toward the main subject, emphasizing composition over initially appealing but ultimately distracting details. He then moves onto applying Adobe's latest Adaptive Color profile, a smart choice especially suitable for enhancing natural scenes. This step immediately improves color depth and contrast, setting a solid base for detailed edits. Calibration adjustments—often overlooked—come next, subtly altering individual color channels to strengthen the photo’s natural tones without overpowering the original scene.
Where Mickey's process becomes particularly insightful is in his use of masking techniques to refine specific elements like the sky, clouds, and terrain. By using Lightroom's intersect feature, Mickey shows how precise masks can be achieved with minimal effort. This isn't just about improving skies or clouds individually, but understanding that separate adjustments to these areas allow greater realism in your final image. This step alone can dramatically improve your approach to complex edits by teaching you to think about photos in distinct visual layers rather than as a flat image.
Mickey also emphasizes localized adjustments, painting light and texture onto rocks and trees using point color adjustments and masking. This stage involves subtle but deliberate brushwork to ensure that changes remain realistic. Instead of relying solely on global adjustments, his method gives you more control over specific areas, which is essential when capturing nuanced natural landscapes. Mickey’s linear gradients and intersecting masks for selective lighting effects demonstrate how targeted edits can effectively simulate natural sunlight. This is a nuanced but powerful technique, significantly enhancing visual depth without appearing artificial.
One especially valuable tip Mickey shares involves stepping away after editing for at least a few hours. He suggests you'll see the photograph differently when you return, noticing mistakes or adjustments that weren't apparent during the initial session. This practical advice helps avoid common pitfalls like oversaturation or unnatural contrast, which often creep into photos when edited in a single sitting. This simple pause is often overlooked but crucial for professional-quality results. Check out the video above for the full rundown from Mickey.
And if you really want to dive into landscape photography, check out our latest tutorial, "Photographing the World: Japan II - Discovering Hidden Gems with Elia Locardi!”


Join the Fstoppers community for free
-
Post comments and join in the discussions
-
Browse the site ad-free
-
Share your work and get featured in the community
-
Compete in the photo contests for fun and prizes
No comments yet