
Ever wanted to make a complex mask in Lightroom but haven't had the patience to follow through? Well, using this simple technique, you can do it in just five seconds.
Complex and intricate masks are normally the vanguard of Photoshop thanks to its advanced layering systems and intelligent AI-powered selective tools. But it's relatively simple to add quite a complex mask in Lightroom too.
There's quite a bit to this tutorial, but the overall process doesn't actually take long at all once you know what to do. So, although there are five or so steps and a few settings changes here and there, it should take you just five seconds to make a complex mask in Lightroom with which to edit your photos.
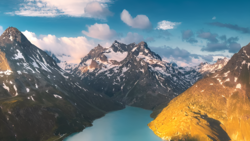
What we're going to do is use the Adjustment Brush to make a large, sweeping mask across the image but have it only affect specific aspects of the frame. I want to make changes to the mossy grass and hills in the scene, boosting colors, enhancing tones, and generally making them stand out a little more. So, let's take a look at the quickest way to do this. I'll split it all down chronologically, down to each second. Ironically, it'll take you longer to read it than do it, but we've all got to start somewhere.
Second One

With the image loaded in Lightroom Classic, switch to the Develop module to make edits. Then zoom out from the image so that it appears relatively small in the middle window. You can do this by pressing Ctrl + - on the keyboard. Alternatively, it may be easier to click the drop-down menu from the Navigator pane in the top-left of the window, scroll down and select 25%, you should see plenty of gray space around the image in the middle window. Now select the Adjustment Brush (K).
Second Two
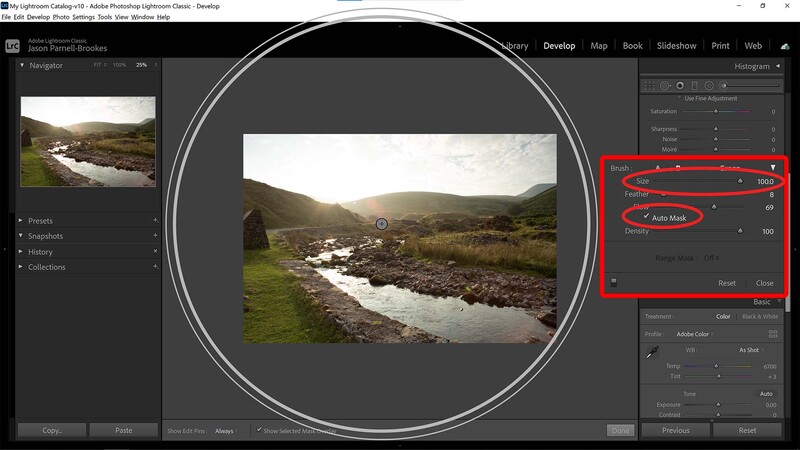
We want to make the brush as large as possible now, so increase the size to 100 or use the square bracket keys, [ and ]. Make sure the brush (notice the grayish circles when you hover the cursor over the image) is larger than the image itself. If it's not, either make the brush bigger or zoom out more. Before you continue make sure you tick Auto Mask in the brush settings menu; Lightroom will make changes based on the color and tone value of where you click first in the image, so this step is crucial.
Second Three
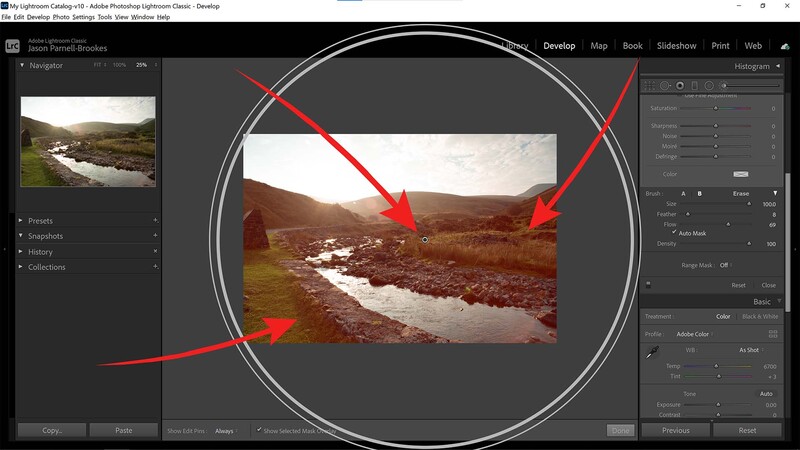
Thanks to the Auto Mask feature, we can now find and click on an area that has similar tonal and color values to those we want to mask in the image. I've chosen a spot near the center that consists mainly of yellowish grass. Because Auto Mask is ticked, the brush will cover any similar color and tone in the entire frame, and my aim is to improve the grassy areas in the shot, without making changes to much else. I've turned the mask overlay on to display in red to show you where the brush is affecting.
Seconds Four and Five
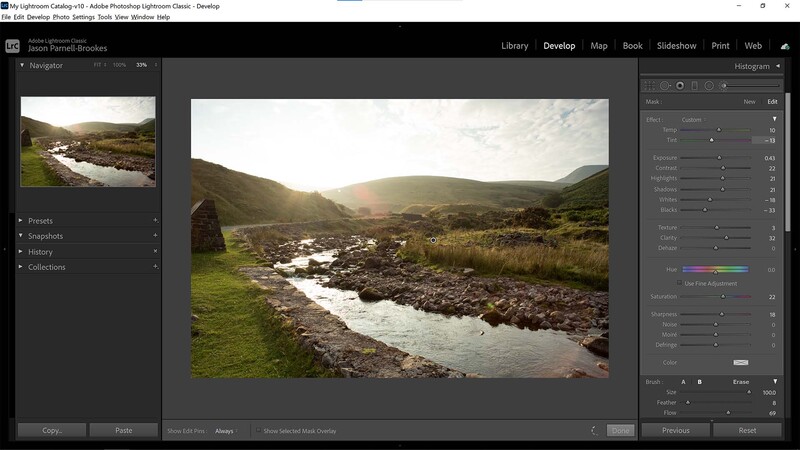
Now that the brush has been set, we can make our edit changes to exposure, saturation, and more. In my shot, I decided to make the grass slightly more yellow, a bit brighter, and with increased contrast throughout the shot in an attempt to make it stand out and glitter in the morning light as the sun rises above the mountains.
Bonus Seconds
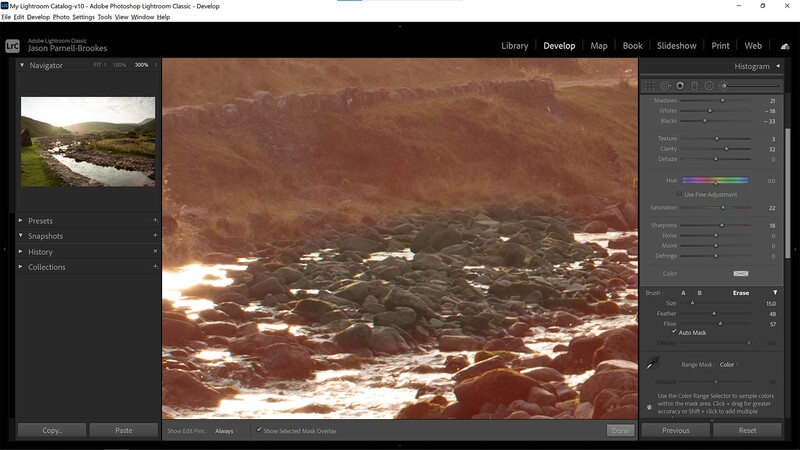
Now, you can definitely add a complex mask in just five seconds using the steps above; I know because I did it for this very tutorial. But if you want to fine-tune this a little further, then you'll have to go in with a smaller brush (hit the square bracket keys, [ and ], to resize quickly) and locate the sections you want to add. If you want to subtract from the selection, you can hold the Alt key on your keyboard and then paint over the areas you want to remove, or alternatively, just go down to the Brush settings and click Erase so you don't have to hold down the key.
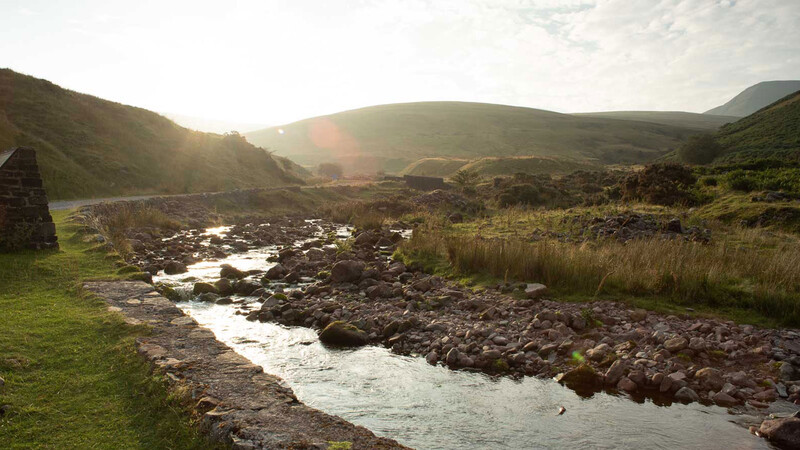
Thanks to the above five-second technique, I managed to selectively improve my landscape scene, despite having to handle an image that records several miles into the landscape. This just goes to show that you don't need to spend ages on a scene that's complex or massive when a simple edit can do the trick.


Join the Fstoppers community for free
-
Post comments and join in the discussions
-
Browse the site ad-free
-
Share your work and get featured in the community
-
Compete in the photo contests for fun and prizes
5 Comments
This does look like a really cool gadget, given how finnicky it seems to be to work properly, what's the advantage over just... stabilizing in post? In Davinci Resolve or Premiere?
I think you are in the wrong comment section?! ;)
Totally agree - I don't even listen to music, I just read. :)
Or in 2 seconds by using area mask and select color or luminosity...