
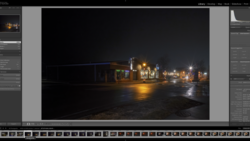
One light, no studio. This quick tutorial will show you how to add a gel backlight to your portraits.
Firstly, I'd like to say this should all be done in-camera, but not everyone especially when starting out has access to multiple lights or a studio for that matter. So this quick tutorial may provide you with a little something to further enhance your portraits.
Step 1
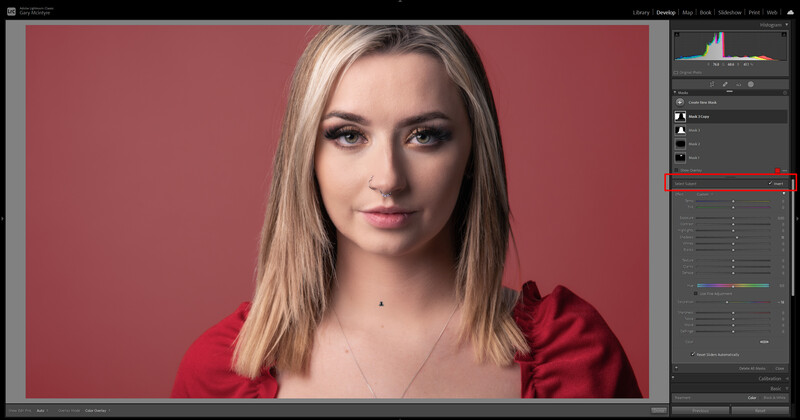
With your image selected, create a mask. In this example, I had already selected the model to do some small edits, so from here I chose to duplicate the mask and then invert the duplicate.

I did this by checking the invert selection after copying. As the copied mask is a selection of the subject and we want the background selected in this example. At this point, I also pulled back the exposure of the background slightly.
Step 2
The next step is to create a radial filter with a good amount of feathering so that the light falls off. This will also allow for the final effect to work better.
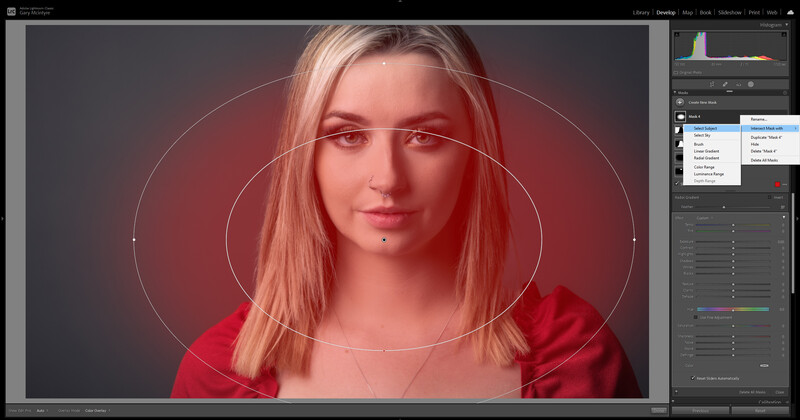
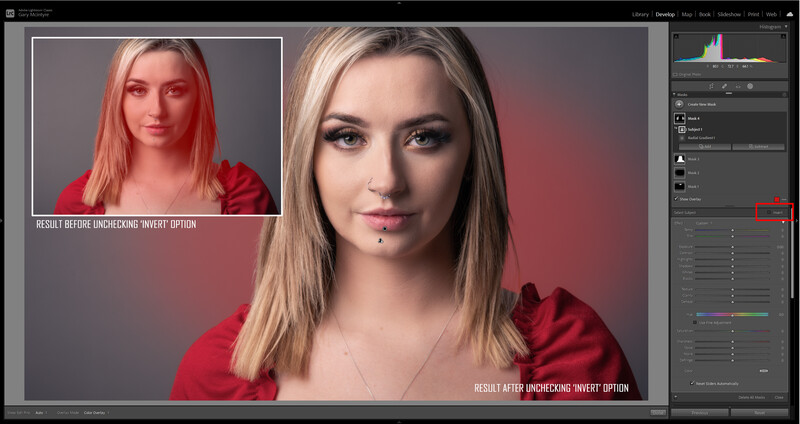
Once you have created a radial filter that you are happy with click on the three dots to the left of the mask icon and select intersect with the subject. This will tell Lightroom to make a mask and then intersect the radial filter with the mask. At this point, you won't see the masking effect you are seeking as you have to deselect the invert check box.
Step 3
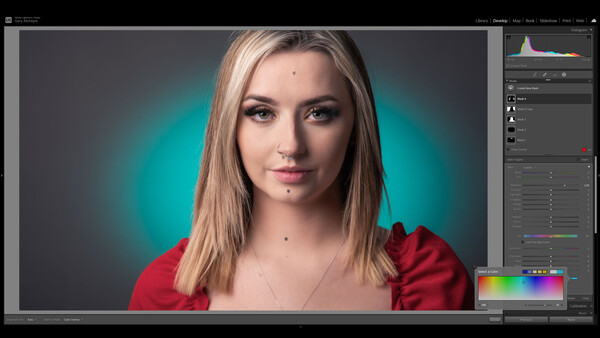
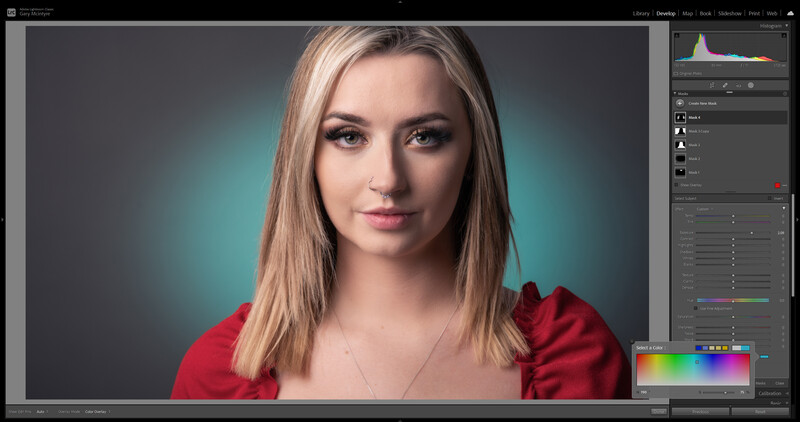
From here it's now time to choose the color of your light and make any further adjustments with exposure and saturation. Remember the colors are editable so you can choose any hue that will suit your image. You don't in fact need to choose a color, you can simply adjust the exposure, depending on what look you are after.
Step 4
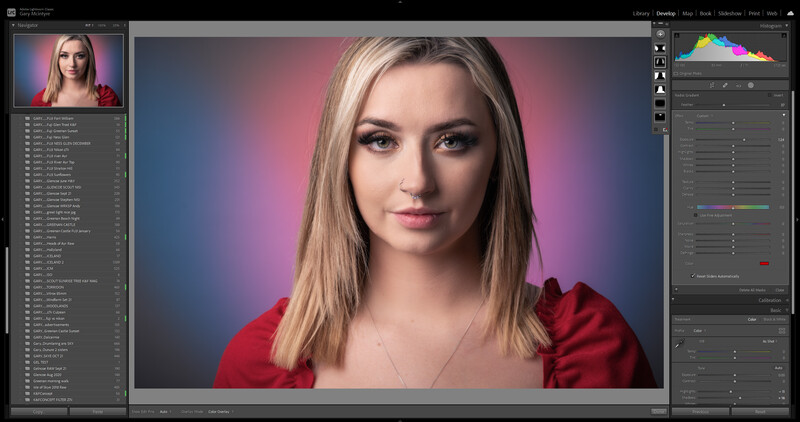
The next step is to duplicate mask 4, in this case, and make any further adjustments. For this, I left the color as is but pulled back the exposure so that the drop-off of the light would look more natural.

Conclusion
Another point to note when copying masks is that you can right-click directly on the mask and select duplicate. By doing this it will copy the mask and all the attributes assigned to it. As this takes on the edits of the original, and especially in this case the color, if you change the color of the new mask the original mask will also change.
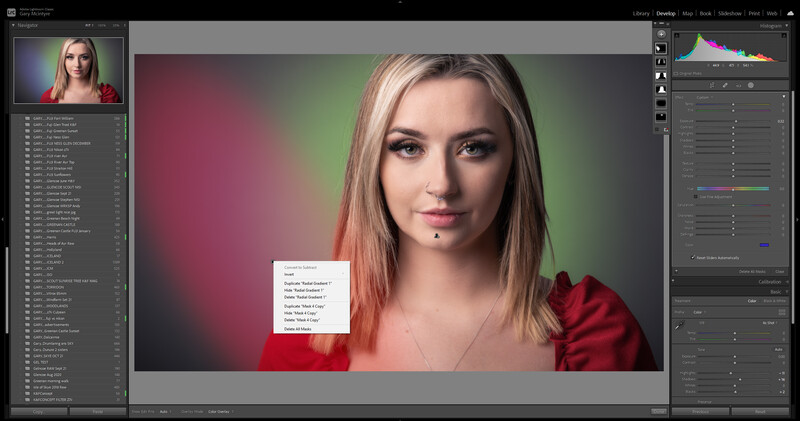
So if you want a completely different color or add multiple emulated gels I would suggest starting from fresh and creating a new mask.
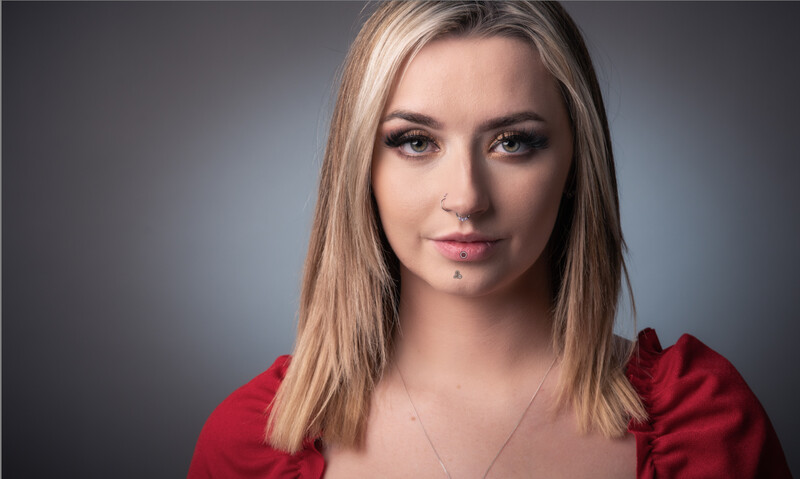
Instead of adding a new color why not simply adjust the exposure as in the image below. This again will add a new dimension to your image.
None of this beats using the gels in the studio, however, and putting the time in to learn how the lights interact with the subject. But as I mentioned at the start not everyone has access to either a studio or multiple lights so this may help enhance your portraits in the meantime.
There really is so much you can do with the new masking feature in Lightroom to quickly enhance images, and with everything being totally editable it really is fun to experiment.


Join the Fstoppers community for free
-
Post comments and join in the discussions
-
Browse the site ad-free
-
Share your work and get featured in the community
-
Compete in the photo contests for fun and prizes
4 Comments
Thanks for the tip! I have been beta testing the masks for a bit and never even crossed my mind!
Thanks for reading. Loving the new masking feature, as I'm sure most are.
Excellent ideas !
Hope it provides more ideas. Thanks for reading.