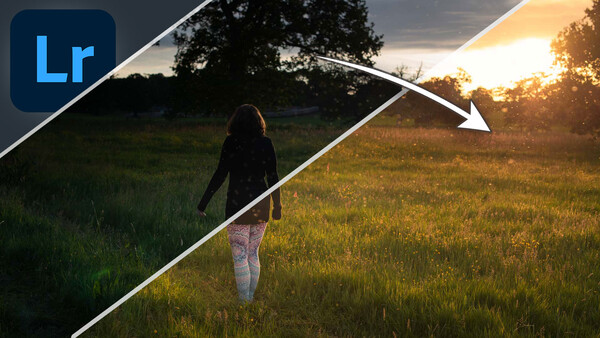
Have you ever taken a photo of a sunset and been disappointed at what it looks like on the camera? Well, follow along for some expert editing tips to transform them into gold.
We've all done it, headed out ready for the golden hour with camera-in-hand, been given a glorious display of color, only to find out when studying them later that they're a bit lackluster. Occasionally we retry our attempt and shoot through sunglasses, put colored filters in front of the lens, or experiment with camera settings but something just doesn't add up. It just doesn't look as good as when we're there. Why is that?
It could well be down to how you're taking the photo and what you do when you're editing. Don't forget, taking the shot is only half the battle, the rest of the work comes from teasing out the fabulous detail in the photo through post-production image editing. If you want to take your sunset (or sunrise) photos to the next level follow along for my tips on how to transform dull, lifeless sunsets into something bursting with color and passion.
Where Do We Start?
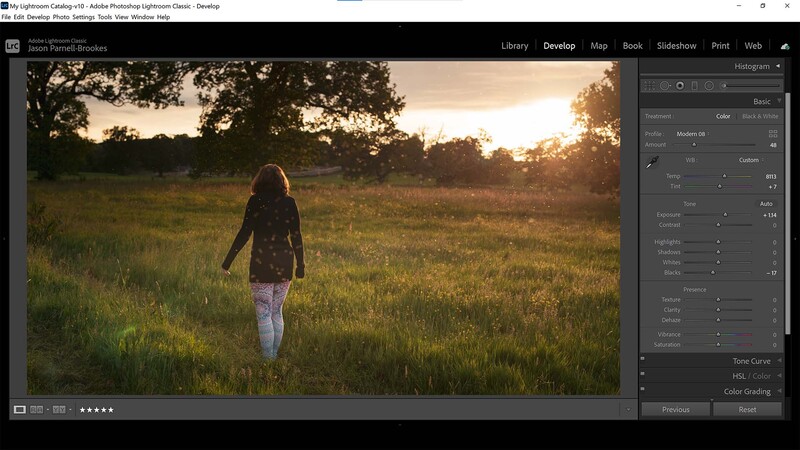
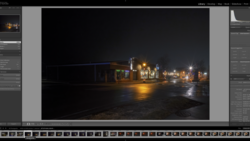
I like to start by opening my image in my favorite editing software, Lightroom, to analyze the photo, paying close attention to exposure, color, and the tonal range throughout the frame
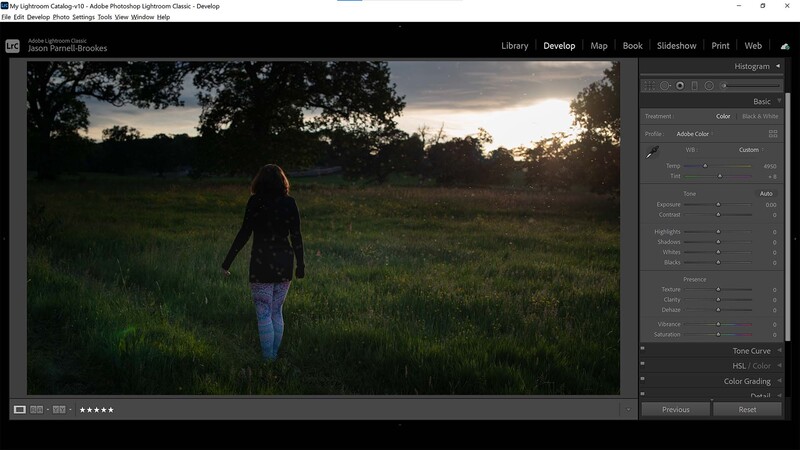
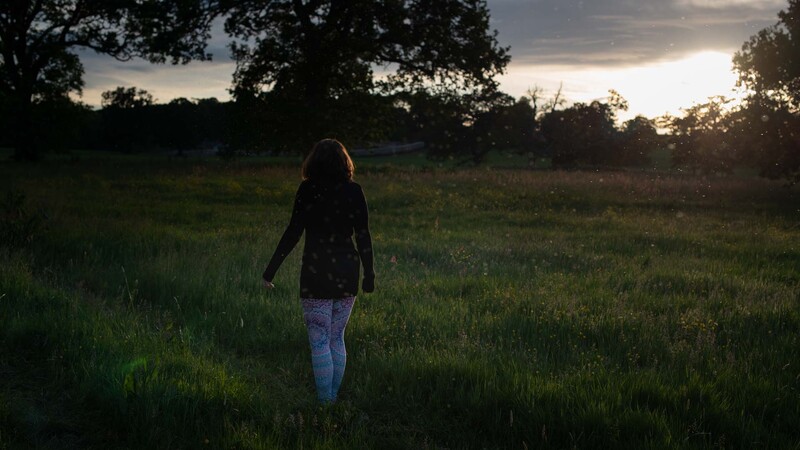
To start with, let's take a look at the photo after import, I like to analyze what needs doing before I make any adjustments. I originally took this photo and underexposed it by around one stop in order to preserve highlight details on my subject's hair and in the sky behind her. As you can see there's one small section (where the sun is) that's too bright and is overexposed completely. I'm not that concerned about this because the photo is all about my subject, not how detailed the area around the sun is.
I also captured this shot with a modified version of the flash white balance preset. I shoot with this preset almost all the time because I've gotten into the habit of looking at my photos on the live view screen on the back of my camera. Due to shooting a wide range of subjects I don't like to switch between white balances in-camera, I prefer doing this in editing software like Lightroom or Photoshop.
Change Color Profile
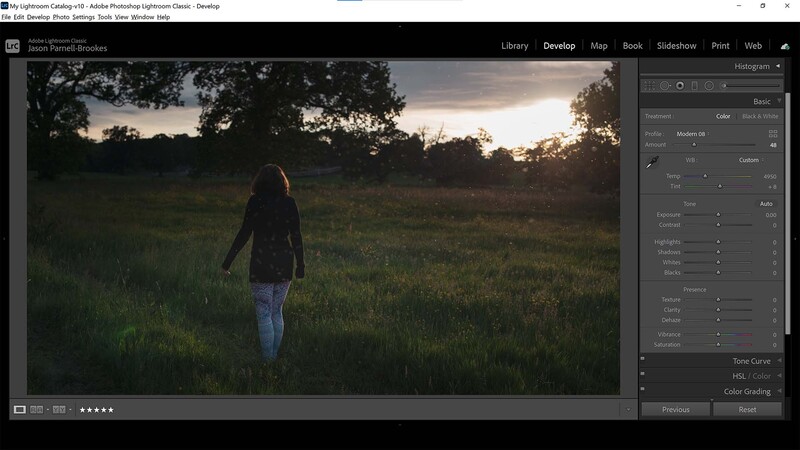
To make a good edit you must first have a good foundation on which to work on. After nailing focus and sharpness in-camera, it's time to start making adjustments to the image itself. Experiment with color profile treatments as the first port of call
Once I've analyzed my photo I like to move into the Develop module in Lightroom and start with the Basic panel. At the very top we're met with the color profile drop-down menu, click on the menu (next to the word Profile) and you'll see there are plenty of preset profile treatments you can choose from. This is the foundation on which the rest of the photo will edit. After looking through all the preset profiles I liked the look of Modern 08 the most because of the muted blacks, warmer tones, and restrictive color palette — dropping cooler blue tones in this shot.
Boost Exposure
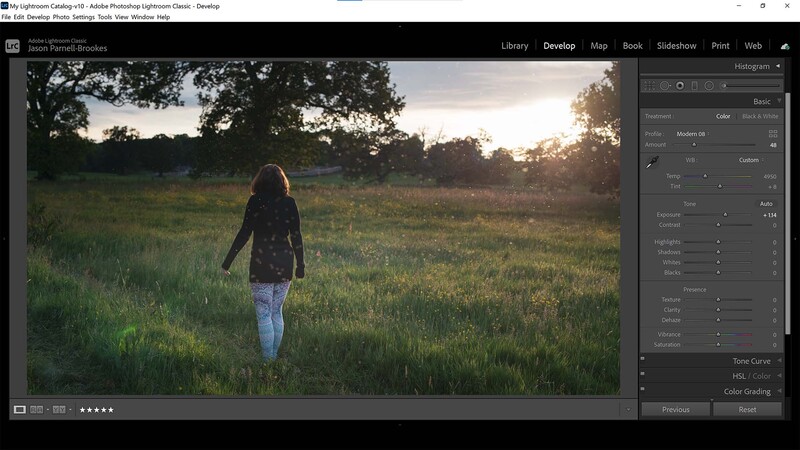
Next, let's take that exposure back up to where it should be. This reveals much more detail in the darker foreground and on my subject so that I can see how the rest of the edits will impact the final photo
Now that I've corrected the profile treatment it's time to wrangle with the exposure of the shot. Since I underexposed this by roughly one stop I've given +1.14 on the Exposure slider to bring my photo back to correct exposure. I still want a little darkness so I haven't boosted it beyond +1.14 as I like the dark shadows to the left of the frame and in the trees. Notice how the sky is brighter as well, but isn't overexposed - thanks to the underexposure upon taking the image. It's good to practice this technique because you can finely tune the exposure of selective areas in the shot, something which is very difficult to do in-camera.
Warm-up With White Balance
This is where things really start to take shape. The preset white balance I shot with, which normally does a pretty good job at providing me with accurate tones, actually falls completely flat for this shot. By warming up the white balance the sunset starts to come alive
My customized flash white balance preset is obviously all wrong for this sunset photo. The photo is far too blue and green and doesn't show just how warm and glowing the sunset was when I took the photo. So I've warmed up the Temp slider considerably from 4,950 to 8,113, and the Tint slider down from 8 to 7. This boosts the yellows and oranges in the photo and the whole photo now has warm summer sunset skipping across the scene.
Deepen the Shadows
I like to deepen the shadows to give added contrast, and increased dynamic range, to the photo. I do this by sliding the Blacks slider to the left
After boosting the exposure the entire frame is now +1.14 stops brighter, including the shadows. I actually preferred the deep black tones in the original image before editing, so I'll attempt to bring this out a little by lowering the Blacks slider to -17. Now, only the very darkest areas in the photo have been affected and there's a wider dynamic range. My highlights and warm sunset light remain unhindered but the shadows on the long grass are enhanced and the trees against the sky now stand in beautiful silhouette against the clouds.
Enhance Color Vibrance
Boost overall color without clipping anything by using the Vibrance slider. Don't go too crazy with it, but use it to lift the more subtle colors in the frame for added atmosphere
The photo is nearly done and it's looking much better than before. However, I'd like to emphasize the more subtle colors in the scene without fear of clipping, so I boosted the Vibrance slider to +37. Some of the less noticeable greens and calmer yellow tones have been enhanced without any distortion of the more apparent colors in the shot.
Color Grade the Highlights
I used the Color Grading panel in Lightroom Classic to increase the yellow and orange tones in the highlights. I did this to make the bright sky and tops of the long grass appear warmer
To finish off let's add a little flourish with the Color Grading panel. Scroll down and select Color Grading until three multicolored circles appear. From here we can control Midtones, Shadows, and Highlights, influencing their color hue and intensity, basically overlaying a color balance to specific bandwidths of exposures in the shot. I wanted to enhance the warmer tones in the shot so I only altered the Highlights selection by clicking and dragging the selector to the top-right around the yellow/orange tones. If you want to replicate this color grading here are the exact settings I used: H:46, S:78, and L:0. You can also change the luminosity of the grading by using the slider beneath each color circle, but I haven't needed that here.
Final Results
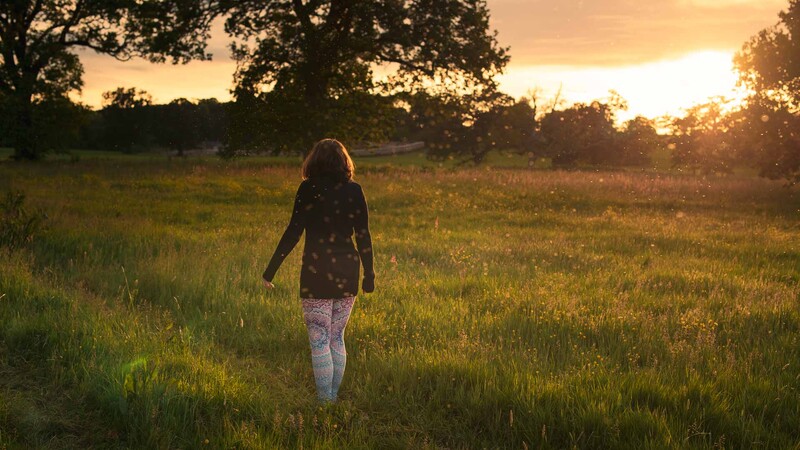
Taking the underexposed shot, with the wrong kind of white balance, I had to make adjustments to the photo in order to replicate the color of the sunset I experienced while I was there capturing the photo. I boosted the exposure to reveal more detail in the foreground and then altered the white balance to introduce warmer yellow and orange tones in the shot. Depending on the type of photo you're editing this may also be a very helpful way to enhance your sunset (or sunrise) images. With these adjustments, I now have a fantastically warm glow across my subject and I can even see the summer flies dancing around in the evening light.
Not once does he mention that you're not really going to achieve any of this if you've shot JPG. This 'tutorial' describes raw manipulation. JPG is not going to give you a +1.14 exposure increase because there's very little information in the shadows to play with. Conversely, there will be very little information in the highlights to manipulate either.
Mind you, he doesn't mention single lens parallax correction, so it's not all bad. ;-)
Thanks for such a well-written article! I love the easy to follow, step-by-step instructions. I really like how you explain everything right from scratch, and how you don't assume that we already know a lot about using Lightroom. Even I could follow along without getting confused ..... and that's saying something!


3 Comments
Uh-oh! It's the tilt-shift man again!
Not once does he mention that you're not really going to achieve any of this if you've shot JPG. This 'tutorial' describes raw manipulation. JPG is not going to give you a +1.14 exposure increase because there's very little information in the shadows to play with. Conversely, there will be very little information in the highlights to manipulate either.
Mind you, he doesn't mention single lens parallax correction, so it's not all bad. ;-)
Jason,
Thanks for such a well-written article! I love the easy to follow, step-by-step instructions. I really like how you explain everything right from scratch, and how you don't assume that we already know a lot about using Lightroom. Even I could follow along without getting confused ..... and that's saying something!
Very nice and clear article. I really appreciate getting this information written out instead of just posting a video.