What happens when you take a shot and you just love the expression of your subject, but the light lets you down? You take it into Lightroom and sprinkle some magic dust all over it, and in this tutorial, I'll show you exactly how I do that.
Facial expressions and poses in portraits can make or break an image, so it can be so frustrating when you get a brilliant shot but are either let down by your camera settings or the lighting. The best method is to get things right at the source. Reset, check your levels, dial in the right camera settings, meter your light, and go again. But for those of us that don't have that luxury, perhaps that one rare snap of your partner you got before they realized you had a camera in your hand or that candid moment between mother and daughter, it might not be possible to repeat it.
That's where post-production image editing comes in to help. With the aid of Adobe Lightroom Classic, you can save even the worst photos from the brink and breathe new life into your images. This is exactly what I had to do when I just couldn't let go of a test shot I captured at the beginning of a portrait session I had last year. There was something special about the shot that resonated with me, so it was time to get to work.
What's Wrong With the Shot?
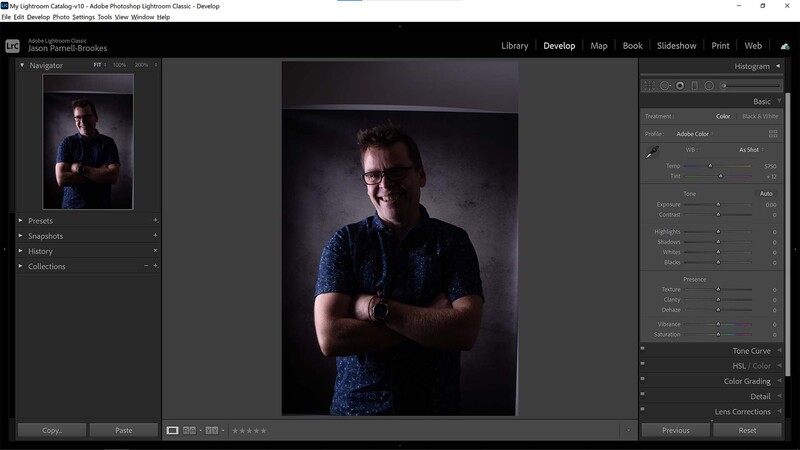
Being a test shot, I was still getting my camera and lighting set up, so the light was far too bright and my shadows too dark. Fortunately, though, the image was in focus and I was able to tease out detail using Lightroom.
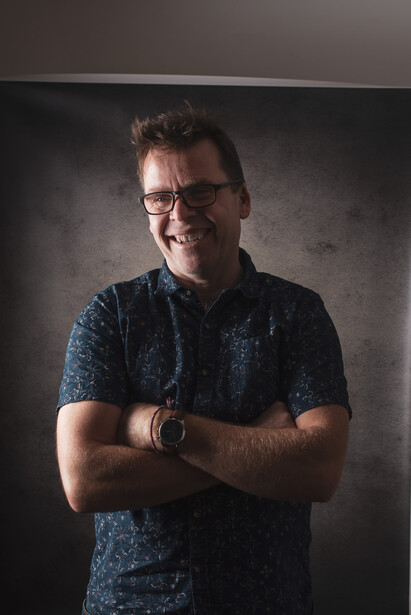
I took this photo right at the start of the portrait session when I was still setting up the lights and getting my levels right. I had my subject stand in front of the lens just so I could see how the light (camera left in a softbox) was looking on his face. I didn't know it at the time, but this initial test shot would end up being one of my favorites from the whole shoot. Unfortunately, though, it's underexposed in the shadows, is far too blue and magenta in hue, and the light striking my subject is much too bright. But I like the playful expression and pose of my subject because it's a very natural, candid moment; it really brings out his personality in a way the other photos didn't. So, I set to work and decided to try and save this photo despite the lighting not being spot-on.
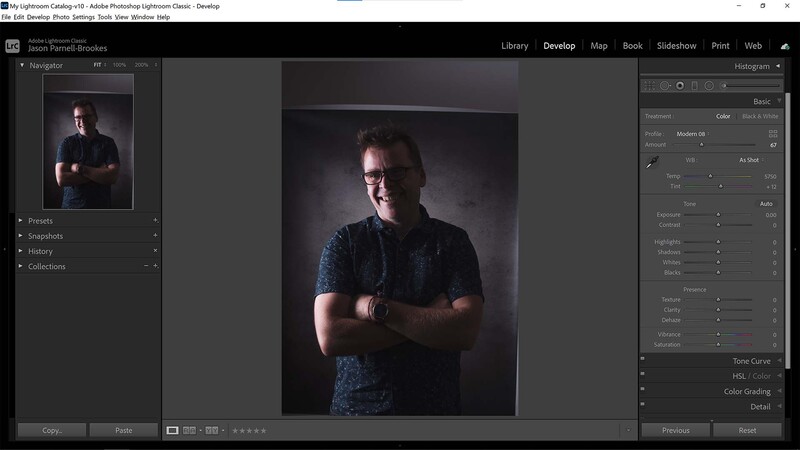
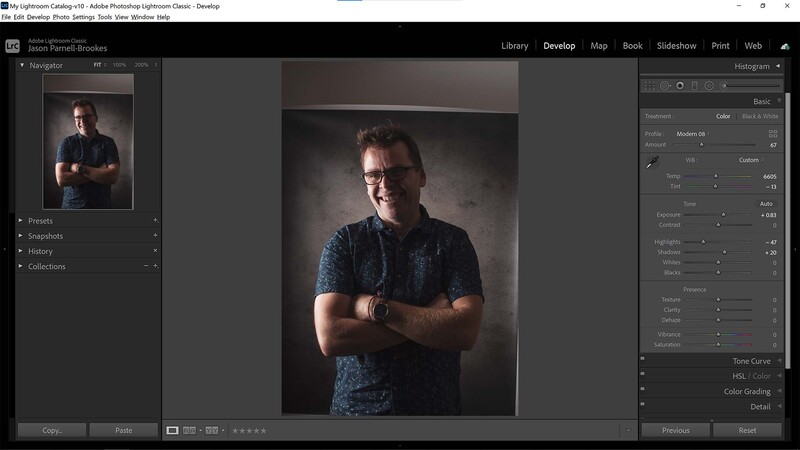
Make a Profile Treatment
I like to set up the foundation of the image by moving down the tools in the Develop module in a rather linear fashion (especially when I'm trying to make corrections rather than enhancements). I start with a profile treatment adjustment.
One of the first things I did was to change the profile treatment at the top of the Develop module. Click the drop-down menu, and you can switch between Adobe Color, Landscape, Neutral, Portrait, Standard, and Vivid as default, but there are also other preset profile treatments you can choose from by clicking the Browse button and perusing the options there. I wanted to warm the photo up a bit and make the black shadows look a little more faded to keep the intimate nature of the dark tones but also reveal a little more detail. I settled on Modern 08 and changed the intensity slider to +67 because +100 was just a little strong for my liking.
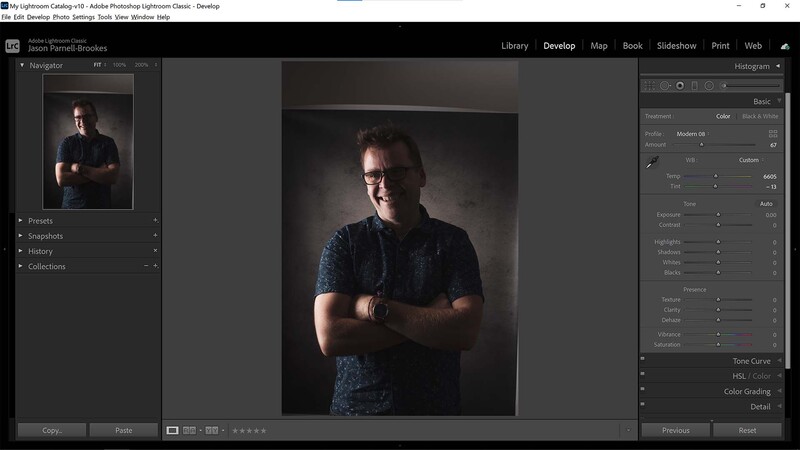
Correct the White Balance
My original shot was far too blue and pink, so I made changes manually using the sliders in the Develop module until it looked as I wanted, rather than using a preset white balance or the white balance selector to pick a neutral gray or white.
Although the Modern 08 profile treatment did warm up the photo slightly by adding a little more yellow, it wasn't anywhere near enough, so I next moved to the white balance. Normally, I would use a flash white balance preset because I was shooting with off-camera flash, but on this occasion, I specifically wanted a much warmer feel to my shot. I think that's because I wanted to convey the warm smile on my subject's face through color. So, I boosted the white balance temp slider up to 6,605 to reduce the blues and enhance the yellows, and I adjusted the tint slider to -13 to attenuate some of the magenta in the shot.
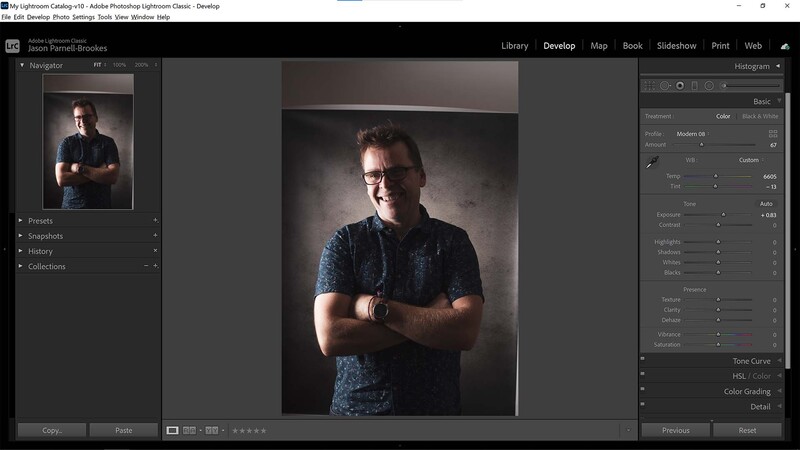
Boost the Exposure
To regain detail in the shadows, I boosted the exposure so that the entire frame was brighter, but that also meant my lit-portion of the subject was now overexposed.
Clearly, my image was underexposed in the shadows, as you can see next to no detail there, so I moved to boost the exposure slider up in an attempt to make everything brighter, thereby revealing more detail. I did this by increasing the exposure to +83. However, there was a catch. That off-camera flash I had to the left of my subject was now too bright by comparison. That's because the exposure slider makes everything in the frame brighter (or darker) universally, regardless of tonal value.
Make Tonal Adjustments
I corrected the overexposure on the camera-left side of my subject by reducing the highlights slider and then revealed more detail in the shadows by boosting the shadows slider until I could see more on the side of his face and in his clothes.
In order to counteract the overexposure from the exposure adjustment, I had to attenuate the highlights. I dragged the highlights slider down to -47, which darkened all but the very brightest of the bright sections in the photo. Luckily, because these highlights weren't originally clipped, there was still some detail left to uncover. I did still feel that the shadows were too dark, though, but I didn't want to up the exposure slider again because that would mean I'd have to lower the highlights slider even lower, and when you do that, it's sometimes possible to see a dark line between highlights and shadows because of the bandwidth cut-off from the slider. Instead, I boosted the shadows slightly to +20. This lifted all but the very darkest sections of the photo, and I could see my subject and his clothes and the background much more clearly.
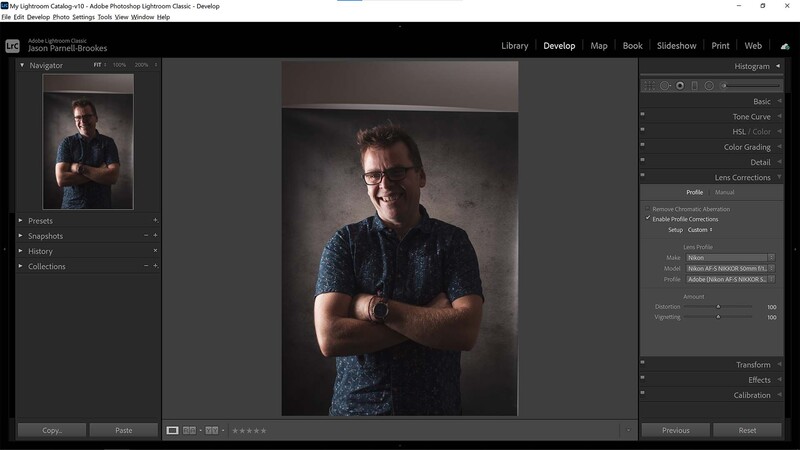
Correct Lens Distortions
To equal out the frame visually and remove any optical characteristics my lens gave to the photo, I used the lens corrections tab to enable profile corrections.
Often, I keep the lens corrections tab unused because I like the optical characteristics of the lens I used. For example, I love the soft, heavy vignetting I get from my Nikon 50mm f/1.4G ,but in this case I wanted to remove as much of the vignetting and optical distortion as possible because I planned on altering the backdrop later. Removing these distortions makes it easier for me to change the background later, especially if I want to extend it and keep the original backdrop intact.
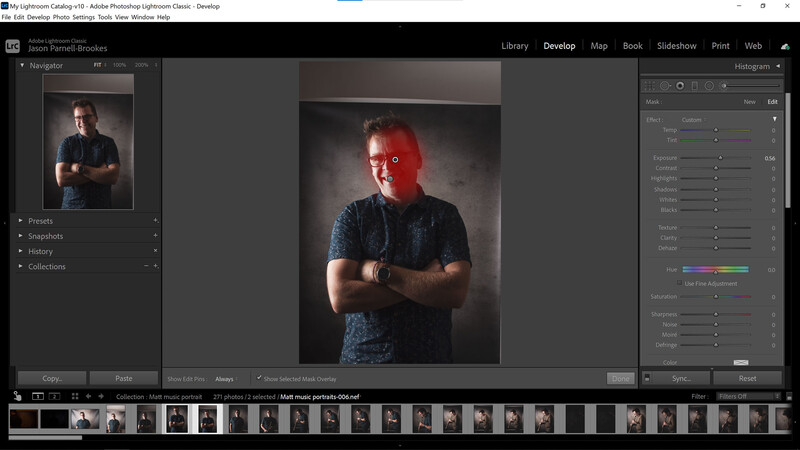
Brighten the Face
To polish off the shot, I wanted to see a little more in my subject's shaded half of his face, so I used the adjustment brush and boosted the exposure to paint some brightness into the shadow. I did this on the face alone because it's the most important part of this shot.
Not wanting to remove the shadows entirely from the photo (I think the chiaroscuro in this shot is actually one of its selling points), I decided to use the adjustment brush to boost the exposure on my subject's face. I painted only over the shadow area of his face and turned on the mask overlay (O) to show where I was affecting. If I turned up the exposure too high, it would look unrealistic, so I kept it subtle at +0.56.
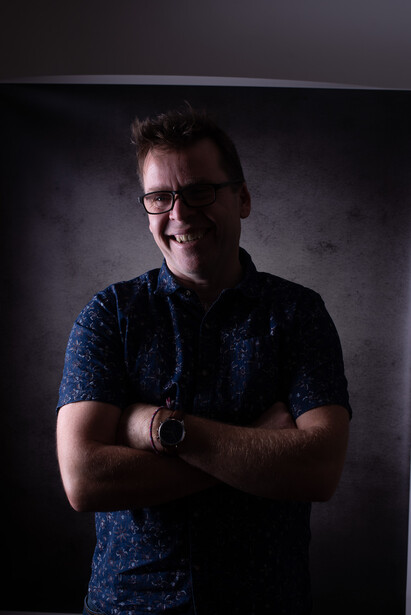
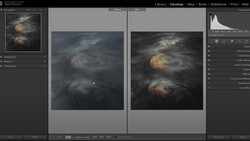
See the Difference
As you can see above, the edited version of my portrait is much more palatable than the original. The highlights are tamed, there's more detail in the shadows, and the warmth from the altered white balance helps draw you into the subject, as it feels more friendly and inviting. The only other thing to change about this image would be to extend the backdrop, but in terms of exposure and color, I think it's pretty much there.


No comments yet